Do you have a question about the ring Stick Up Cam and is the answer not in the manual?
Your Stick Up Cam includes a free 30-day trial of the Ring Protect video recording service.
Extend your subscription and save videos by visiting ring.com/recording.
A subscription service storing videos of events captured by Ring products for up to 60 days.
Review and share Ring videos anytime; interact with visitors, and monitor property in real-time.
Ring Protect costs $3/month or $30/year per device. Plus is $10/month or $100/year for all devices.
Subscribe via ring.com/recording by logging into your Ring account and choosing a plan.
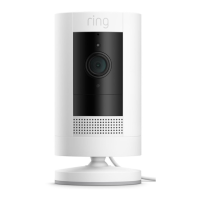
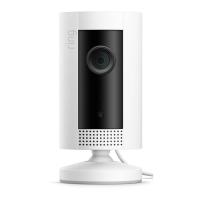
Place the Stick Up Cam on a flat surface; plug in and set up via the Ring App.
Refer to the included manual for detailed instructions on wall mounting.
Refer to the included manual for detailed instructions on ceiling mounting.
Search 'Ring' in app stores, open, create account, select 'Set Up a Device'.
Scan the provided QR code to make setup fast and easy.
Follow in-app instructions to finalize Stick Up Cam installation.
Fully charge the battery using the orange USB cable; one LED lit indicates a full charge.
Twist the battery cover counterclockwise to unlock and remove it from the Stick Up Cam.
Insert the charged battery into the bottom of the Stick Up Cam until it clicks into place.
Search 'Ring' on app stores or visit ring.com/app to download and manage your Stick Up Cam.
Have your Wi-Fi password ready for setup; it is case-sensitive.
In the Ring app, select 'Set Up a Device' and follow the in-app instructions.
After setup, tap the Live View button in the Ring app to see live video.
A flashing light means software is updating; do not remove the battery during this process.
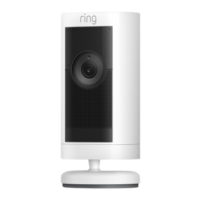
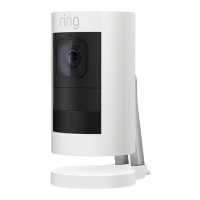
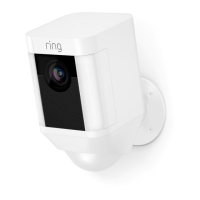
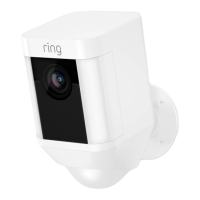
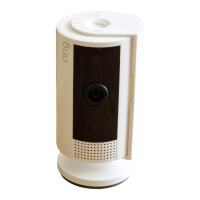
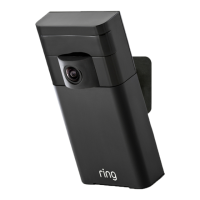
Stick Up Cam can be placed on a table/shelf, or mounted on a wall or ceiling.
Insert and tighten the provided security screw into the base for stability on a table or shelf.
Remove the plastic cover and rubber pad from the base before mounting.
Flip the hinged base down and behind the Stick Up Cam for wall mounting.
Push rubber pad against wall, drive screws to secure base, using integrated level.
Snap the cover back onto the base and secure with the included base security screw.
Remove the plastic cover from the base before mounting.
Rotate the stand 180 degrees so the base is positioned above your Stick Up Cam.
Hold base against ceiling, drive screws to secure, using integrated level.
Snap the cover back onto the base and secure with the included base security screw.
Line up 'open lock' symbol, push cover on, and twist clockwise to lock it in place.
Pull rubber plug, insert security screw, and tighten with screwdriver bit to secure battery cover.
Ensure Wi-Fi password is correct; passwords are case-sensitive and errors count.
If connection fails, turn router off, wait 30s, then turn back on to resolve issues.
For help, visit ring.com/help or ring.com/callus for support numbers.
Call US: 1 800 656 1918, Canada: 1 855 300 7289, Worldwide: +1 310 929 7085.
Mount the solar panel following instructions in the included manual.
Remove rubber plug, plug in solar panel, and secure with screws if needed.
Device complies with FCC Rules Part 15, subject to conditions regarding interference.
Equipment complies with FCC radiation exposure limits for uncontrolled environments.
Device complies with Industry Canada's licence-exempt RSSs, subject to conditions.
The Ring Stick Up Cam Battery is a versatile security camera designed to monitor your property, both indoors and outdoors. It offers flexible installation options and integrates with the Ring ecosystem, providing video recording and real-time interaction features.
The primary function of the Ring Stick Up Cam Battery is to capture video of events occurring at your property. It allows you to monitor your home in real time and interact with visitors. The camera is equipped with a battery for power, offering portability and ease of placement without needing a constant power outlet.
| Type | IP security camera |
|---|---|
| Day/night mode | Yes |
| Placement supported | Indoor & outdoor |
| Connectivity technology | Wireless |
| Form factor | Cube |
| Mounting type | Ceiling/wall |
| Product color | Black |
| Cables included | Micro-USB |
| Number of cameras | 1 |
| LED type | IR |
| Ethernet LAN | - |
| Battery life | 1 year(s) |
| Power consumption | 5200 mA |
| Audio system | 2-way |
| Minimum illumination | - lx |
| Field of view (FOV) angle | 80 ° |
| Operating temperature (T-T) | 5 - 48 °C |
| Depth | 37 mm |
|---|---|
| Width | 62 mm |
| Height | 127.5 mm |
| Package type | Box |