Trainer 40 Instructions
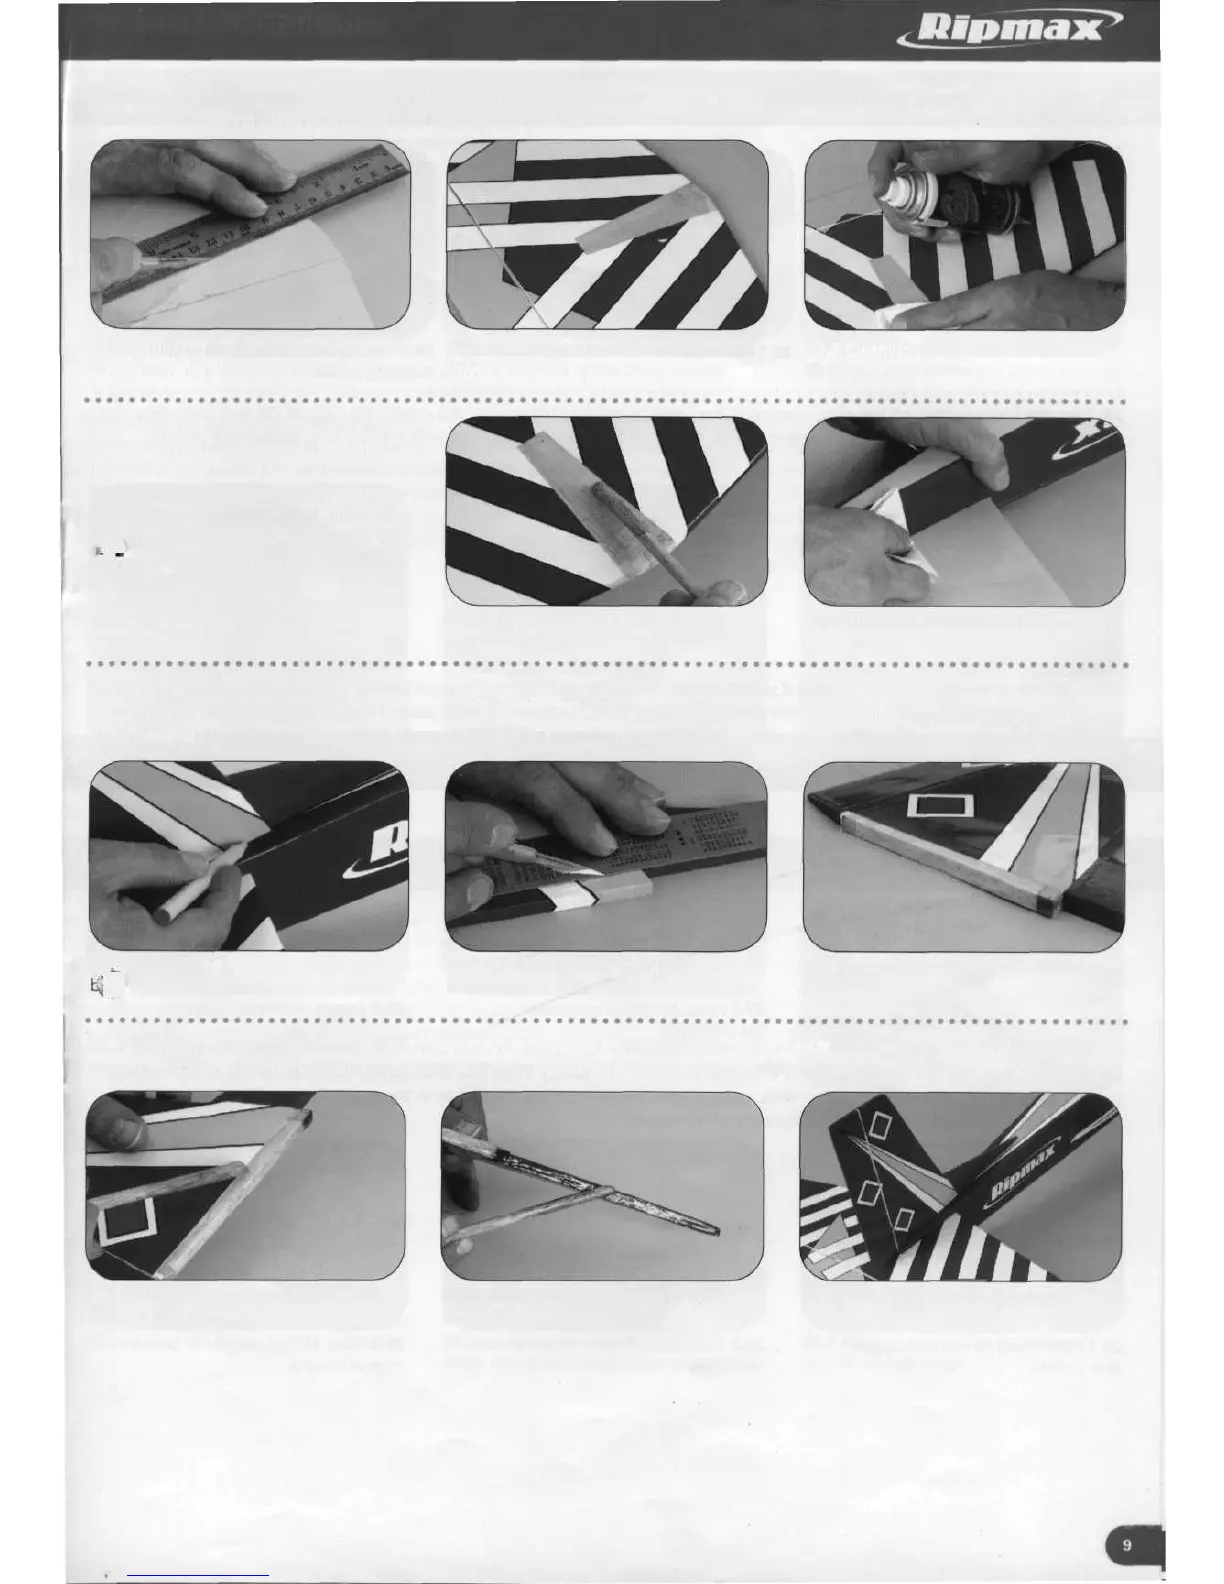
21. Using a modelling knife and ruler carefully cut through ONLY the covering material inside of the marked lines.
Remove the covering material and clean off any trace of pen marks.
21.1 Cutting through only the
covering material
21.2 Covering removed from upper and
lower surfaces
21.3 Cleaning off any trace of pen
22. Mix sufficient 30 minute epoxy and
apply plenty to the exposed upper and
lower surfaces just formed. Slide the
tailplane back into place wiping clear any
excess adhesive, including within the fin
slg^Once more check that the tailplane is
afljwed to the fuselage and leave to cure.
22.1 One hour epoxy applied to both
sides of the tailplane
22.2 Cleaning off excess adhesive
23. Slide the fin into the slot in the rear of the fuselage above the tailplane, checking that it is standing perpendicular to the tailplane
by viewing from the rear. Using a felt tip pen, mark the shape of the fuselage onto both sides of the fin. Remove the fin and, in a
similar way to the tailplane, cut carefully through ONLY the covering material inside of the marked lines. Remove covering material.
23 1 Marking the fuselage shape onto
£ sides of the fin
23.2 Cutting through only the
covering material
23.3 Covering removed from both sides
of the fin
24. Apply plenty of 30 minute epoxy to both sides of the exposed lower part of the fin and slide it in place into the fuselage. Wipe
clear any excess adhesive, checking once more that it is aligned perpendicular to the tailplane. Leave to cure.
24.1 30 minute epoxy applied to both
sides of fin
24.2 ....and to the underside of the
fin strake
24.3 Fin in place and perpendicular