Rite-Hite
®
Installation/Service/Owner's Manual PitMaster™ II Under-leveler Seal
Publication: AMEN00401 2021-04-02 5
3ply Top Section Continued
C
16 in
(405 mm)
16 in
(405 mm)
D1
19 in
(480 mm)
19 in
(480 mm)
19 in
(480 mm)
D2
G
E
F
Side View
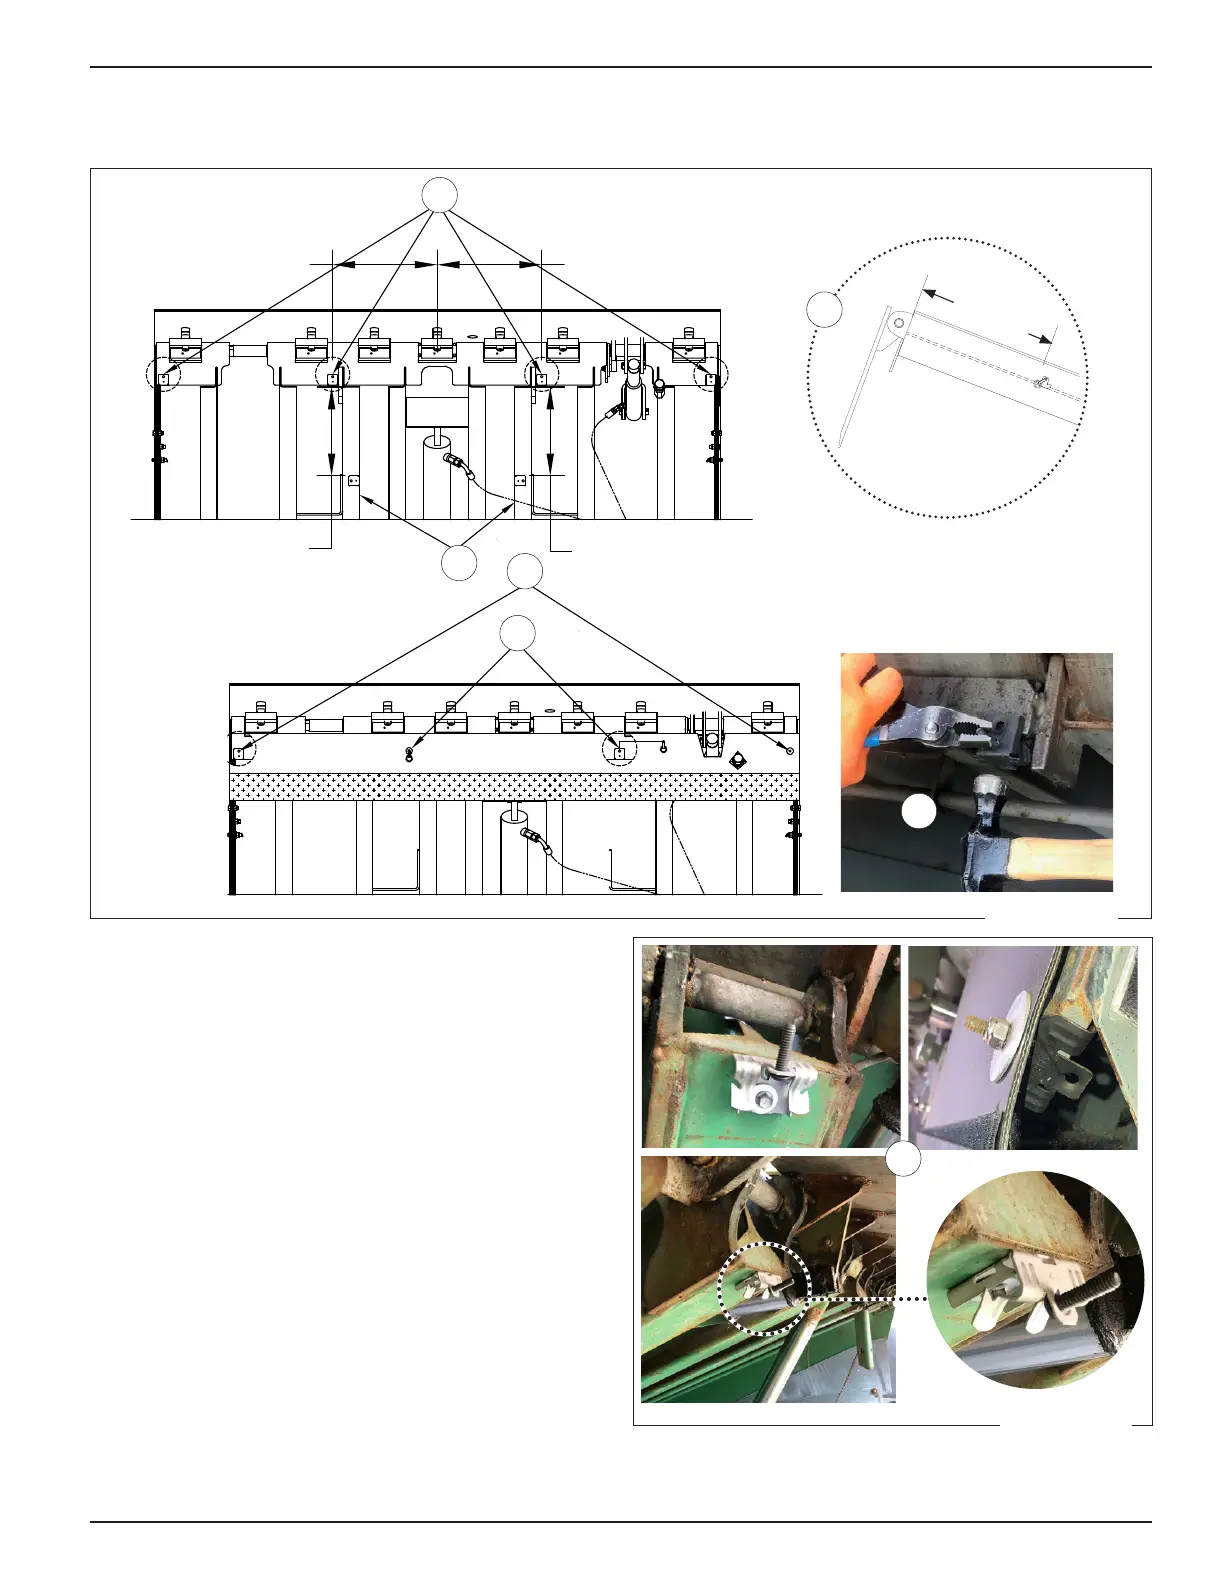
3. Attach spring clips in 4 locations (minimum) (C) on
either the leveler plate or leveler stringers. Use a mallet
or hammer to pound spring clips into position (G).
NOTE: For levelers with limited or no mounting
locations, the clips may need to be screwed to the
leveler stringers. See examples (H).
4. Attach 2 of the remaining spring clips (with O-rings) to
the leveler stringers (D1).
• The stringers used should be close (within 4 in
[100 mm]) to 16 in (405 mm) from the center of the
leveler.
• Locate spring clips 19 in (480 mm) back from the
front of the stringers (D2).
5. Align the 3ply top section over the top of the spring
clips. Mark each screw location on the top section.
Cut or drill holes so the screws come through
the 3ply. Add provided washer and nut to each
screw (E, F).
NOTE: The spring clips ≈ 16 in (405 mm) from the
center (F) will have an O-ring. See
"Figure 2" on
page 4.
H
Figure 3
Figure 4
INSTALLATION