PitMaster™ II Under-leveler Seal Installation/Service/Owner's Manual Rite-Hite
®
8 Publication: AMEN00401 2021-04-02
INSTALLATION
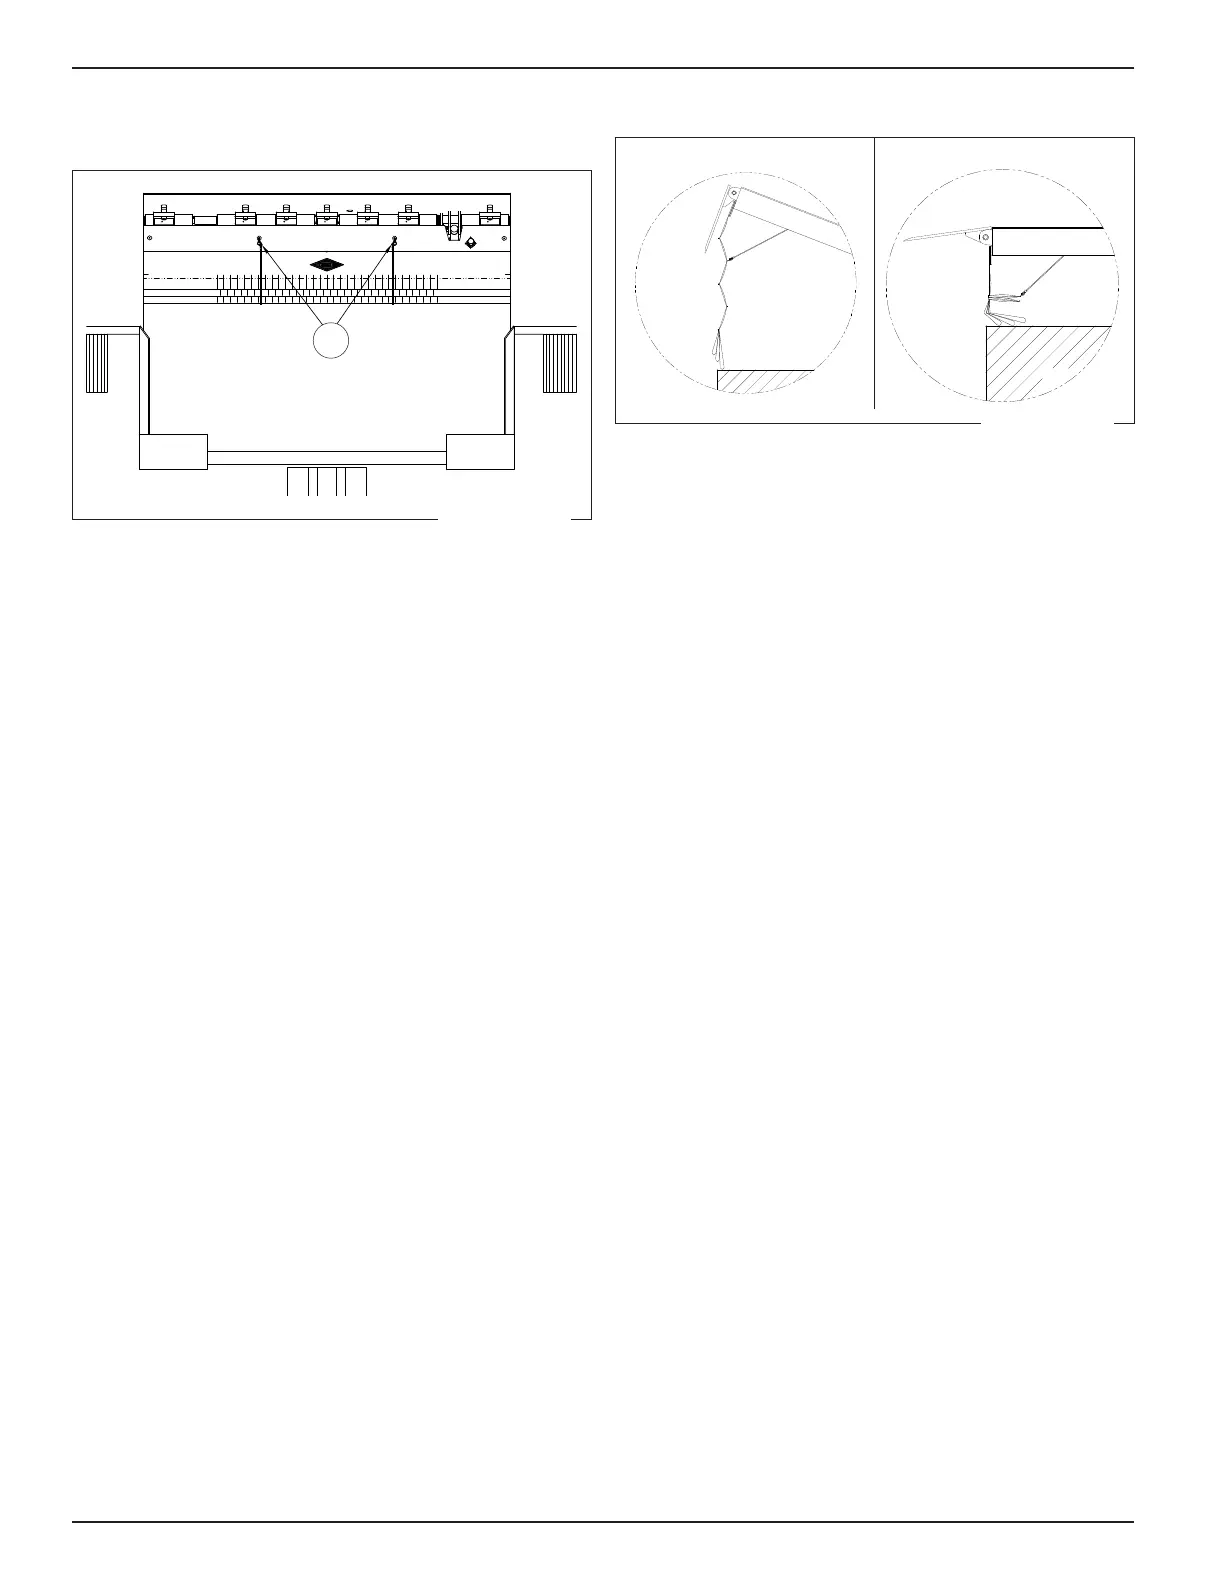
Trim Main Curtain
A
1. Drop main curtain to the operating position by
removing the shock cords (A) from the 3ply top
section and attaching them to the spring clips
19 in (483 mm) back on the leveler stringers. See
side view of "Figure 6" on page 6.
NOTE: Main curtain should not be pulled into the pit
by the shock cords. Curtain should be aligned with or
in front of the side seals. If the shock cords appear to
be pulling back on the main curtain, adjust the spring
clips forward until curtain is properly aligned.
2. Trim flaps of the main curtain around leveler
sub-structure. Start with the layer furthest to the back
and work forward. Trim flaps so that all 3 layers fit
around all parts of leveler sub-structure.
Make sure PitMaster II is sealing eectively.
It may be necessary to trim all aps.
NOTE: If the leveler has a "lip stored switch", trim
the top section around the switch. Contact Rite-Hite
applications if the "lip stored switch" cannot be
eectively trimmed around.
OPERATION
Side View: Open Side View: Stored
When the leveler stores the PitMaster II folds onto itself
(accordion-fold). If panels are not folding correctly, adjust
shock cords and pull curtain forward until it operates
correctly.
NOTE: Panels are exible and will bend around the
leveler's sub-structure.
MAINTENANCE
Before use, inspect all parts for damage. Repair and
replace as required.
Clean seal with a low pressure hose or damp cloth and
mild detergent as required.
Figure 9
Figure 10