PitMaster™ II Under-leveler Seal Installation/Service/Owner's Manual Rite-Hite
®
4 Publication: AMEN00401 2021-04-02
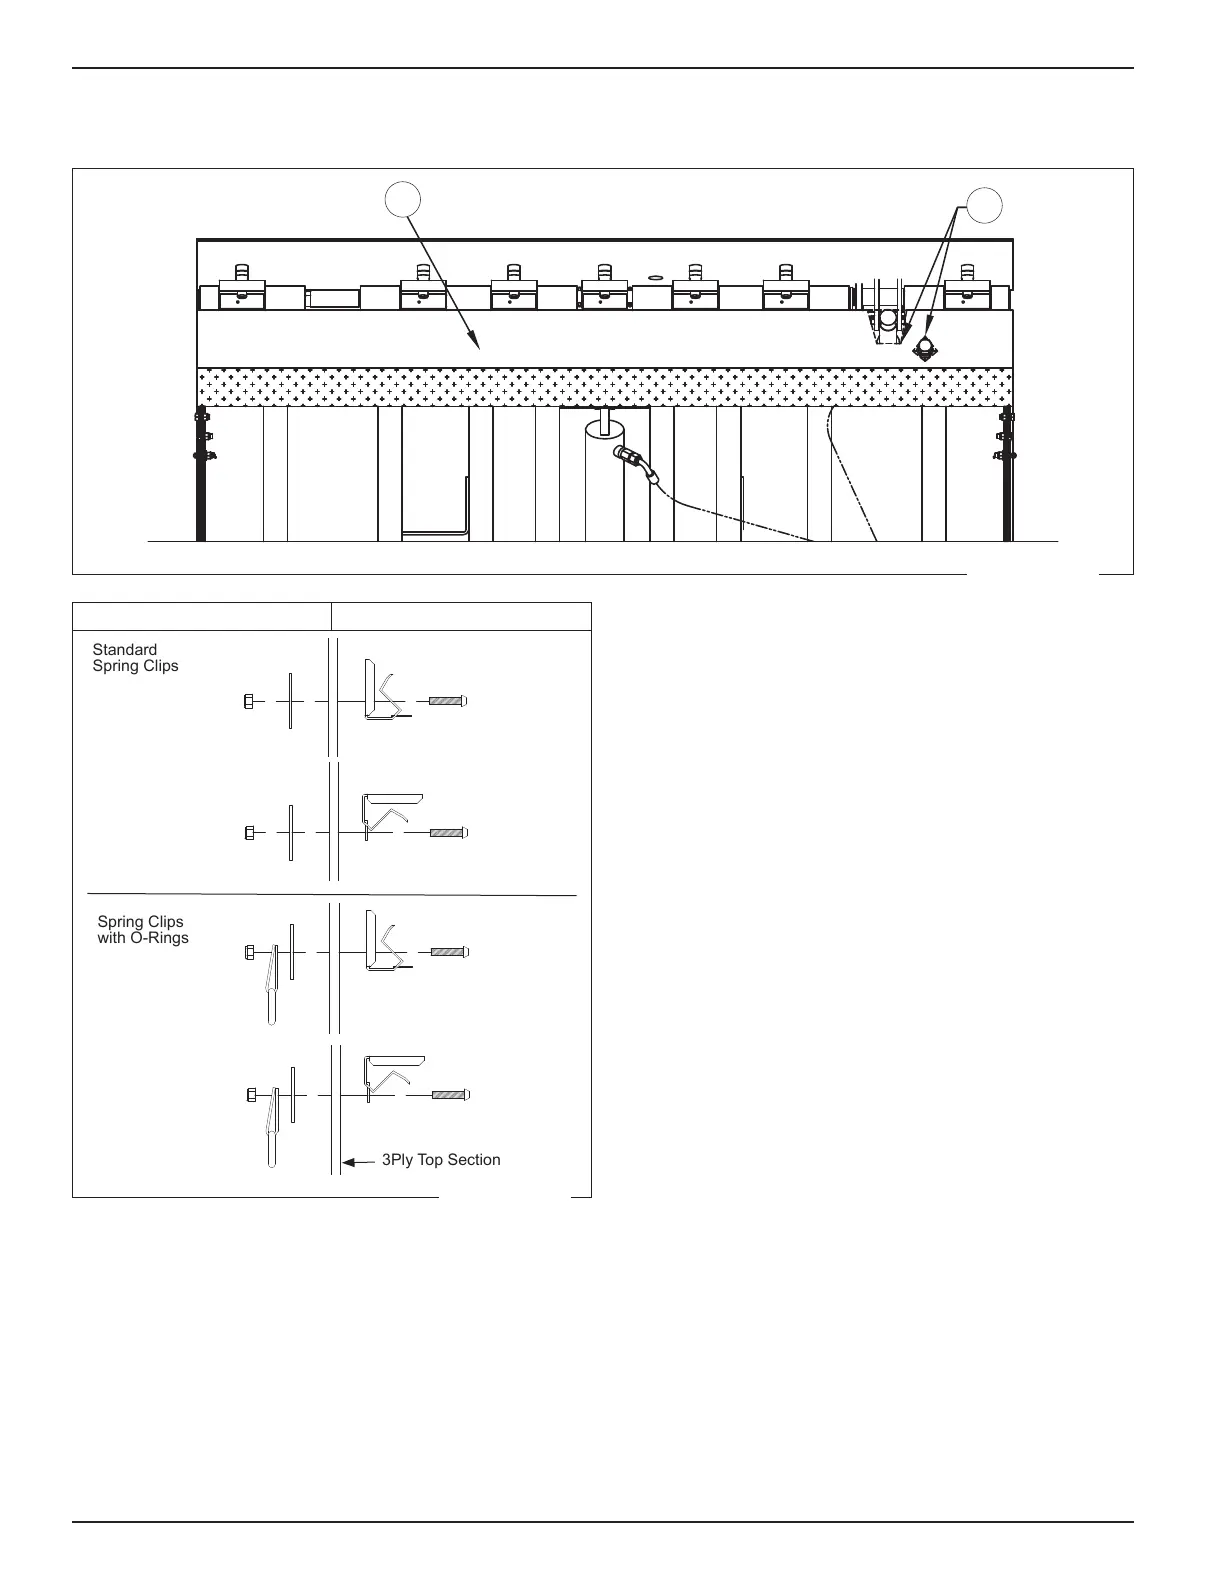
3ply Top Section
A
B
Outside of Dock Leveler Side
Spring Clips
with O-Rings
1. Align the 3ply top section (A) with the leveler plate.
Hold 3ply in place with a clamp, if needed.
Find if trim outs (B) are required around the lip piston,
lip stop bolt, pull chain or other obstacles. Mark trim
outs with a white chalk pencil and trim.
NOTE:
• For a better seal on lip stop bolts, cut a plus pattern
or cross. Do not cut circular holes.
• If the leveler has a "lip stored switch', trim the
top section around the switch. Contact Rite-Hite
applications if the "lip stored switch" cannot be
eectively trimmed around.
The 3ply top section must sit uniformly at across the
front of the leveler. Set 3ply top section aside after trim
outs are made.
2. When installing spring clips to 3 Ply top section:
• Select spring clip size to use (2 sizes supplied).
• Select the orientation of the spring clips before
attaching screws to spring clips (Figure 2).
• Install screws so the end of the screw is facing out
from dock when spring clip is mounted. Make sure
the screw is tight or it may un-thread when attaching
nut and washer.
NOTE: 2 of the spring clips will require O-rings to be
attached. Location is described in next step.
Figure 1
Figure 2
INSTALLATION