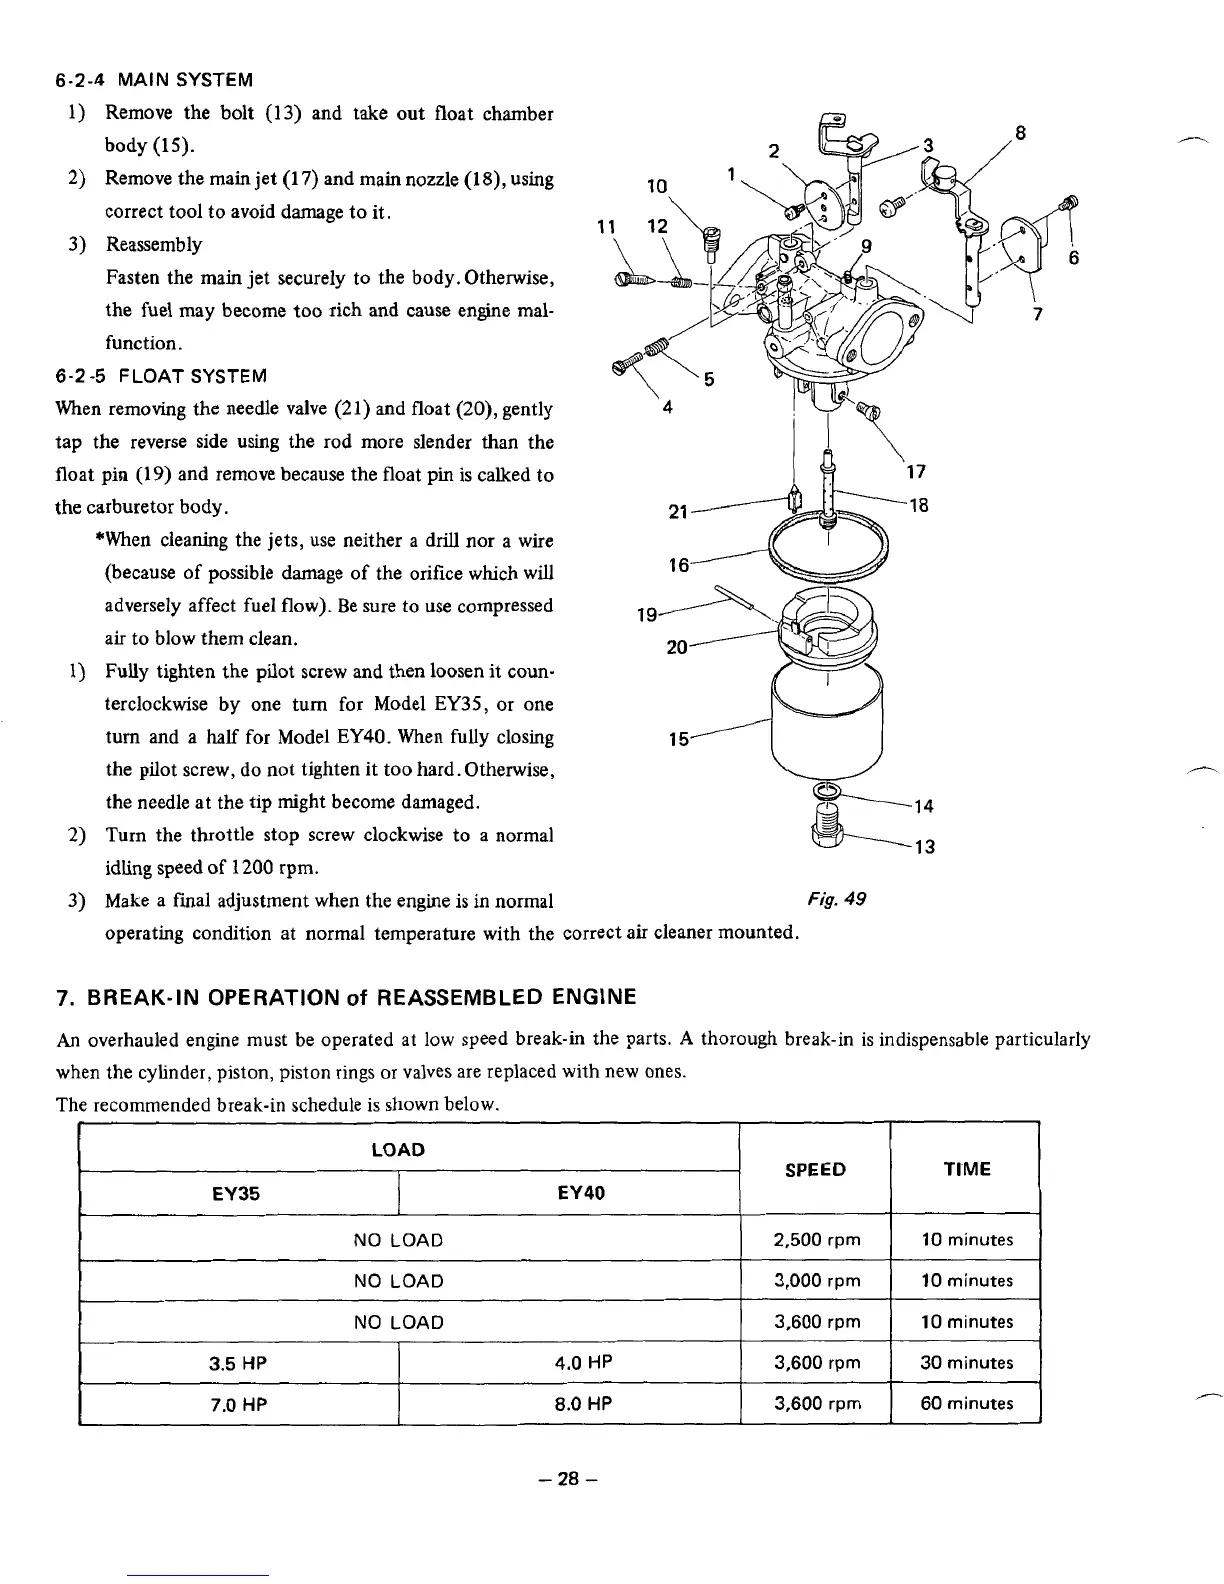
6-2-4
MAIN
SYSTEM
1)
Remove the bolt
(1
3)
and take out float chamber
body
(15).
2)
Remove the main jet
(1
7)
and
main
nozzle
(1
8),
using
correct tool to avoid damage to it,
3)
Reassembly
Fasten the main jet securely to the body. Otherwise,
the fuel may become
too
rich and cause engine mal-
function.
6-2
-5
FLOAT
SYSTEM
When removing the needle valve
(21)
and float
(20),
gently
tap the reverse side using the rod more slender than the
float pin
(19)
and remove because the float pin
is
calked to
the carburetor body.
*When cleaning the jets, use neither
a
drill
nor
a wire
(because of possible damage of the orifice which will
adversely affect fuel
flow).
Be sure to use compressed
air to blow them clean.
Fully tighten the pilot screw and then loosen
it
coun-
terclockwise by one turn for Model
EY35,
or one
turn and a
half
for Model
EY40.
When fully closing
the pilot screw, do not tighten it too hard. Otherwise,
the needle at the tip might become damaged.
Turn the throttle stop screw clockwise
to
a
normal
idling speed
of
1200
rpm.
Make a final adjustment when the engine is in normal
I
A
‘17
19
-18
Fig.
49
operating condition at normal temperature with the correct air cleaner mounted.
7.
BREAK-IN OPERATION
of
REASSEMBLED ENGINE
An
overhauled engine must be operated
at
low speed break-in the parts.
A
thorough break-in is indispensable particularly
when the cylinder, piston, piston rings or valves are replaced with new ones.
Thl
e
recommended break-in schedule is shown below.
LOAD
SPEED
TIME
EY35
EY
40
NO
LOAD
10
minutes
2,500
rprn
~
NO
LOAD
30
minutes
3,600
rpm
4.0
HP
3.5
HP
10
minutes
3,600
rprn
NO
LOAD
10
minutes
3,000
rpm
7.0
HP
I
8.0
HP
~
1
3,600
rpm
I
60
minutes
1
-
28
-