6 Rockwell Automation Publication 750-IN017B-EN-P - June 2018
PowerFlex 750-Series Service Cart Frames 8…10 Conversion Kit
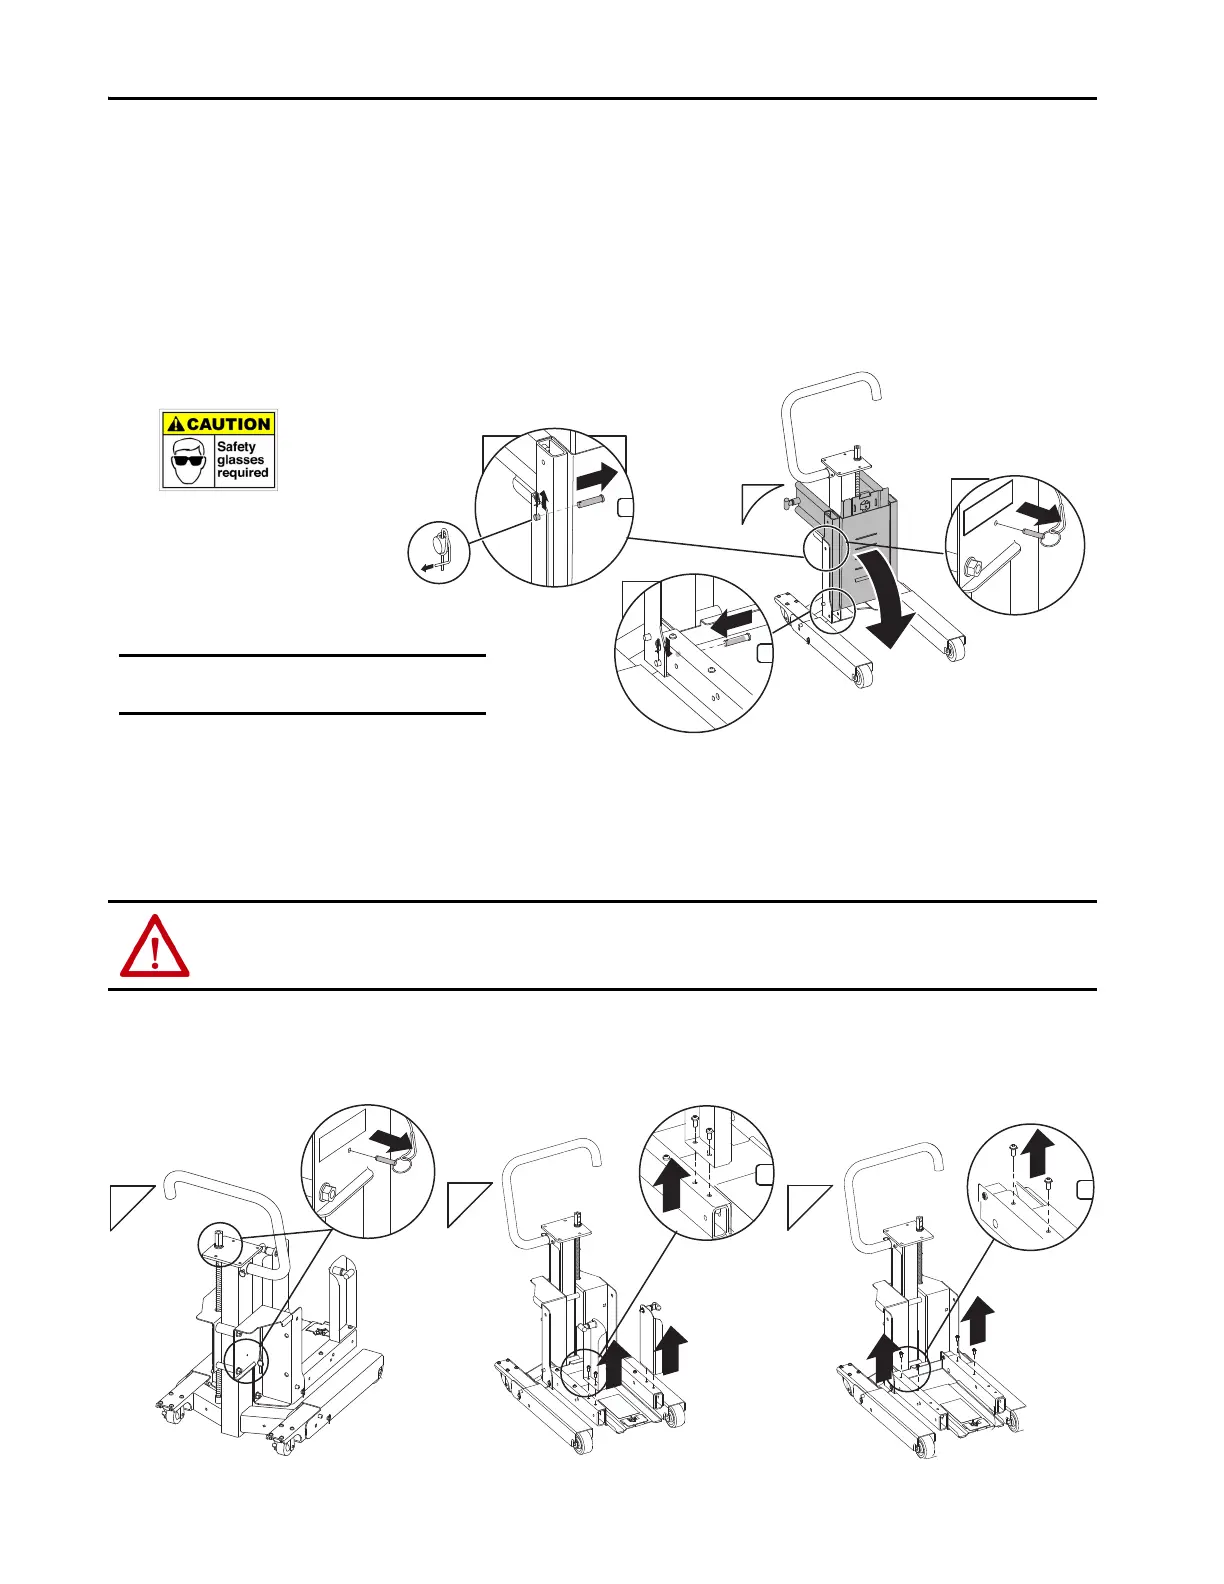
Extend the Carriage Assembly
To extend the carriage assembly, complete these steps.
1. Remove the cotter pins from the upper clevis pins that secure the bridge span and carriage assembly to the carriage trolley.
2. Remove the clevis pins.
3. Lower the bridge span and carriage assembly to its horizontal position.
4. Insert the clevis pins through the lower holes of the carriage trolley and secure with the cotter pins.
5. Remove the jackscrew lock.
Disassemble the Service Cart and Stage for Conversion
To disassemble the service cart and stage it for conversion to a frames 8…10 service cart, complete these steps.
1. Verify jackscrew lock is removed. Use the jackscrew to raise the carriage assembly 153 mm (6 in.) off of the floor.
2. Use the T40 hex bit to remove the four M8 bolts that connect the left and right vertical supports to the carriage assembly.
3. Use the T40 hex bit to remove the four M8 bolts that connect the bridge floor to the carriage assembly.
TIP Package all loose bolts and removed parts and store them in a dry place.
ATTENTION: Before adjusting the height of the cart, remove the jackscrew locking pin. Failure to remove this locking pin will result in equipment damage.
1
2x
4
2x
3
2
5
To remove, pull the cotter key toward you and then push up.
IMPORTANT Insert cotter pins from the inside to avoid
interference with carriage operation.

 Loading...


