Maintenance
Repair
122 MagneMotion
Rockwell Automation Publication MMI-UM037A-EN-P - April 2020
6. Insert the replacement eccentric bearing from the bottom of the carriage.
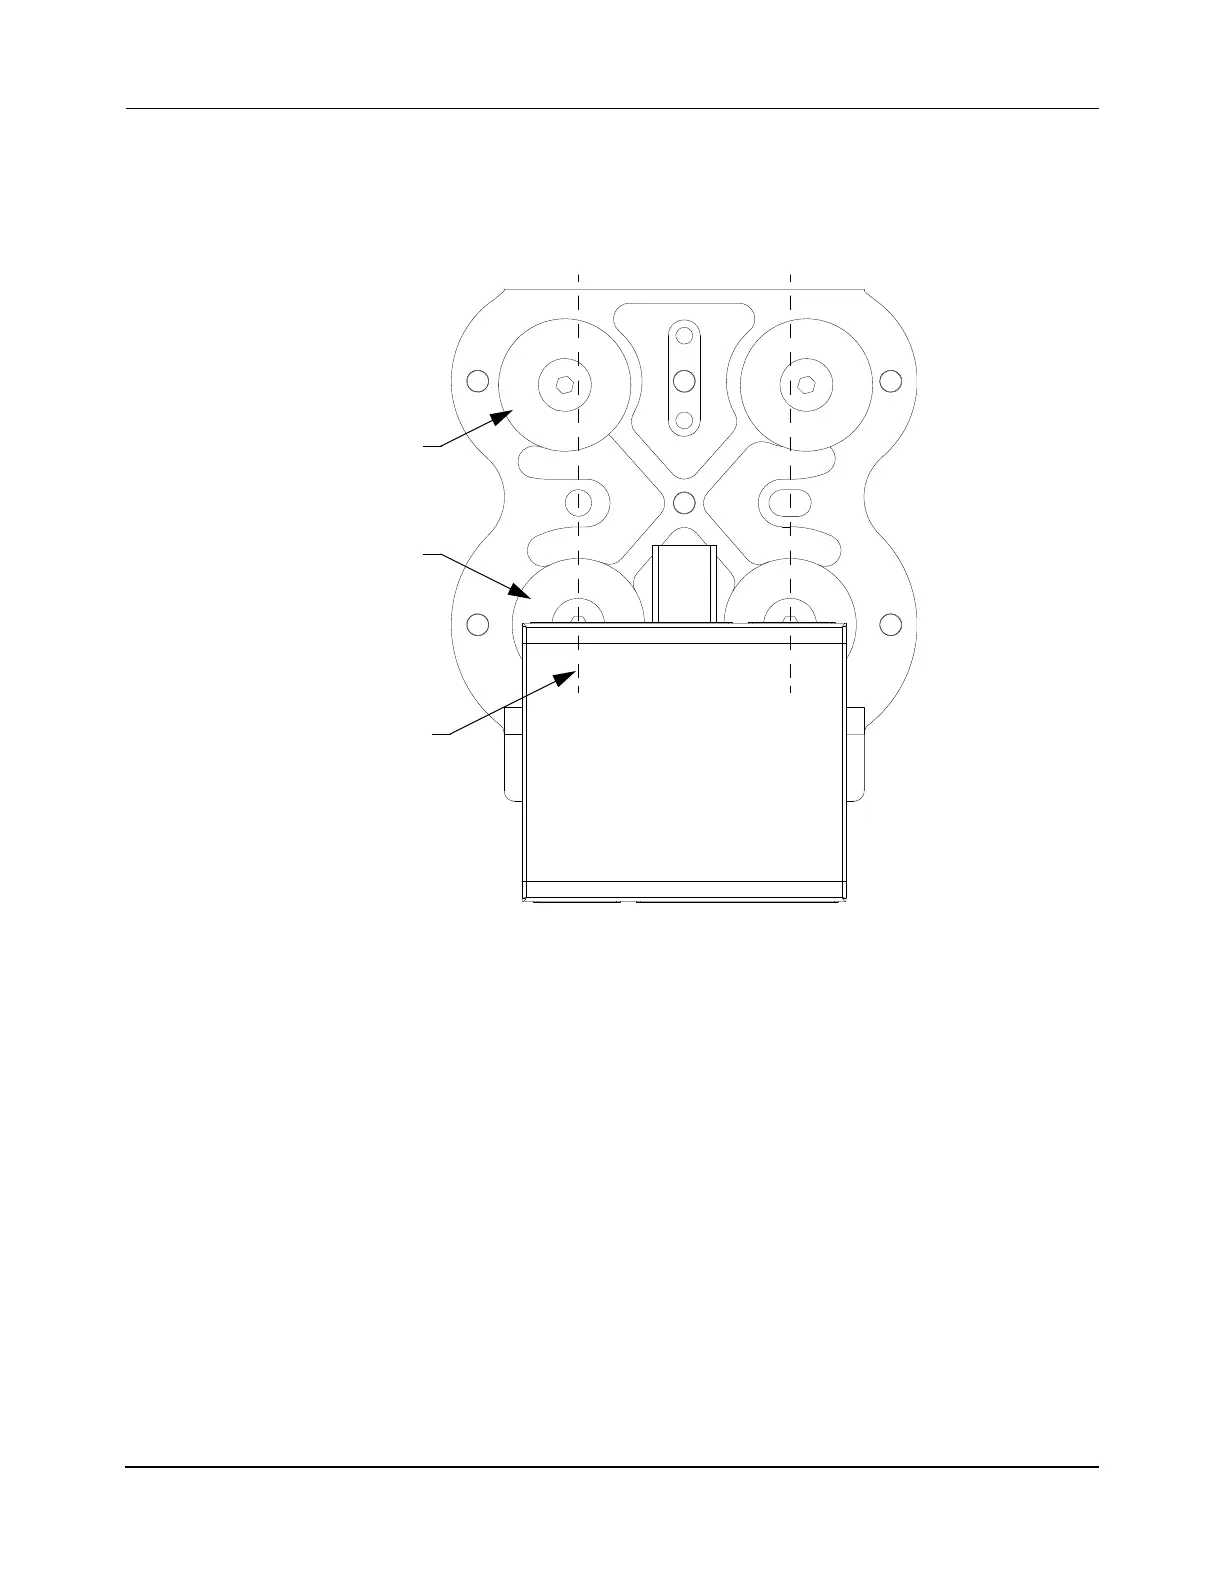
Make sure that the orientation of the eccentric bearing is the same as the orientation of
the removed bearing. The center of the eccentric bearings must be further apart than
the center of the concentric bearings as shown in Figure 49.
Figure 49: Eccentric Bearings Orientation
7. Place the washer over the bearing post on top of the carriage.
NOTE: Make sure that all washers are placed on top of the carriage below the top
nut. Do not reassemble with washers on the underside of the carriage.
8. Thread the nut onto the bearing over the washer on top of the carriage.
9. Hold the bearing nut underneath the carriage in place with a 13 mm thin open ended
wrench. Use a 13 mm torque wrench to tighten the nut on the top of the carriage and
finger-tighten.
NOTE: Do not apply Loctite or tighten the eccentric bearing until after the vehicle is
mounted on the precision rail system and all adjustments are complete.
10. Repeat this procedure on the companion eccentric bearing, if it is also being replaced.
11. See Replace Precision Rail Vehicles on page 104 to return the vehicle to the precision
rail.
Concentric
Eccentric
Bearings
Bearings
Concentric
Bearing
Centerline
 Loading...


