INSTALLATION AND CONNECTION
Voltage Supply Box and Weft Feeder installation
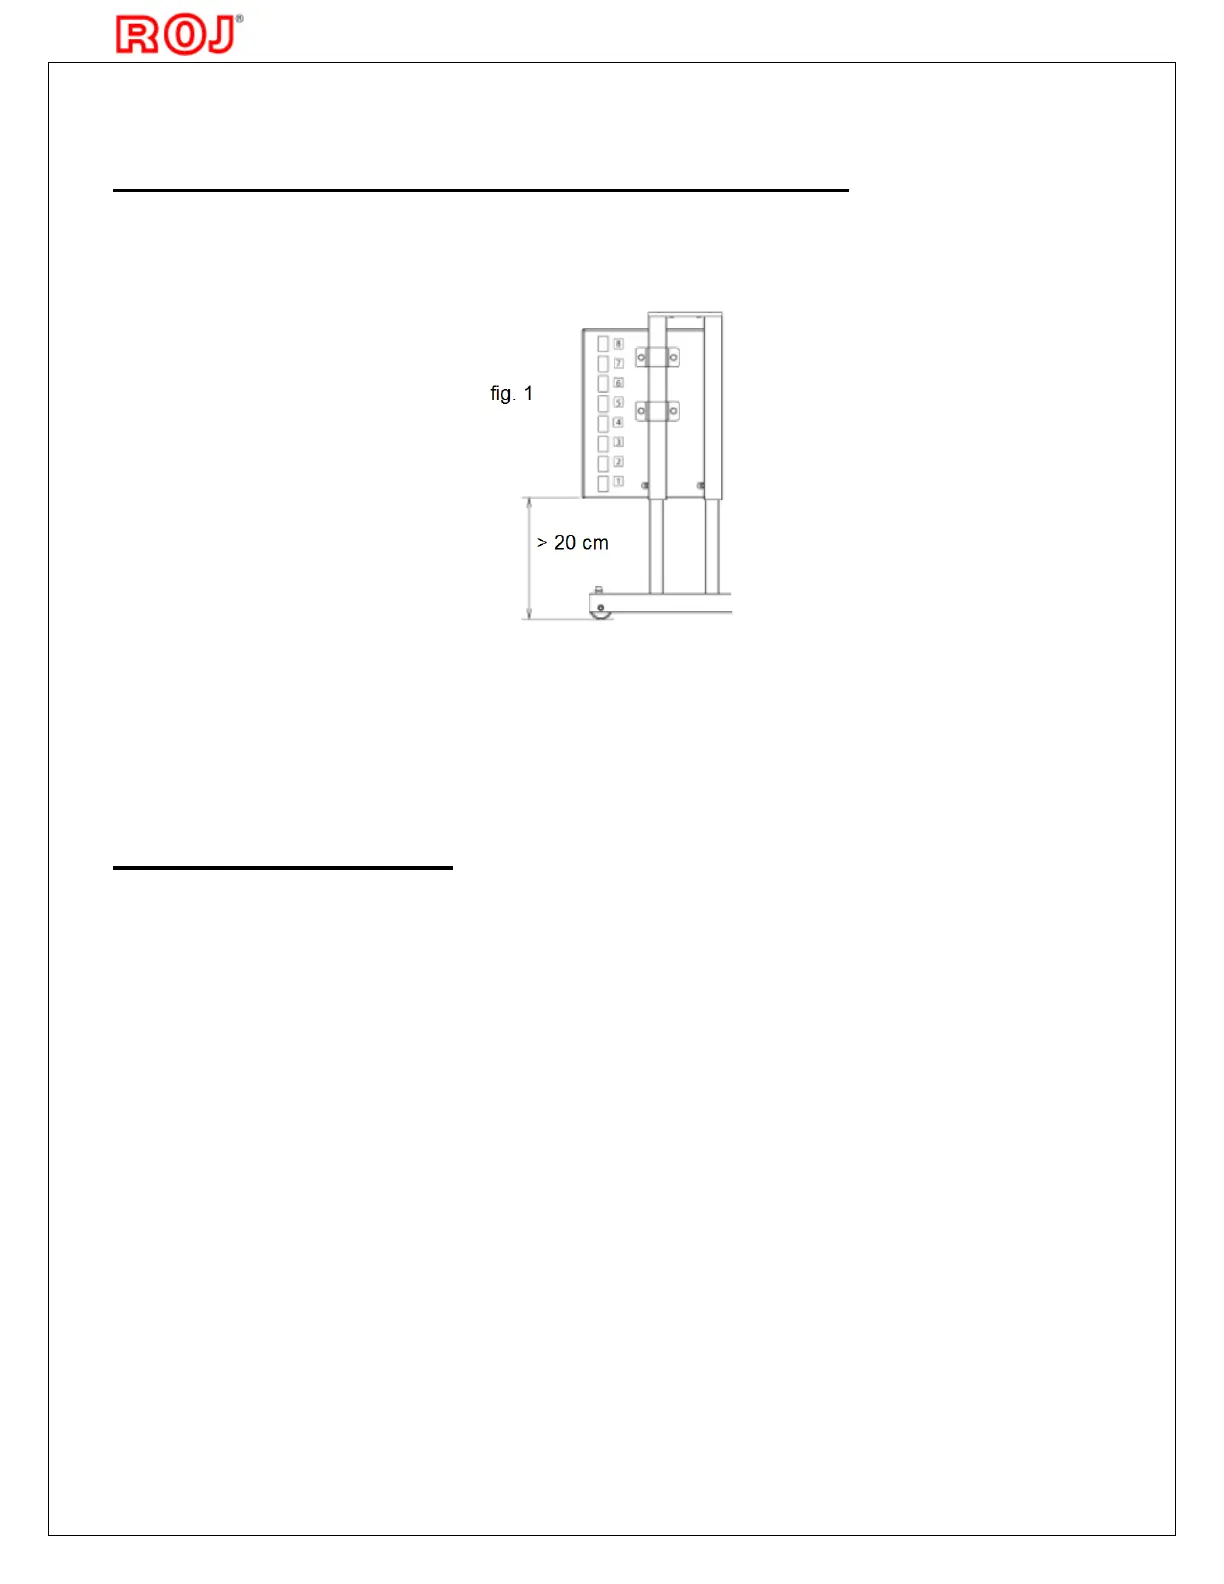
Fix the Voltage Supply Box to the Stand by means
Minimum distance from the Box to the floor must
Install the Weft Feeders on the Stand by means of
The feeders must be positioned on the stand according to the type of installation. It
yarn path is as straight as possible between the Feeders
Place the Feeders' cables and the air tubes inside the tunnel of the Stand.
Connect the Feeder's cables to the Voltage Supply Box
correspondence to the loom nozzles (Feeder working with the weft threaded in
be connected to the position 1 of the Voltage Supply Box; etc.).
BUS cable to the loom (see fig.
Feeder's Stand and Creel must be connected to the earth of the loom.
Connect the plug of the 3
phase power cord to the socket on the loom main
connection between the Voltage Supply B
network must always be as stated on the follow
ing page. In this way, the loom
performs also as main switch
for the Weft Feeders (see fig.
values supplied to the Weft Feeders can be checked on the Voltage
Box connectors (see fig. 3