30
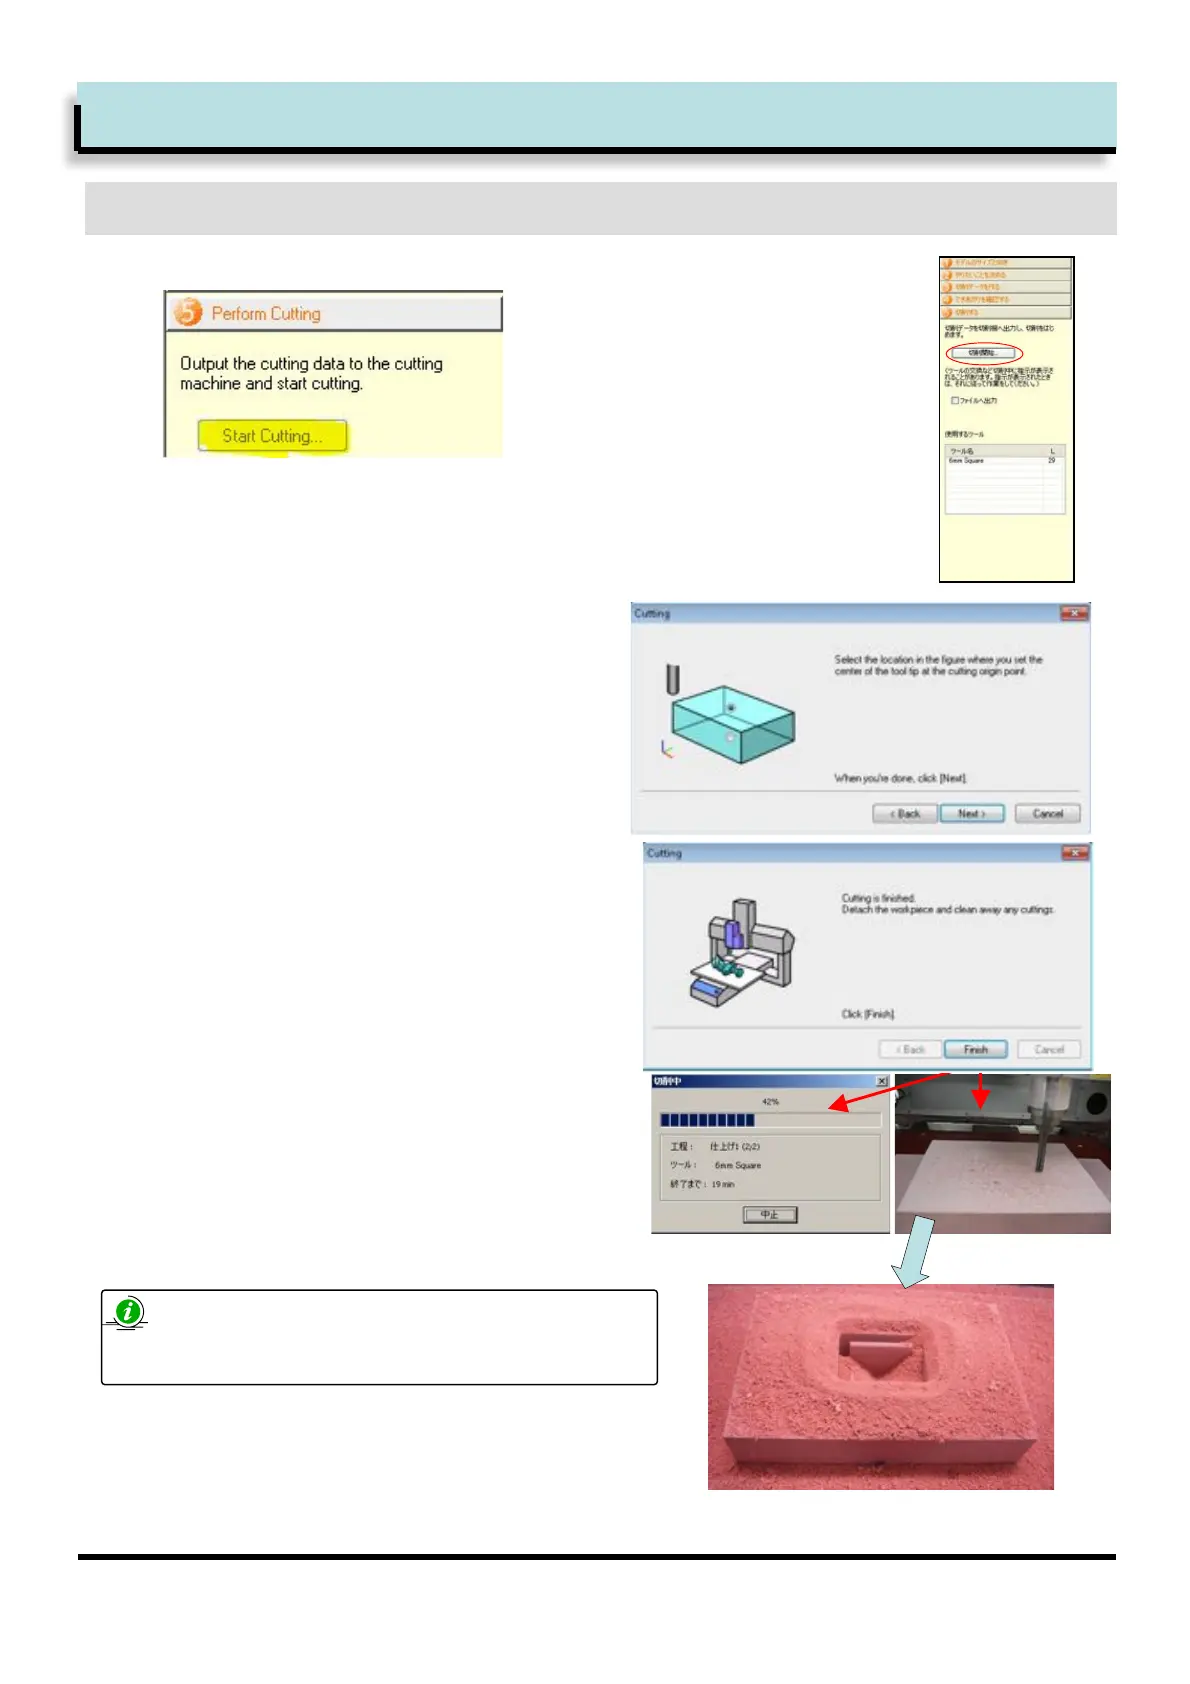
Start cutting
1
2
3
Step 5.+Cutting the model
+++++++++++++++++++++
Click [Start cutting] from [Perform Cutting tab]
As we have already surfaced the model
work piece, and we have already set the
XYZ origin, so no changes are required.
Click [Next] to continue.
Click [ Next] to start cutting
KWhile cutting, the cutting progress is displayed.
The MDX-40A now starts cutting.
L1When all the data has been machined, the
MDX-40A will stop cutting and ‘Finished’ will be
displayed.
Open front cover and clean off the cutting waste.
If you open the front cover of the MDX-40A while
cutting, the spindle and axes will lose power. You
cannot continue cutting after an ‘emergency stop’ error.
Start cutting
Just finished cutting
L
 Loading...