23
Preparation of the workpiece for model and surface levelling
Prepare the model workpiece using the size 120mm x 100mm x 30mm.
Draw the diagonal lines as with the base to locate the centre origin.
Apply double-sided tape to the entire area on the back of the workpiece.
1
2RTT
,.RTT
,RRTT
Top of model workpiece
Underside of model workpiece
Double sided
tape
2
Remove the backing from the double sided tape and fix the
model workpiece to the base.
+Ptnsure both surfaces are clean and free from dust and swarf.
3
Perform surface levelling repeating the process from Page 19 in
this guide.
Set the surfacing area to 120 x 120mm.
Set surfacing amount to 2 mm.
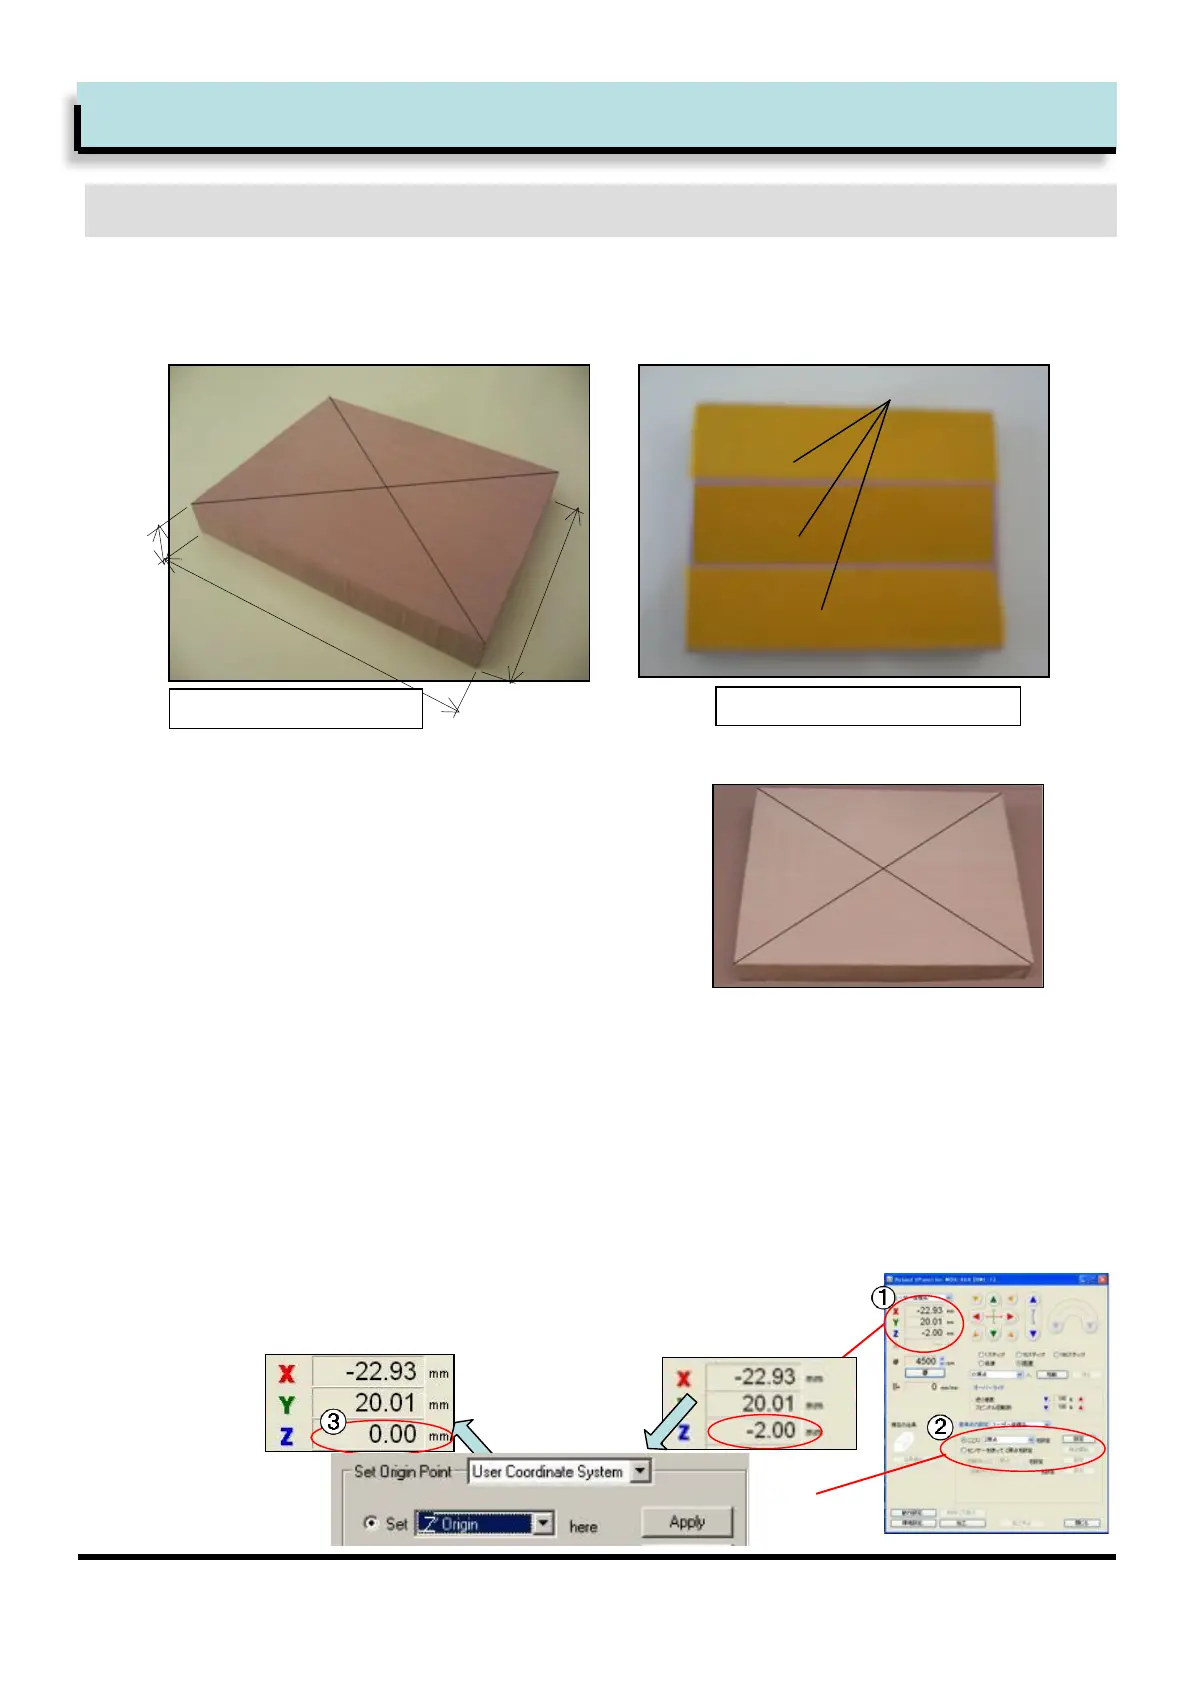
After surface levelling has completed, using Vpanel, set Z origin on the surface
of the workpiece.
You can do this by using the Z0 sensor or by lowering the Z by the surfacing
amount (2mm in this example) and selecting the option [set Z0 from here].
4
<$=>1hi+<=$(>1CGAFAi1J($$*#B1$E=1^GA=
G#'1D&%F>*=)=
 Loading...