21
Making Detailed Settings (SETUP)Making Detailed Settings (SETUP)
Adjusting the Oset of the Hi-Hat (VH-10/VH-11)
OPEN
CLOSE
oset
adjustment
screw
1. With the hi-hat completely separated from the
motion sensor unit, power-on the TD-07.
motion sensor unit
Separated
clutch screw
2. Loosen the clutch screw and let the hi-hat rest
naturally on the motion sensor unit.
3. Press the [ ] (SETUP) button.
4. Use the [C][A] buttons to select “PAD,” and
press [ ] (ENTER) button.
5. Strike the hi-hat to select the pad.
6. Use the [C][A] buttons to select “Type,” and
use the dial to select the type of hi-hat you’re
using (VH-10 or VH-11).
PAD HH
Type VH10À
7. Use the [C][A] buttons to select “VH Set,” and
press [ ] (ENTER) button.
8. If the screen indicates
“Turn screw L,” turn the
oset adjustment screw
counter-clockwise. If
the screen indicates “Turn screw R,” turn it
clockwise.
When the value shown in the lower left of the screen is
approximately 80 and the “OK!” indication appears, the
adjustment is complete.
Adjust HH offset
<80> OK![EXIT]
9. Fasten the clutch screw so that the hi-hat
opens to the amount you prefer.
10.
Press the [ ] (DRUM KIT) button to return to
the DRUM KIT screen.
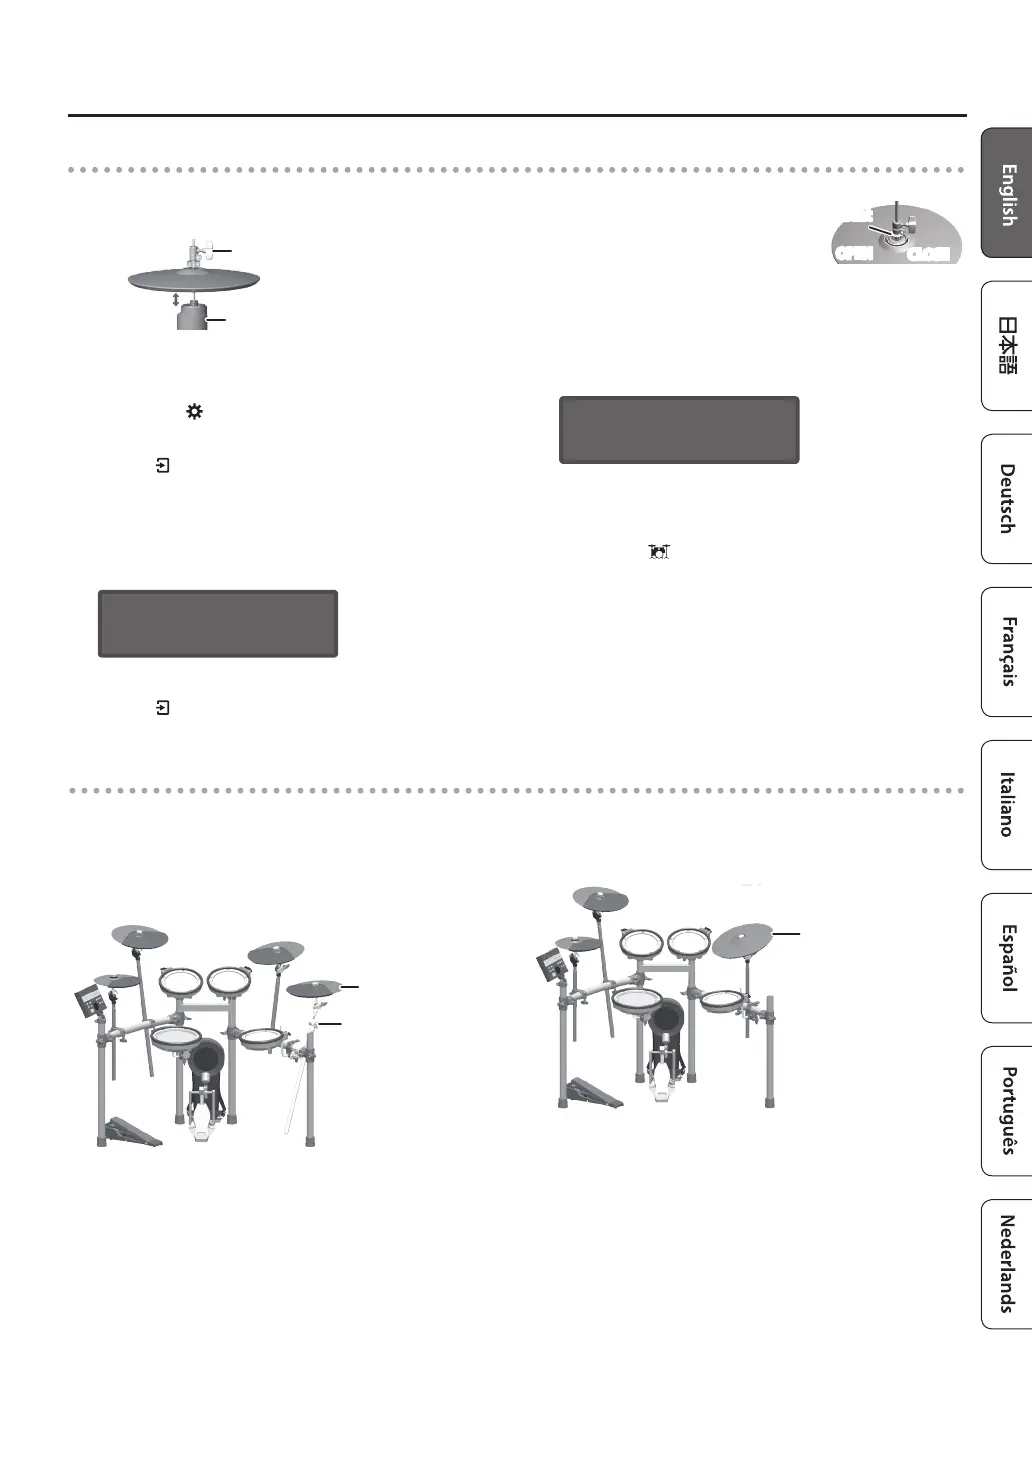
Expanding your drum set
Adding a crash cymbal
This is an example setup in which the TD-07KV is
supplemented by adding a separately sold cymbal (CY-8)
as "crash cymbal 2" (CR2), using a separately sold cymbal
mount (MDY-Standard).
Added CY-8
MDY-Standard
CR2 (CY-8) settings
1. Connect CR2 of the dedicated connection
cable to the CY-8 pad that you added.
2. As described in “Making Pad Settings” (p. 19),
set the CR2’s PAD Type to “CY8,” and set
CR2Usage to “CR2.”
This completes settings.
Using a CY-13R instead of the CY-8 ride cymbal
Here’s an example of replacing the ride cymbal (CY-8) with a
separately sold CY-13R.
* In this case, the CR 2 pad
cannot be connected.
Replaced with a CY-13R
RIDE (CY-13R) settings
1. To the CY-13R’s BOW/EDGE OUTPUT jack,
connect the dedicated connection cable’s “RD”
connector, and to the BELL OUTPUT connector
connect the dedicated connection cable’s
“CR2” connector.
2. As described in “Making Pad Settings” (p. 19),
set the RD’s PAD Type to “CY13R,” and set
CR2Usage to “RDB.”
This completes settings.

 Loading...