9
P/N 1011271 Rev. A 06/14
MAINTENANCE
WARNING
The unit will remain hot while it is cooling
down. Personal injury and burns may result
from touching the unit before it is nished
cooling down. Wear Heat Resistant Gloves.
DAILY MAINTENANCE
The daily maintenance steps involve:
y Cleaning the Acces-
sories and Toaster
y Cleaning the Release Sheet
Cleaning the Accessories and Toaster
1. Turn the toaster o and allow
it to cool before proceeding.
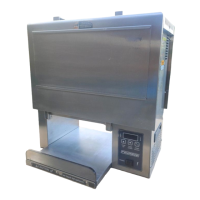
2. Refer to Figure 3. Remove the
Bun Feeder, Release Sheet,
and Bun Chute and set aside.
NOTE: Do not wash the Release
Sheet in the sink. It must
be washed by hand.
3. Wash the Bun Feeder and
Bun Chute in soap and wa-
ter. Rinse with clean wa-
ter and allow to air dry.
4. Wipe all surfaces of the unit
with a hot damp cloth.
NOTE: Do not use a dripping wet
cloth. Wring out before use.
Cleaning the Release Sheet
1. Inspect the Release Sheet.
Replace the Release Sheet if
it is worn, creased, or torn.
2. Spray an approved cleanser
on a clean, dry towel.
3. Wipe the Release Sheet
rmly from top to bottom.
4. Repeat this procedure
with a clean, dry towel
dampened with water.
5. Next, wipe the release sheet
with a clean towel damp-
ened with an approved
sanitizer. Allow to air dry.
6. Repeat Steps 1 through
6 on the inside portion
of the Release Sheet.
7. Refer to the section titled
Installing the Release Sheet.
Install the Release Sheet ac-
cording to those instructions.
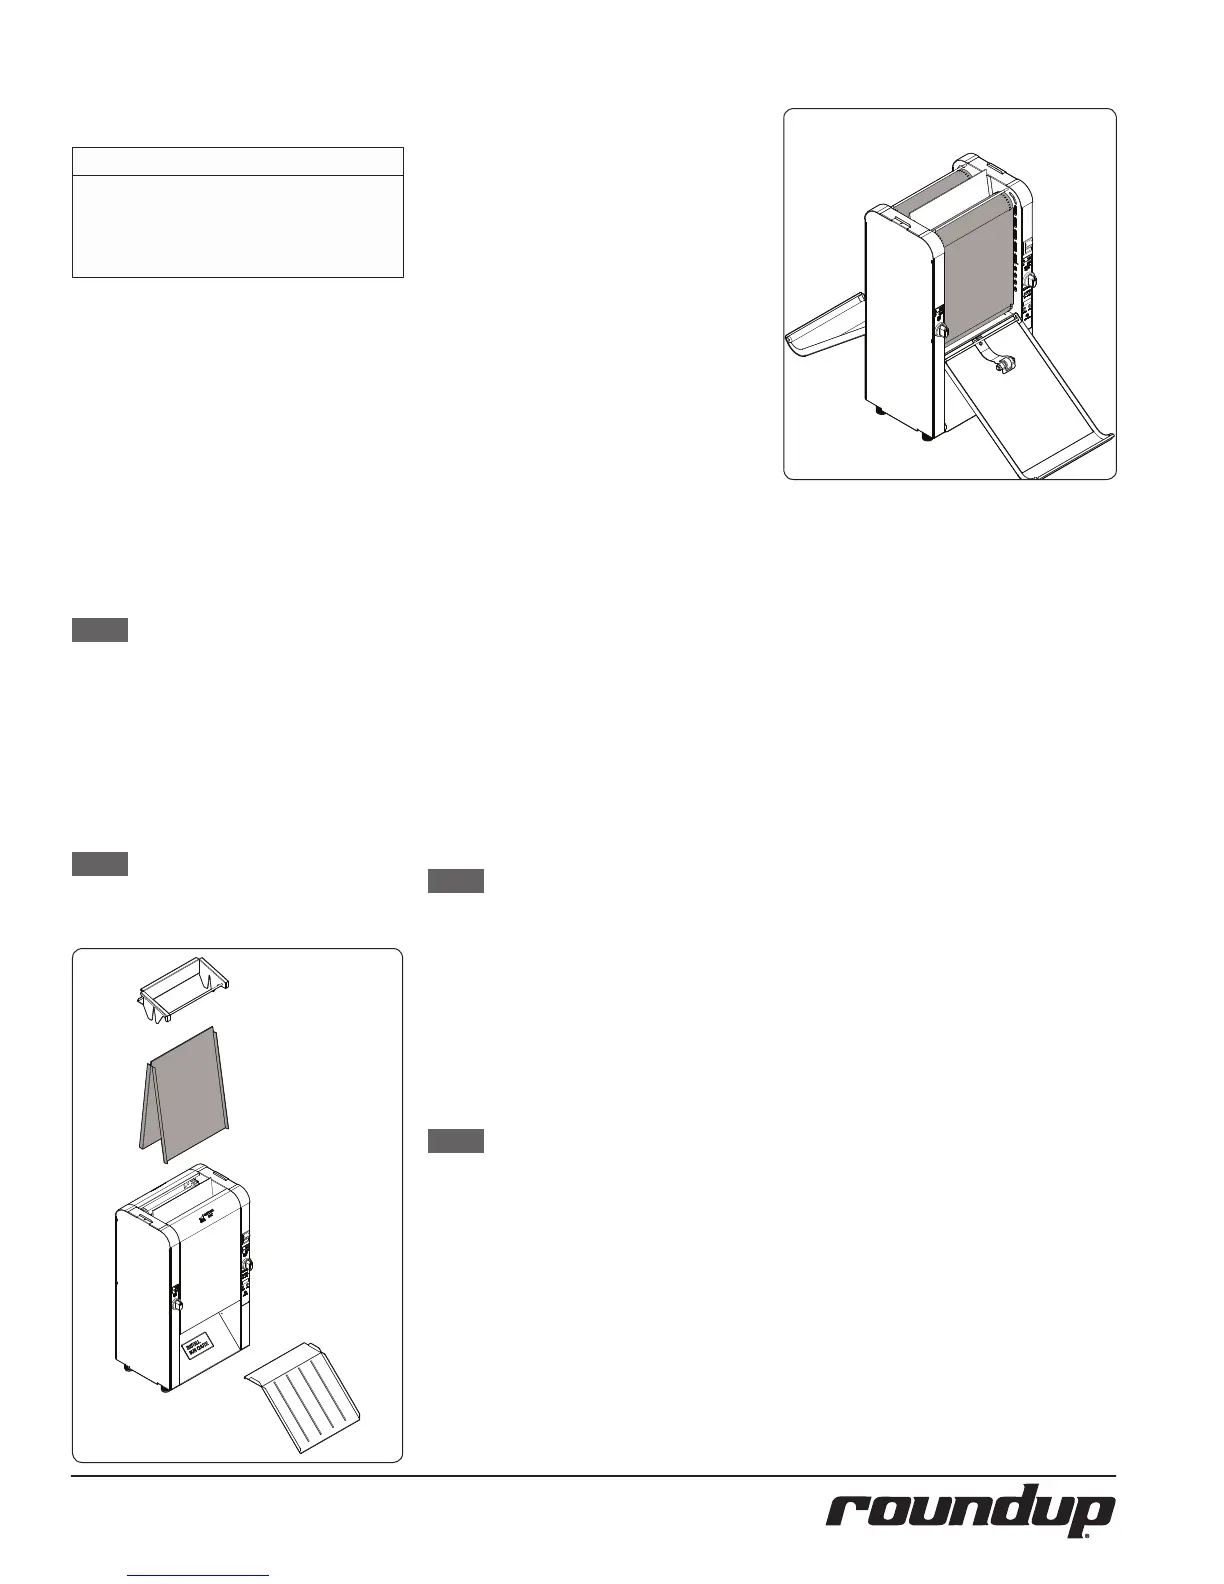
Cleaning the Belt Wraps
1. Open the front and rear Con-
veyor Covers (Figure 4)
2. Inspect the front and rear Belt
Wraps. Replace the Belt Wraps
if there are any signs of tear-
ing, folding, or other damage.
3. Turn on the unit.
NOTE: This step requires that the
toaster be turned on with the
Conveyor Covers open. Use
caution during these steps.
4. Spray a clean, sanitized towel
with an approved cleanser and
wipe the front and rear Belt
Wraps for one full rotation.
5. Repeat Step 3 with an ap-
proved sanitizer.
NOTE: Repeat these steps as needed
until the Belt Wraps are clean.
Figure 3
Figure 4