31
COMPILER TECO/ATI ENDORSEDDATE
14.07.2003
REG. CODE
1-5302-612
MODEL N°
50894
DATE OF ISSUE
07-03
REVISION 00
XIII
56
57
58
59
ENGINE ASSEMBLY
These instructions are valid for engines up-dated prior to
the publication of this manual. Any modifications must be
checked on the technical news-sheets.
Before assembling the engine carefully clean all parts
with paraffin and dry them with compressed air. Lubricate
moving parts to prevent seizing when starting up. Replace
the gaskets with new ones each time the engine is
assembled.
Use torque wrenches to ensure that the correct tightening
torques are applied.
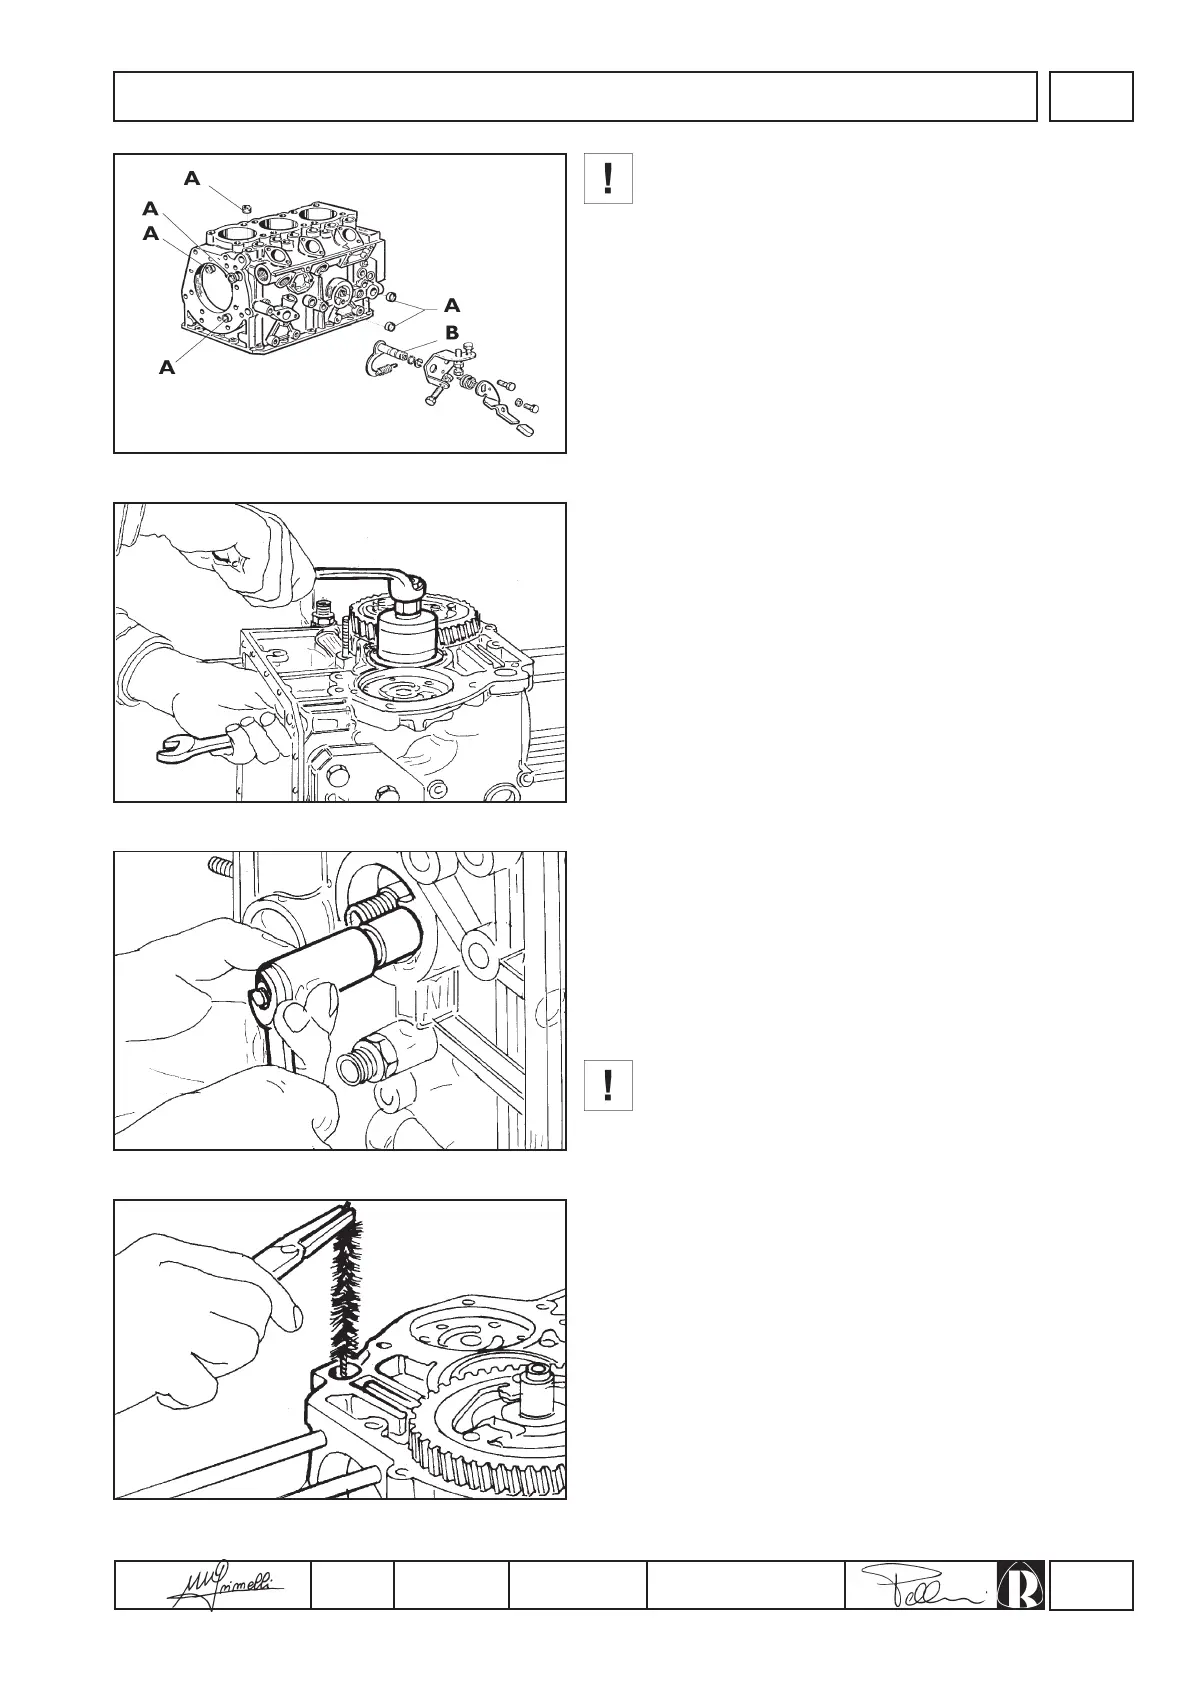
Preparing the crankcase
Clean the mating surfaces of sealing compound residues or other
foreign material using a copper scraper or fine emery stone. Make
sure that the oil passages are open and free of built-up deposits.
1.Fit the plugs (A, fig. 56) in their holes.
2.Insert the internal accelerator lever (B, fig. 56) into the
crankcase with its spring taking care to protect the oil seal O-
ring from damage.
Complete the external assembly with plate, spring, lever, etc. as
shown in figure 56.
3.Mount the timing system side bearing bush using either a
standard press or a made-to-measure punch as shown in
figure 57.
Fit the bush by matching the groove with the seat on the
crankcase.
Bushes with standard or smaller internal diameters can be
ordered as required.
4.Insert the complete oil pressure indicator valve into its housing
(fig. 58). Make sure that the valve ball seat is free of dirt that
could reduce the effectiveness of the pressure seal.
5.Insert the cylinder studs and the centring pins.
6.Fit the vent restrictor element (fig. 59).
Camshaft
Prepare the camshaft assembly (fig.60) as described below:
1.Fit adjustment shim (nr. 3) and governor washer (nr. 4) onto the
camshaft.
2.Fit snap ring (nr. 5) and key (nr. 7) into their respective seats.
3.Preheat (180 ÷ 200 °C) gear (nr. 6) complete with flyweights
and mount it to the camshaft, making sure that it is snugly fitted
against the retaining ring.
4.Insert the governor driving plate retaining ring (nr. 2).
A warped oil retainer may allow the introduction of air into
the engine thus causing crankcase ventilation problems.
Use genuine oil retainers with the RUGGERINI.
 Loading...