16
English
Fig.18B
1
☞
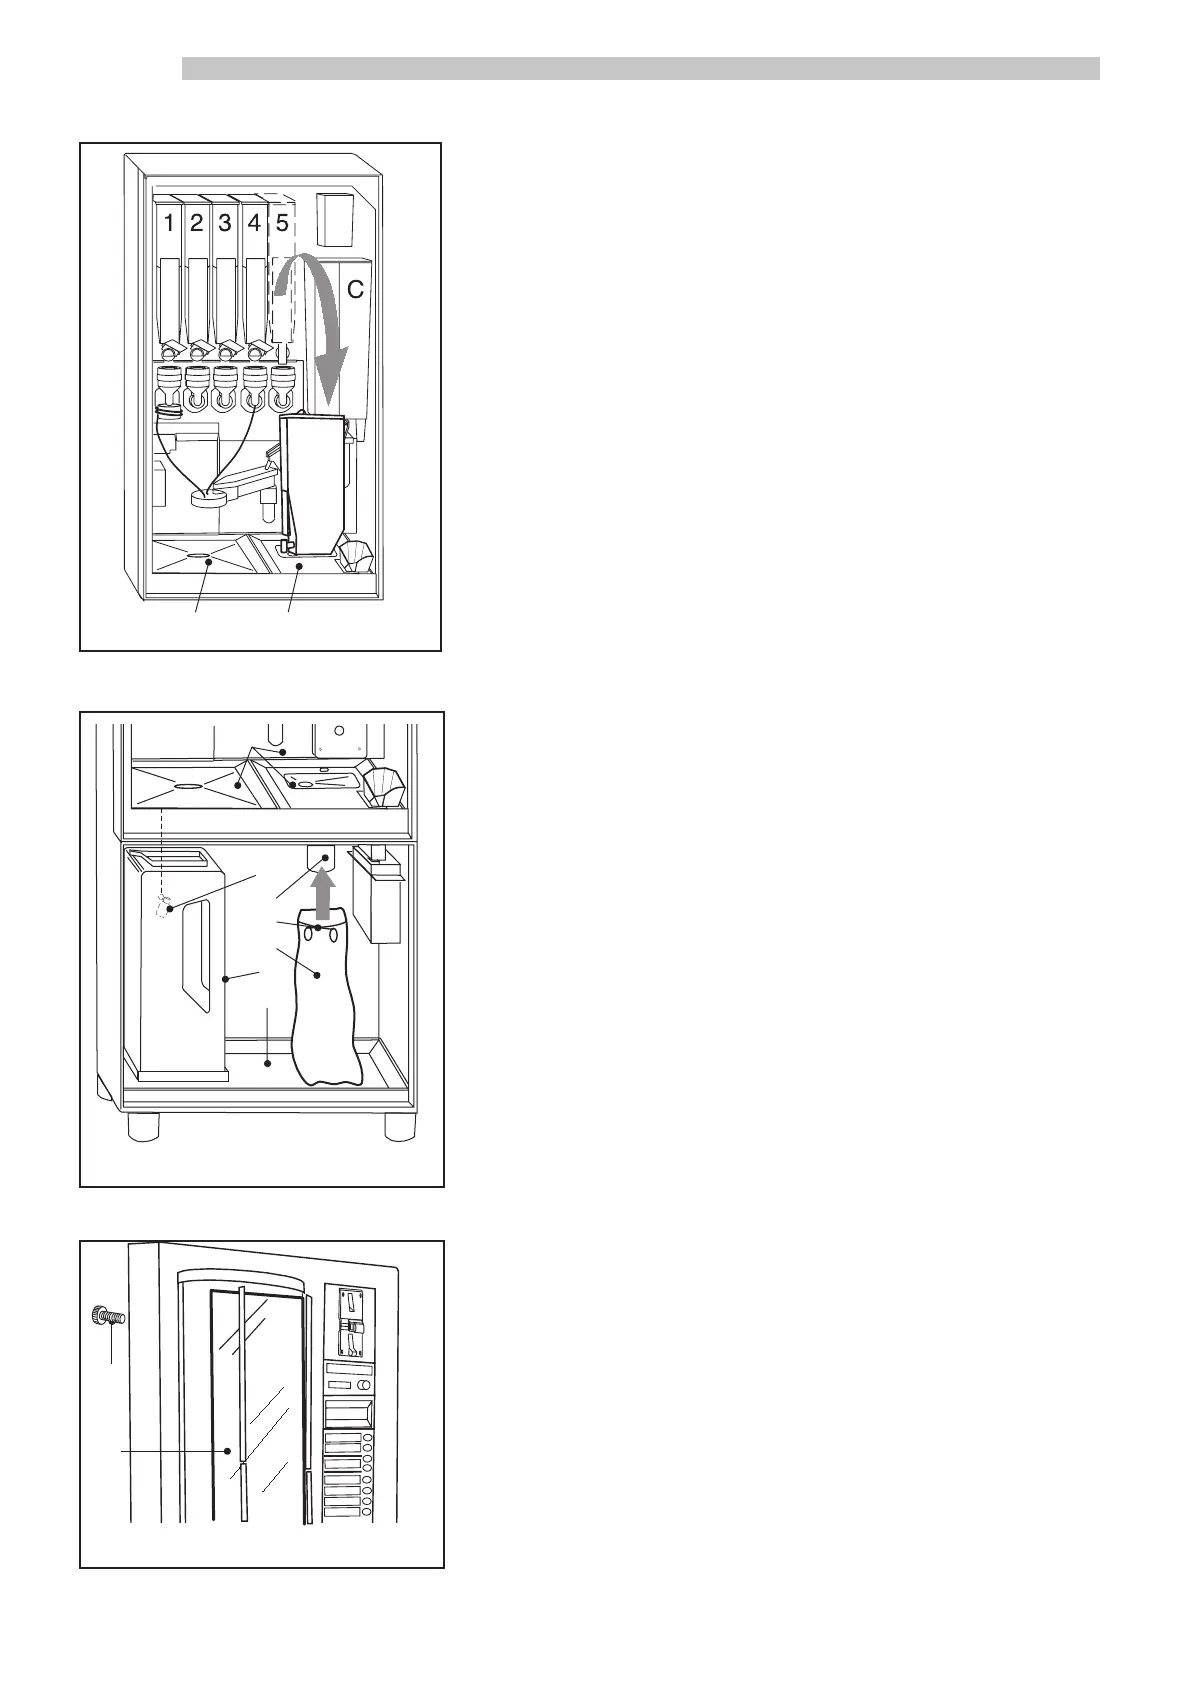
Fig.18
6
7
Filling soluble product bins
- Remove each bin by gently lifting it out by the built-in handle.
- Place the bin on the support seat installed in the drip tray ref. 6 and 7
(Fig. 18) and refill it.
NOTE: Do not exceed 2/3 of the bin capacity.
- The machine is furnished by the Manufacturer with standard beverage
settings, anticipating use of the following products:
bin 1 : TEA
bin 2 : MILK
bin 3 : HOT CHOCOLATE
bin 4 : SOUP
bin 5 : DECAFFEINATED COFFEE
bin C : COFFEE BEANS
Assembling used grounds bag
- Widen the spring ref. 3 (Fig. 18A) on the grounds drain tube ref. 2 (Fig.
18A).
- Insert the bag ref. 4 (Fig. 18A).
- Release the spring so that it closes firmly around the bag.
Checking drain tank float
- Make sure that the float ref. 1 (Fig. 18A) is inserted into the drain tank
ref. 5 (Fig. 18A). The drain tank should be correctly placed into its position
in the cabinet drip tray ref. 6 (Fig. 18A).
Checking drip tray positions
- Make sure that the three upper drip trays ref. 7 (Fig. 18A) and the cabinet
drip tray ref. 6 (Fig. 18A) are all correctly positioned.
Inserting labels and stickers
- Separate the beverage selection labels along the perforations. Apply the
price stickers onto the labels. Insert the labels into the corresponding win-
dow slots in the front door. Insert the instruction label under the graphic in
the front door. To access the front door graphic box, remove the frame
screws ref. 1 (Fig. 18B) and lift the transparent panel ref. 2 (Fig. 18B).
2
Fig.18A
1
2
3
4
5
6
7
 Loading...