18
English
☞
9
10
11
12
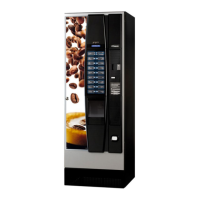
Fig.22
☞
WARNING: Execute caution when following this procedure, as the insertion of the safety
disabling key allows the machine to operate with the front door open, but at the
same time also disables the machine’s safety mechanisms. This procedure should be performed
only by trained and skilled personnel (maintenance technician).
- Turn the adjusting ring ref. 1 (Fig. 21) to a lower number for a finer grind, a higher number for a coarser grind.
- After pressing the free button ref. 10 (Fig. 22), dispense a beverage several times to check the quality of the beverage.
NOTE: After adjusting the grind setting, dispense at least two espresso in order to remove previous grinds
from the grinder.
If espresso is dispensed too slowly, adjust the grinder to a higher number; if espresso is dispensed too quickly, adjust the
grinder to a lower number.
After adjusting the grinder:
- Remove the safety disabling key and close the front door ref. 1 (Fig. 19).
5 - SETTING UP THE MACHINE
5.1 General precautions
NOTE: Before reading this paragraph, you should carefully read the instructions contained in Paragraph
1.1 “General safety precautions”, so that you are aware of the safety conditions required prior to
operating this machine.
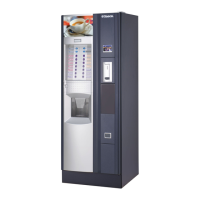
5.2 Controls and buttons
Controls and buttons to use the machine are located on the front door pa-
nel. Four other buttons, for programming and reset functions, are found on
the inside front door. The controls and buttons on the panel are (See Fig.
22-23):
1 - 40 character-display (20x2 lines)
2 - Beverage selection buttons
3-4 Pre-selection buttons “Sugar quantity”
5 - Pre-selection button “Without cup”
6 - Pre-selection button ”Decaffeinated coffee”
7 - Green LEDs: indicate that the corresponding beverage is available
8 - Red LEDs: indicate that the corresponding beverage is not available
9 - Priming button
10 - Free button
11 - Programming access button
12 - Reset button