
W
whitebrandiSep 9, 2025
How to fix storage fault in SAJ Camera Accessories Master?
- JJake RiveraSep 9, 2025
To fix a storage fault in your SAJ Camera Accessories Master, inspect the storage device for errors.
How to fix storage fault in SAJ Camera Accessories Master?
To fix a storage fault in your SAJ Camera Accessories Master, inspect the storage device for errors.
What to do if SAJ Camera Accessories Master has high temperature?
If your SAJ Camera Accessories unit is experiencing high temperatures, ensure it has proper ventilation and check the cooling system.
How to solve battery overvoltage in SAJ Camera Accessories Master?
To resolve a battery overvoltage issue in your SAJ Camera Accessories Master, check the battery charging system.
What to do if SAJ Camera Accessories Master shows output overload?
If the SAJ Camera Accessories unit shows an output overload, reduce the load on the output.
What to do if SAJ Camera Accessories Master has bus voltage high?
If your SAJ Camera Accessories unit is experiencing a bus voltage high, inspect the bus voltage and system loads.
How to fix low temperature in SAJ Camera Accessories Master?
To address a low temperature issue with your SAJ Camera Accessories Master, check for adequate insulation and heating systems.
What to do if SAJ Camera Accessories Slave shows BMS communication loss alarm?
If the SAJ Camera Accessories Slave unit shows BMS communication loss alarm, check BMS communication lines.
What to do if SAJ Camera Accessories Slave shows Ammeter communication loss alarm?
If the SAJ Camera Accessories Slave unit shows Ammeter communication loss alarm, inspect ammeter connections.
How to troubleshoot relay fault in SAJ Camera Accessories Master?
To troubleshoot a relay fault in your SAJ Camera Accessories Master, check relay operation and connections.
What to do if SAJ Camera Accessories Master shows DC side hardware overcurrent?
If the SAJ Camera Accessories Master is experiencing a DC side hardware overcurrent, inspect the circuit for overloads and manage loads.
Essential safety advice for operating the AS1 AC Retrofit Battery System.
Explains important symbols used in the user manual for safety and operation.
Recommended actions in case of battery damage, fire, or hazardous gas release.
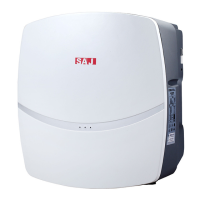
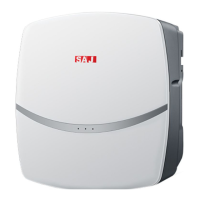
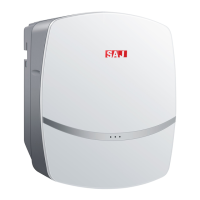
Describes the AS1 series for energy storage retrofits and AC coupled systems.
Explains the naming convention and components of the AS1 product models.
Provides detailed technical specifications for the AS1-3KS-5.1 model.
Crucial safety precautions for the installation process of the AS1 unit.
Guidance on selecting the appropriate installation method and location for AS1.
Detailed procedures for mounting and installing the AS1 unit and its components.
Details the various electrical interfaces and ports on the AS1 unit.
Illustrates the overall wiring diagram for connecting the AS1 system.
Instructions for connecting the wiring for the master AS1 device.
Instructions for connecting the wiring for slave AS1 devices.
Explains the communication interfaces, including RS232 and DRMS.
Steps for installing the Current Transformer (CT) for measurement.
Proper procedure for establishing a ground connection for the AS1 unit.
Guidance on installing external circuit breakers and RCDs for safety.
Overview of the AS1's human-computer interface (LCD and LED indicators).
Steps for initializing the AS1 device using communication modules and software.
Detailed steps for powering on and starting the AS1 inverter.
Procedures for safely shutting down and powering off the AS1 inverter.
Instructions on setting up and using remote monitoring via APP or website.
Guidelines for safely transporting lithium batteries and the AS1 unit.
Recommended conditions and procedures for storing the AS1 unit and batteries.
| Model | AS1-3KS-5.1 |
|---|---|
| Rated Power | 3 kW |
| Max. DC Voltage | 550 V |
| Start Voltage | 120 V |
| Rated AC Power | 3 kW |
| Max. AC Power | 3.3 kW |
| Rated AC Voltage | 230 V |
| Max. Efficiency | 97.6% |
| MPPT Efficiency | 99.9% |
| Cooling | Natural Convection |
| Protection Degree | IP65 |
| AC Voltage Range | 180 V - 280 V |
| Operating Temperature Range | -25°C to +60°C |