OPERATION
4.4 Revised 5/19/2010
5. Hold the magazine upright against paper towels or
other absorbent material to allow excess paraffin to
drain off the magazine before placing it in the
AutoTEC.
6. Insert the loaded magazine/s into the input door and
press each of them down as far as possible.
NOTE: After the magazine is inserted, verify the magazine
lid is popped open for the Standard magazine. The Xpress
magazine is shorter so the top of the lid cannot be seen;
however, as the Xpress magazine is sliding down into the
ID, a slight resistance should be felt near the bottom of the
ID insertion, as the lid slides open.
NOTE: If the door is shut then immediately re-opened, the
system will not sense the addition of further magazines. To
continue to add magazines, close the door and touch
CONTINUE in the prompt (Figure 4-H) that appears as
soon as the door is closed, then touch the LOAD
MAGAZINES button again to insert more magazines. The
cassette count for a given input magazine is cleared when
that magazine is removed from the door. The count can
also be reset immediately by logging off the system and
logging in again, with magazines left inside the input door.
Figure 4-H: Input Door Activity Acknowledgement
7. Securely close the input door by rotating the knob
clockwise and touch CONTINUE in the on-screen
prompt. The Warming Cassettes screen displays and
the 15-minute cassette warming process begins. This
warm up time is required to ensure there is no solid or
semi-solid paraffin in the magazine that could
interfere with the action of the robotic arm. If
magazines were previously inserted and have
reached temperature, the system will immediately
start or continue to embed these cassettes. By the
time these cassettes are completed, the newly
inserted magazines will likely be ready for embedding
for maximum efficiency.
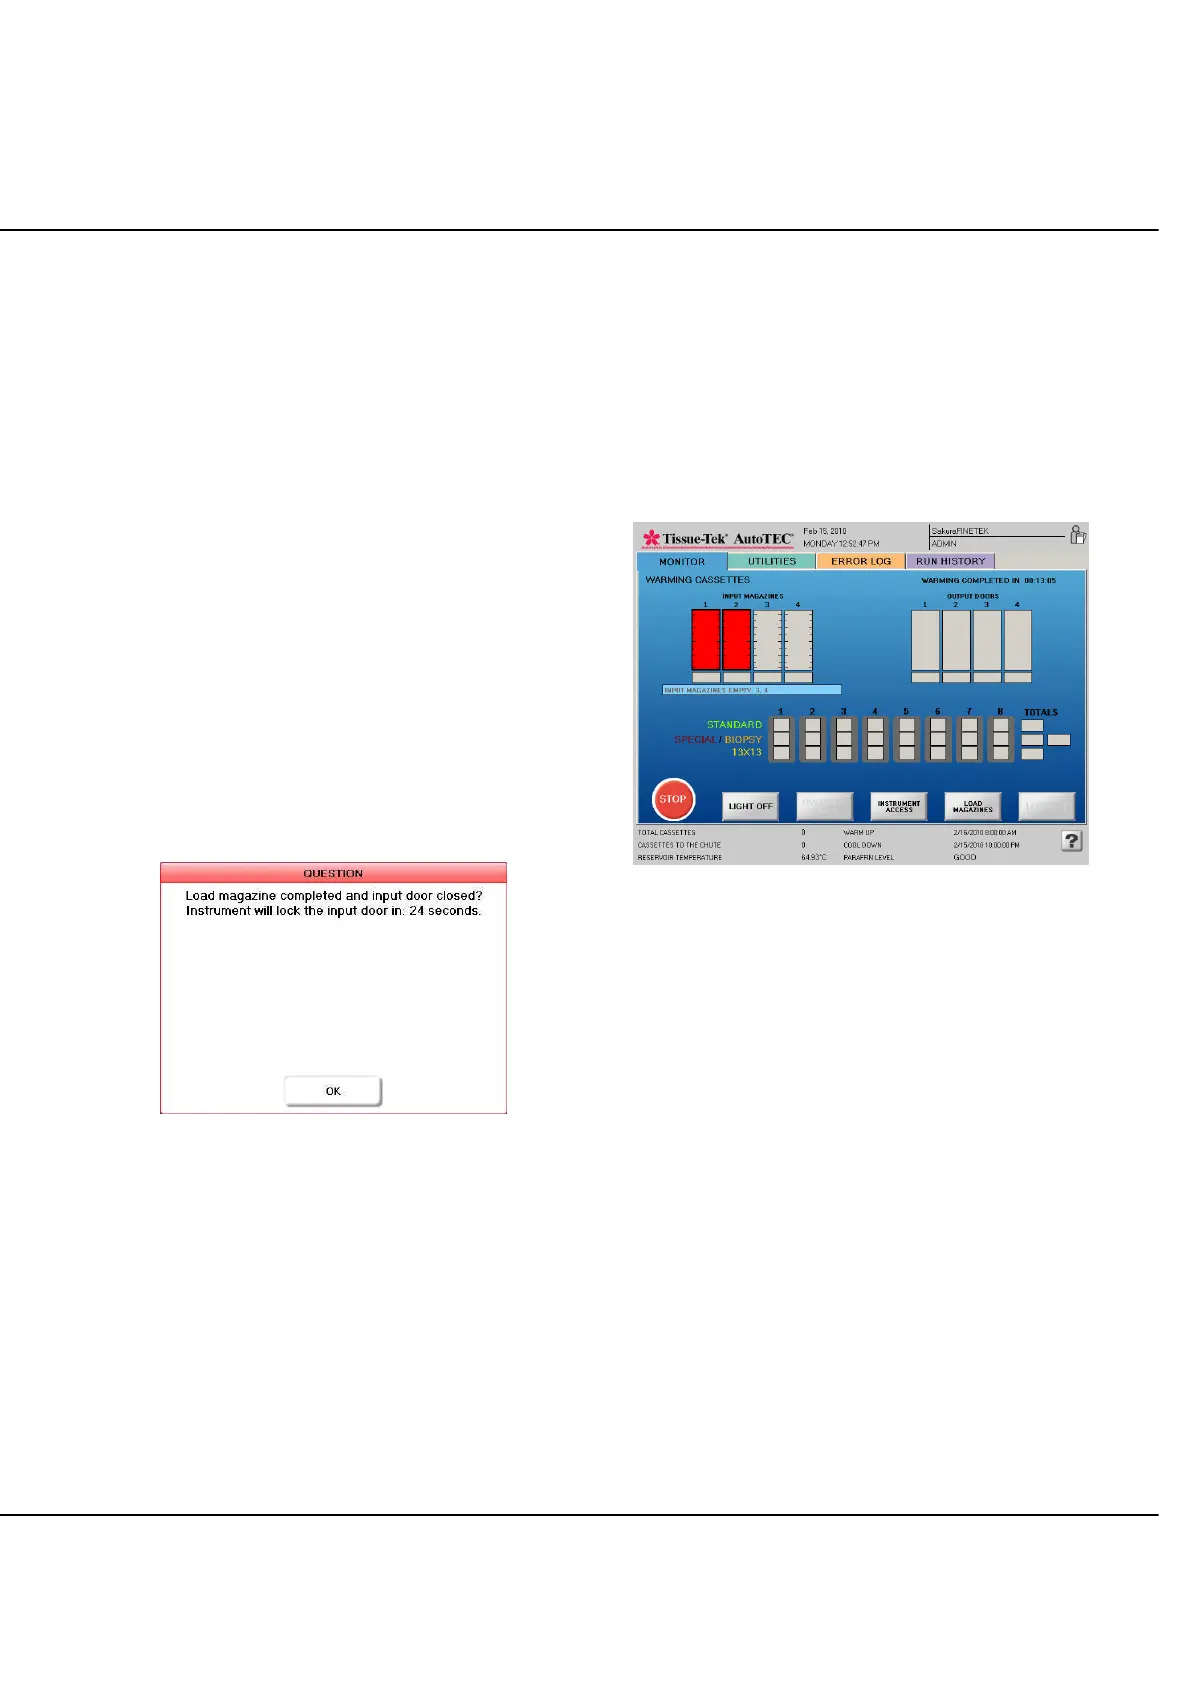
The Warming Cassettes screen (Figure 4-I) specifically
displays magazines in their 15-minute cassette warm up
period. In this figure, as indicated by the red highlights,
two magazines have been loaded and will reach
temperature in 13 minutes 5 seconds as shown in the
upper right corner. A complete description of Run screen
layout and color coding is given on the next page.
Figure 4- I: Run screen, Warming Cassettes
NOTE: To maximize system throughput and efficiency,
remove any empty magazines and replace them with filled
ones as they become available. Operating in this manner
will always guarantee that the 15-minute cassette warm
up time is completed by the time the instrument robotics
are ready to embed these cassettes.
 Loading...