Section 1
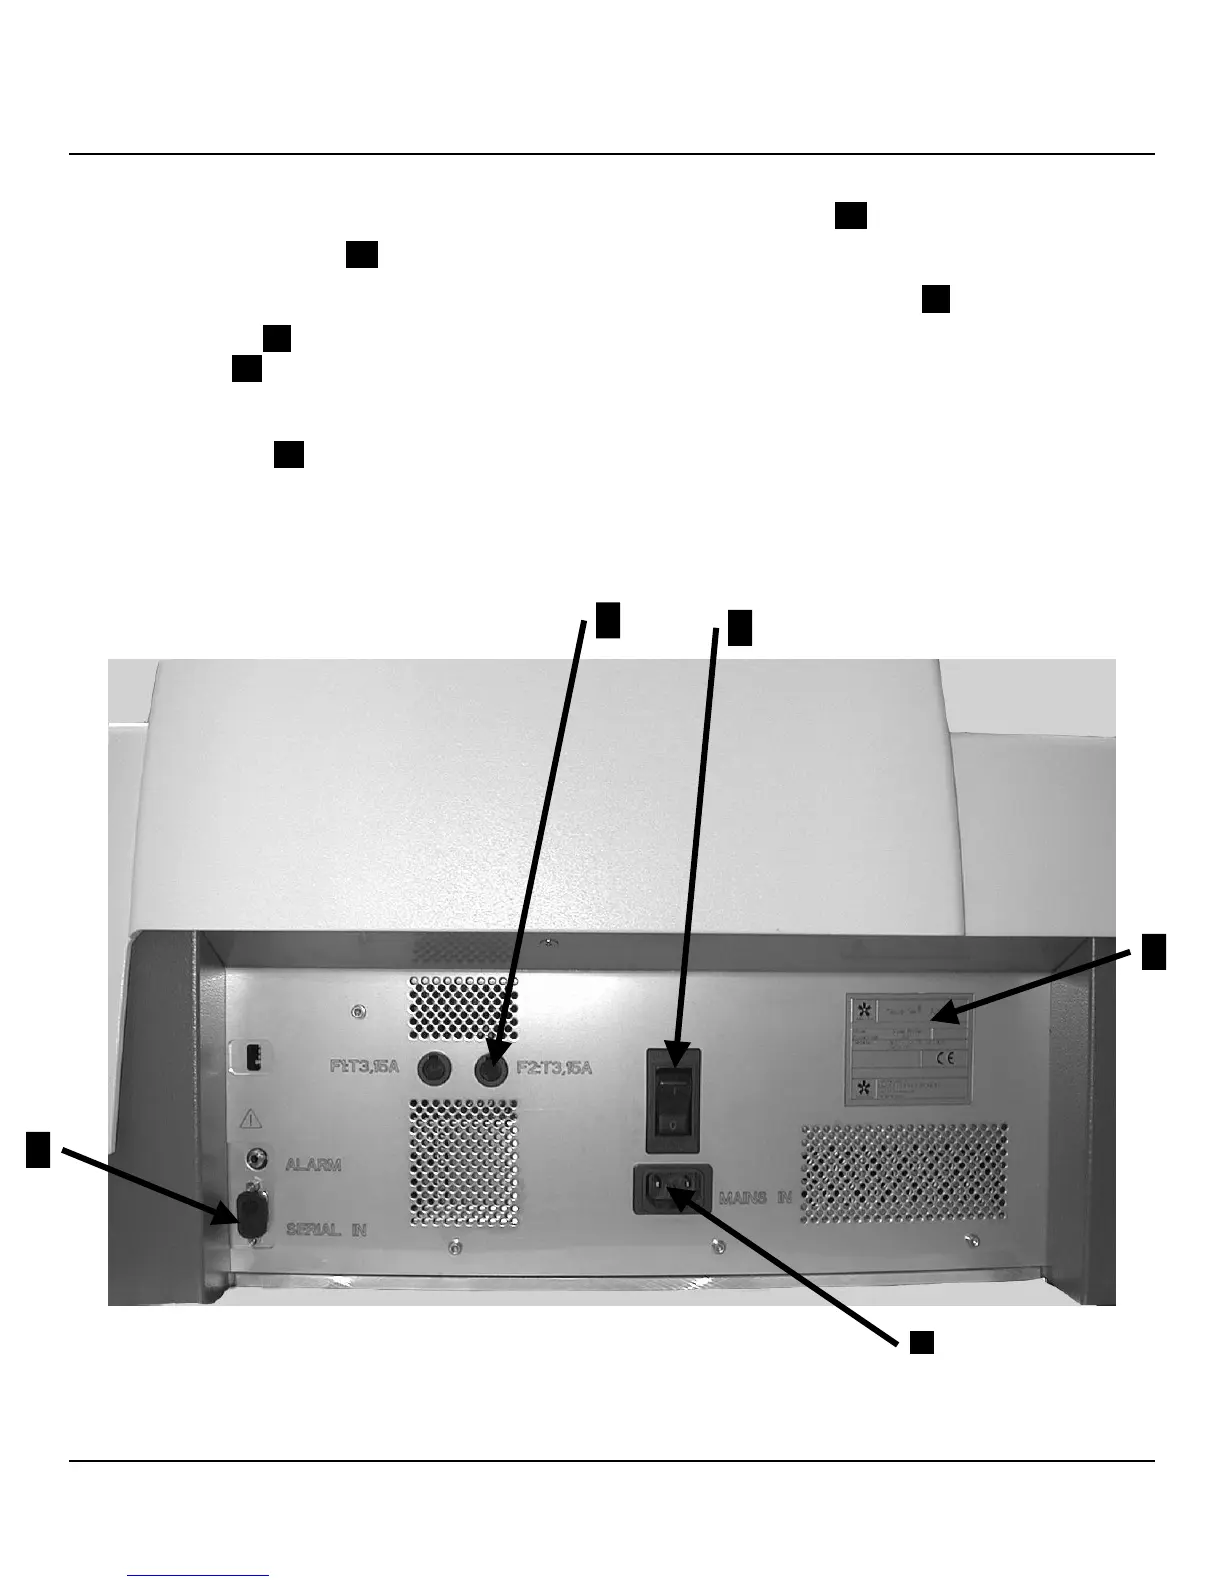
Rear of Instrument (Figure 1-R)
Print Interface Connection
1
..
The printer interface
connection is a serial port connection used to connect the
printer with the PC by means of a serial cable.
Secondary Fuses
2
..
Two x 3.15A melting fuses.
Power Switch
3
..
The instrument power is turned on
and off by pressing the power switch located on the back
of the instrument.
Power Connection
4
..
The power connection is used
to connect the instrument to a power source using the
power cord provided. The other end of the power cord must
be plugged into an appropriately grounded AC electrical
outlet.
Printer Rating Label
5
..
The printer rating label is
located at the rear of the instrument and indicates the
instrument serial number and electrical specifications.
Unload Station Rating Label
6
..
(not shown)
The
unload station rating label is located at the rear of the
unload station and indicates the unload station serial
number and the electrical specifications.
2
3
5
1
Figure 1-R
4
 Loading...