Section 6
5.
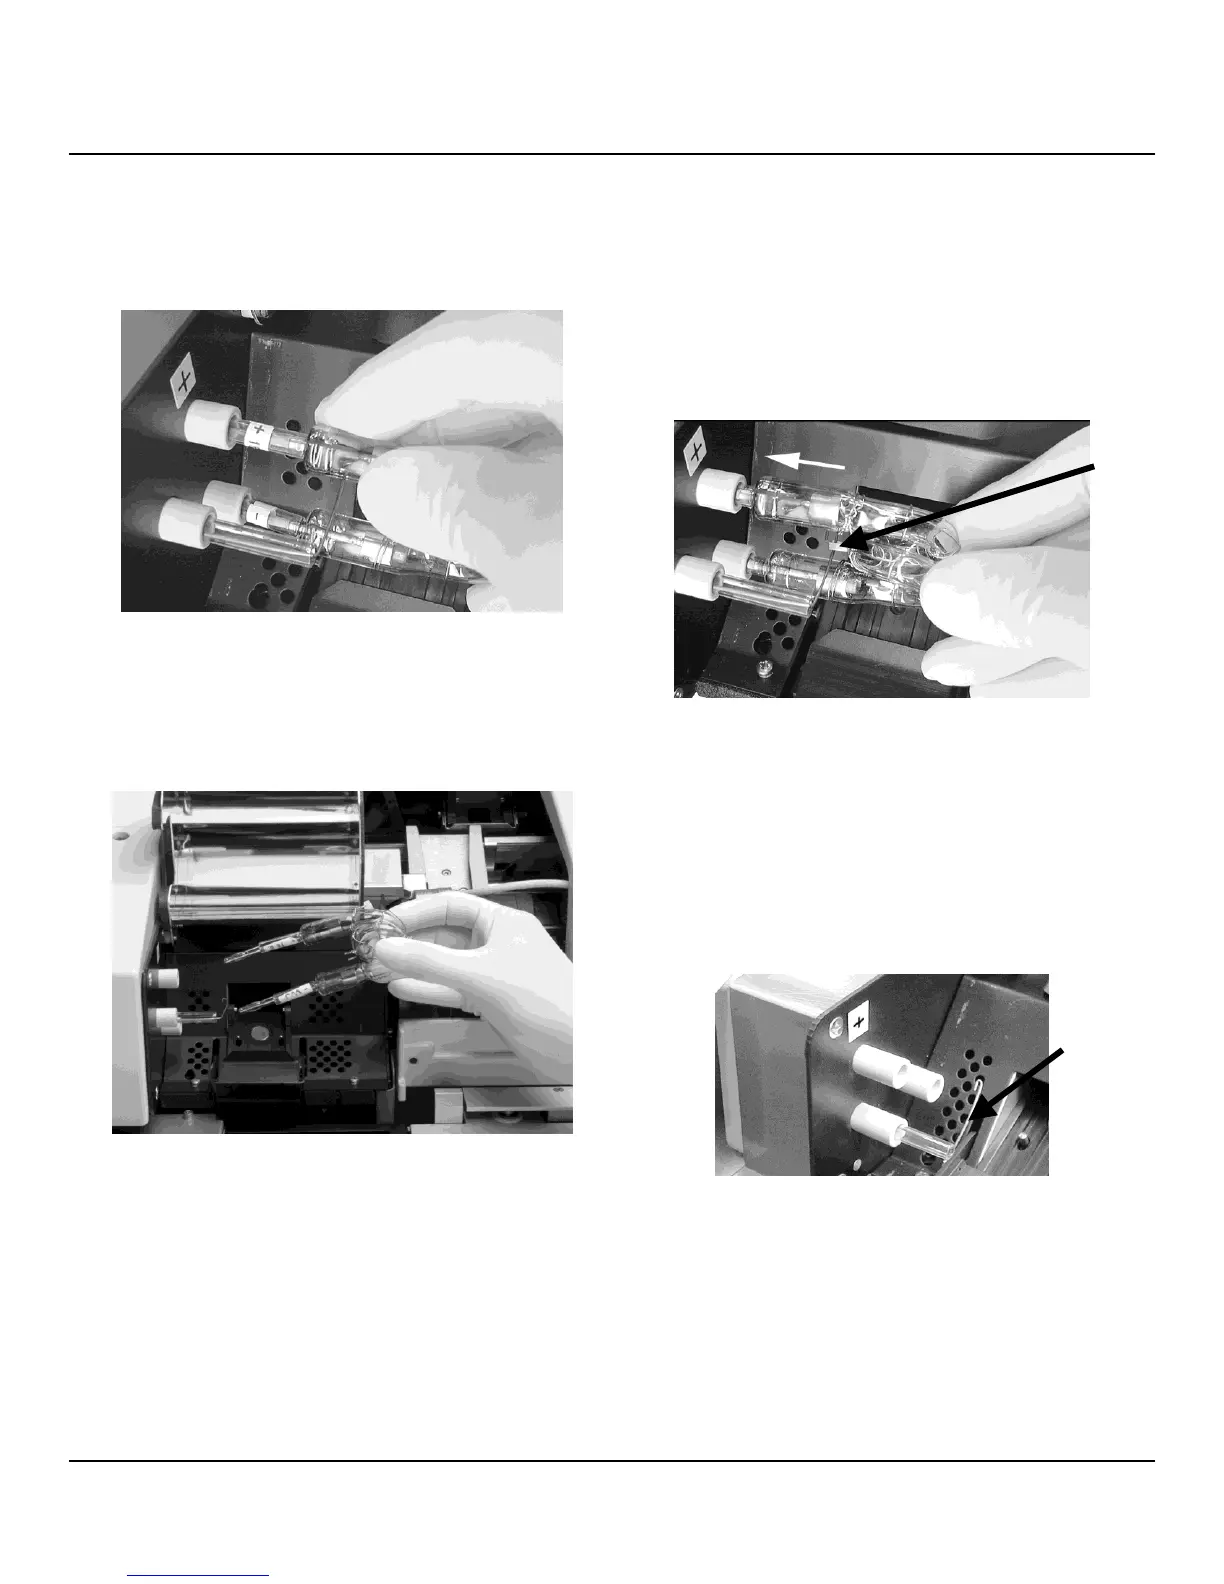
Carefully pull the curing lamp (Figure 6-E) straight out
and slightly to the right; do not twist. If the curing lamp
is difficult to pull out, rock it gently side to side.
Figure 6-E
Installing a new Curing
Lamp
6.
Hold the curing lamp at the base (Figure 6-F).
Figure 6-F
CAUTION: Do not compress or hold the lamp by the
sides as it may cause
splintering.
7.
Locate the position of the "+" and the "-" on the
electrodes of the curing lamp. Position the lamp so
that the "+" and "-" are inserted into the connection
ports bearing the same mark.
8.
Insert lamp into the connection port and push
carefully inwards as far as it will go. If necessary, rock
the lamp slightly for full insertion (Figure 6-G).
Contact
Spring
Figure 6-G
CAUTION: If the lamp electrodes are inserted the
wrong way, the lamp will work, but will wear out very
quickly and may fail soon after insertion.
NOTE:
Be sure that the priming wire (Figure 6-H), located
on the instrument, is set between the contact spring on the
lamp (Figure 6-G).
Priming
Wire
Figure 6-H
9.
Press the reflective cover downwards. Reinsert and
tighten the washer and screw (Figure 6-D).
10. Close the main cover of the instrument.
 Loading...