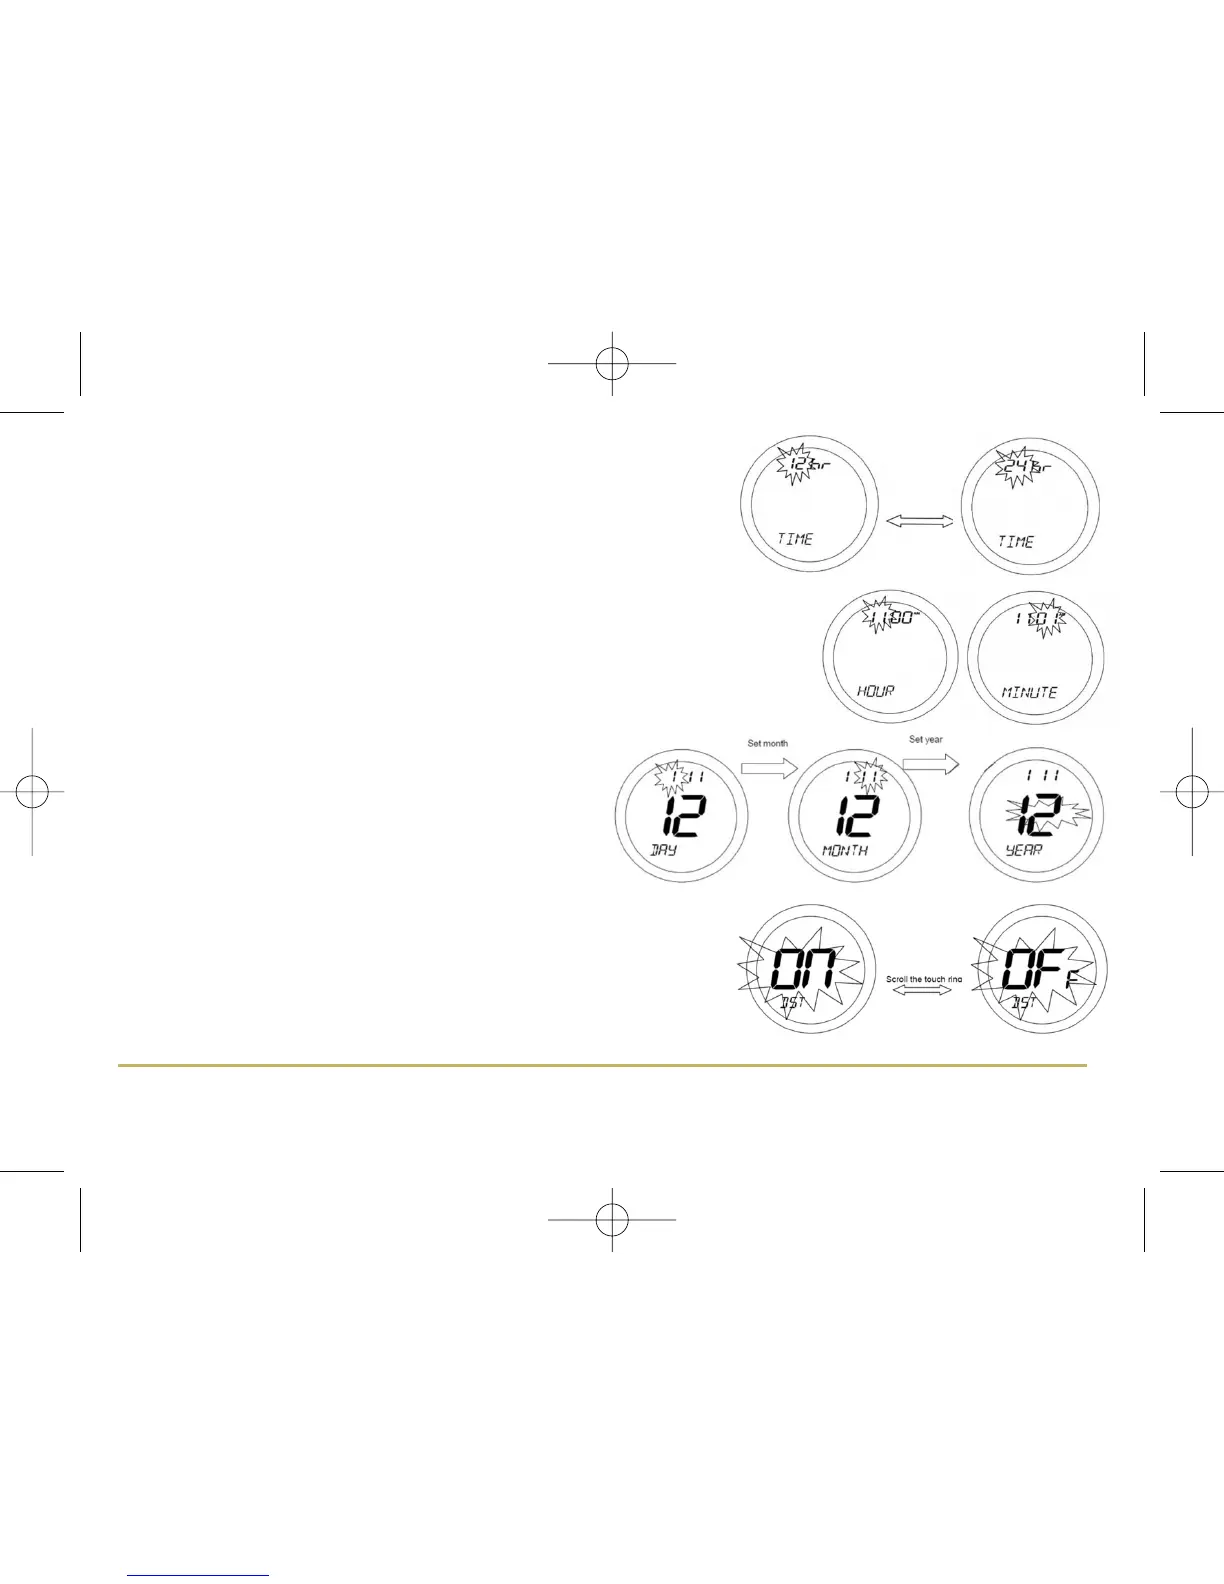
MANUAL SETTING OF TIME AND DATE
If the time and date setting need to be set manually, this can be done by
accessing the TIME menu. The first option within the menu is a choice of 12
or 24 hour clock setting. On entering the menu, use the Touch Ring to scroll
to the preferred option (12 or 24 hour clock), and confirm the choice using
the OK button. Use the Arrow key to return to the previous screen display.
After setting the time display format, the next screen display allows you to set the time.
Use the Touch Ring to scroll to set the hour and confirm the choice using the OK button.
The minute setting will then be selected – change this setting in the same way using the
Touch Ring, and confirm the setting using the OK button. After setting the time, the
next screen display allows you to set the date – this is set in exactly the same way as
previously described for the time.
After setting the date, the next screen display allows you to
set the daylight saving time (DST) option. Use the Touch
Ring to scroll to set the DST option ON or OFF, and confirm
the setting using the OK button – the default setting is ON.
Press the Arrow key to return to the previous screen display,
or do nothing for 10 seconds and the ST620RF will return to
NORMAL mode.
The DST setting allows the ST620RF to automatically adjust the time when
local time changes from Greenwich Mean Time (GMT) to British Summer
Time (BST) on the last Sunday in March, and then back to GMT on the last
Sunday in October each year.
If the ST620RF is able to receive an RCC signal, the time will be correctly
updated regardless of the DST setting, but if no RCC signal is being received
and DST is ON, then the current stored time will be automatically adjusted.
29ST620RF INSTRUCTION MANUAL