Install the strainer with the direction of flow
matching the arrow on the body. Make sure
the filter element is vertically suspended. Re
-
member to leave enough space to remove it.
2.1.2 Additional installation in
-
structions
We recommend to install a hand-operated
shut-off valve both upstream of the strainer
and downstream of the regulator to be able to
shut down the plant for cleaning and mainte
-
nance.
To monitor the pressures in the plant, install a
pressure gauge both upstream and down
-
stream of the regulator.
To check the adjusted set point, we recom-
mend to install a thermometer near the sensor
that extends into the process medium.
2.2 Installing the temperature
sensor
Refer to Mounting and Operating Instructions
EB 2430 EN for details on the Type 2430 K
Thermostat and to EB 2430-3 EN for details
on the Type 2430 K Thermostat (vapor pres
-
sure).
The temperature sensor may be installed in
any desired position. Make sure its entire
length is immersed in the process medium.
Choose a place of installation where neither
overheating nor considerable idle times oc
-
cur.
Weld in a sleeve with G ½ or G ¾ female
thread at the place of installation.
Seal the screw gland or thermowell into the
welded-in sleeve. Insert the sensor and fasten
it with the clamping screw.
NOTICE
To prevent damage caused by corrosion,
make sure to use the same kinds of materials
when installing a sensor or thermowell. For
example, avoid using a thermowell or tem
-
perature sensor made of non-ferrous metal in
a stainless steel heat exchanger. In this case,
the sensor is to be used together with a stain
-
less steel thermowell.
2.2.1 Capillary tube
Install the capillary tube such that no mechan
-
ical damage can occur. The smallest permissi
-
ble bending radius is 50 mm.
Roll up the excess tube to form a ring; never
bend or shorten it.
Make sure the capillary tube is not exposed to
excessive temperature fluctuations.
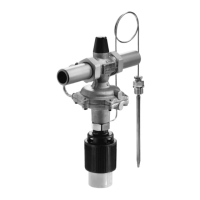
2.3 Mounting the thermostat
Place the thermostat on the connection of the
actuator and tighten it using the coupling
nut (10) and a tightening torque of 20 Nm.
6 EB 3132-2 EN
Installation