11-2 EB 8310-6 EN
Removal
11.1 Removing the actuator
from the valve
1. Undo the clamps of the stem connector
(A26/27).
2. Loosen the stem connector nut (9) and
lock nut (10).
3. Removing actuators with "stem ex-
tends" action with/without preloaded
springs: to undo the ring nut (A8), apply
approx. 50% signal pressure to open the
valve.
4. Unscrew the ring nut (A8) on the valve
bonnet (2).
5. Disconnect the signal pressure again.
6. Remove the ring nut (A8) and actuator
from the valve.
7. Fasten the lock nut (10) and stem con-
nector nut (9) on the valve.
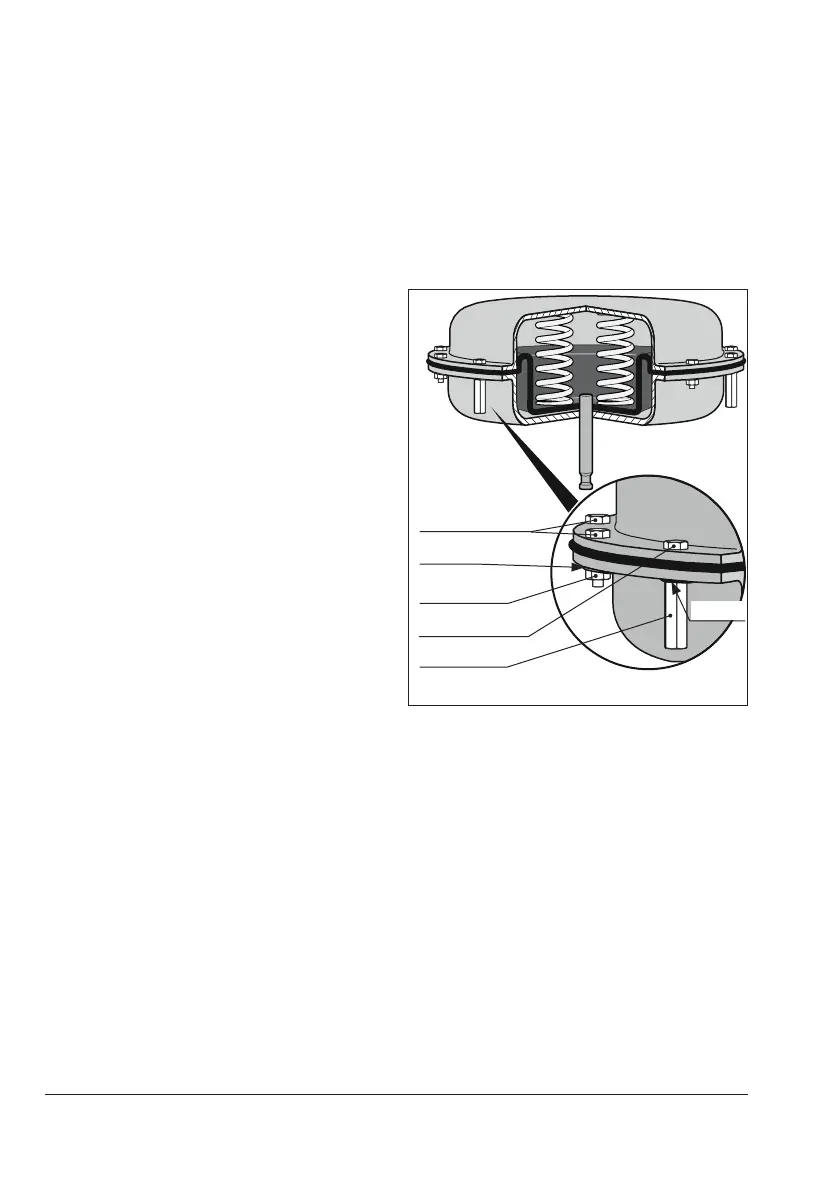
11.2 Relieving the spring com-
pression in the actuator
The long clamping bolts with long clamping
nuts and the short bolts with short nuts are
arranged evenly around the circumference of
the actuator housing to fasten the top and
bottom diaphragm cases together. The
springs in the actuator are compressed using
the long clamping nuts and bolts.
To relieve the compression of the springs in
the actuator, proceed as follows:
1. Unthread and remove the short nuts and
bolts (including the washers) on the dia-
phragm cases.
2. Loosen the long clamping nuts and bolts
on the diaphragm cases evenly in a
crisscross pattern to gradually relieve the
spring compression. Hold the bolt head
stationary with a suitable tool and apply
the torque to the nuts.
Clamping bolt
Clamping nut
Short bolt
Short nut
Washer
Washer
Fig.11-1: Preloaded springs