4-6
Chapter 4
Installing Processor and Interface Cards
MFM Daughterboard
This board (Figure 4-10) has no selectable options and installs in any available position of the
MCP2 card when the system has one cabinet installed (Figure 4-1
). If the system has more than
one cabinet, the MFM board must be installed in position LOC3 of the MCP2 card, any available
position of the SCP2 card (Figure 4–3
) or any available position of the LCP2 card(s) (Figure 4–4).
Up to three MFM boards can be installed in a system (one on the MCP2 or SCP2 and one on
each LCP2). The MFM board is used to provide an additional 12 DSP circuits for DTMF and tone
detection.
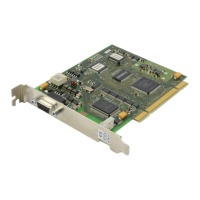
To install the MFM board, remove the two screws holding the MCP2 or LCP2 protective casing
together (Figure 4-6
) or remove the four screws holding the SCP2 case together (Figure 4-8)
and separate the two halves of the case. Place the MFM board face down over the two
connectors, taking care to properly line them up, and press gently on the back of the board to
seat it. The card casing can now be reassembled if all required daughterboards have been
installed.
NOTE: Only one MFM board can be installed on each processor card.
RCM Daughterboard
This board (Figure 4-11) has no selectable options and installs in any available position of the
MCP2 card when the system has one cabinet installed (Figure 4-1
). If the system has more than
one cabinet, the RCM board must be installed in position LOC3 of the MCP2 card (Figure 4-1
),
any available position of the SCP2 card (Figure 4-3
) or any available position of the LCP2
card(s) (Figure 4-4
). Up to three RCM boards can be installed in a system (one on the MCP2 or
SCP2 and one on each LCP2). The RCM board is used to provide 14 Caller ID DSP circuits for
Caller ID detection on loop start trunks (TRK B and 8TRK).
To install the RCM board, remove the two screws holding the MCP2 or LCP2 protective casing
together (Figure 4-6
) or remove the four screws holding the SCP2 case together (Figure 4-8)
and separate the two halves of the case. Place the RCM board face down over the two
connectors, taking care to properly line them up, and press gently on the back of the board to
seat it. The card casing can now be reassembled if all required daughterboards have been
installed.
MODEM Daughterboard
This board (Figure 4-12) has no selectable options and installs on the IOM board (Figure 4-13).
The Modem board provides a 56Kbps/V90 modem for communicating with the system remotely.
Place the Modem board face down over the two connectors, taking care to properly line them up,
and press gently on the back of the board to seat it.