Do you have a question about the Samsung PS-42S4S and is the answer not in the manual?
Explains screen burn-in and how to avoid it.
Discusses minor imperfections in plasma display cells.
Specifies operating altitude limits for the PDP.
Explains heat dissipation and safety precautions.
States that image retention is not covered by warranty.
Lists the remote control and batteries as included.
Lists power and antenna cables.
Lists items sold separately.
Describes the Digital Natural Image Engine.
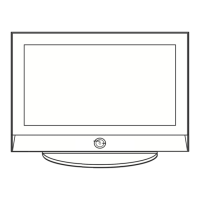
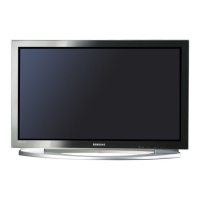
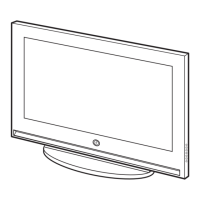
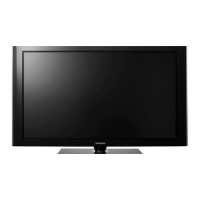
Introduces the PDP and its components.
Covers initial setup and basic functions.
Guides on stand/wall mounting.
Details aerial, cable, and satellite connections.
Covers power and standby modes.
Covers remote programming and Plug & Play.
Identifies the speaker location.
Explains how to use the front panel buttons.
Describes the power status light.
Indicates the IR receiver location.
Details S-Video and Audio inputs on the side.
Lists DVI, PC, Component, Antenna, and Power inputs.
Covers Power, Volume, and Source selection.
Buttons for picture/sound modes and effects.
Buttons for channel tuning and teletext access.
Includes PIP, DNIe, and Fastext functions.
Steps if remote is not working.
Step-by-step guide for battery installation.
Instructions for attaching the TV stand.
Safety and location guidelines for wall mounting.
Lists required mounting hardware.
How to tilt the TV after wall mounting.
Steps to secure the hanger to the TV.
Final steps to mount the TV.
How to connect antenna or cable.
How to connect satellite/decoder via coaxial.
Basic power on/off procedure.
How to put the TV into standby.
Explains number pad, volume, mute.
Describes MENU, ENTER, and EXIT buttons.
Details SLEEP, PIP, DNIe, etc.
How to program remote for VCR, CATV, DVD.
Specific steps for cable receivers.
Specific steps for VCRs.
Specific steps for DVDs.
Setting the display language.
Verifying antenna connection.
Choosing the geographical region.
Performing auto channel tuning.
Setting the current time.
Navigating to settings.
Steps to reset the initial setup.
Navigating to language options.
Selecting the desired display language.
Starting the automatic channel scan.
Reordering stored channels.
Options like skipping, naming, fine-tuning.
Steps to enter manual tuning mode.
Inputting channel, colour, sound settings.
Using search to find channels.
Setting the channel's number.
Saving the programmed channel.
Navigating to the edit options.
Marking channels to skip or keep.
Entering the channel sorting menu.
Rearranging channel order.
Navigating to the name editing screen.
Typing names for channels.
Turning on the Low Noise Amplifier.
Guidance on when to use or turn off LNA.
Activating the feature to prevent unauthorized use.
Selecting channels to lock.
Using INFO button for status.
Navigating to picture options.
Choosing Standard, Movie, Custom, etc.
Adjusting Contrast, Brightness, etc.
Selecting various colour temperature presets.
Adjusting Contrast, Brightness, Sharpness.
Selecting colour tones in PC mode.
Fine-tuning Red, Green, Blue.
Adjusting screen position and size.
Fine-tuning screen placement.
Viewing resolution and frequency.
Automatically optimizing screen settings.
Entering the fine tuning menu.
Manually improving picture clarity.
Returning fine tune settings to default.
Viewing memorized channels in order.
Freezing the current image.
Selecting 16:9, Panorama, Zoom, 4:3.
Positioning and sizing the screen with Zoom.
Optimizing picture for film content.
Notes on PC, Component, DVI modes.
Turning DNIe on/off or using demo mode.
Selecting predefined colour adjustments.
Fine-tuning specific colours like Pink, Green, Blue.
Restoring My Colour Control to defaults.
Navigating to the colour weakness settings.
Customizing Red, Green, Blue for weakness.
Controlling the blue screen display on no signal.
Enabling/disabling startup melody.
Activating the Picture-In-Picture feature.
Choosing the source for the sub-picture.
Interchanging the primary and secondary images.
Changing the size of the sub-picture.
Setting the location of the sub-picture.
Choosing the channel for the sub-picture.
Shows valid source combinations for PIP.
Direct remote control for PIP activation and swapping.
Remote functions for sub-picture control.
Enabling noise reduction for weak signals.
Moving pixels to prevent image retention.
Using white screen or pattern for burn-in removal.
Using signal patterns for long-term burn-in prevention.
Choosing between Standard, Music, Movie, Speech, Custom.
Fine-tuning audio frequencies.
Automatically adjusting volume per channel.
Explains SRS technology for virtual surround.
Options for Off, 3D Mono, Stereo.
Turning off internal speakers.
Explains NICAM Mono and Stereo options.
Explains A2 Mono and Stereo options.
Configuring automatic standby time.
Enabling or disabling the sleep timer.
Configuring the TV's internal clock.
Using the INFO button to view time.
Scheduling automatic power-on.
Scheduling automatic power-off.
Auto-off if no input for 15 mins or 3 hrs after timer.
Switching between connected devices.
Customizing names for input sources.
Types of information provided by teletext.
Explains parts A-F of a teletext page.
Entering teletext display.
Viewing broadcast and teletext simultaneously.
Options for hidden text and normal screen.
Selecting next/previous pages and sub-pages.
Options for larger text display.
Direct input of page numbers.
Using colour buttons for topics.
Scrolling through sub-pages.
Using MONITOR OUT for RGB devices.
Connecting various devices to AV inputs.
Connecting camcorders or VCRs via S-Video.
Connecting devices to side S-Video/AV.
Connecting PCs or devices with DVI output.
Connecting PCs via RGB and Audio.
Connecting DVD players via Component.
Connecting DTV receivers via Component.
Routing TV audio to external system.
Setting TV to display DVD player input.
Adjusting resolution, colours in Windows.
Configuring screen refresh rate.
Table of resolutions and frequencies.
Tips for optimal PC display.
Pin assignments for PC connector.
Pin assignments for DVI connector.
Checks for power and settings.
Troubleshooting sound, interference, snow.
Checks for battery and window issues.
Manufacturer codes for cable devices.
Manufacturer codes for DVD devices.
Manufacturer codes for VCR devices.
| Screen Size | 42 inches |
|---|---|
| Display Type | Plasma |
| Resolution | 852 x 480 |
| Aspect Ratio | 16:9 |
| Contrast Ratio | 3000:1 |
| Brightness | 1000 cd/m² |
| HDMI Ports | 1 |
| Component Video Inputs | 1 |
| Viewing Angle | 160 degrees |
| Input Ports | HDMI, Component, Composite, S-Video, RF |
| Power Consumption | 280 W |