-9-
Mechanical Disassemblies
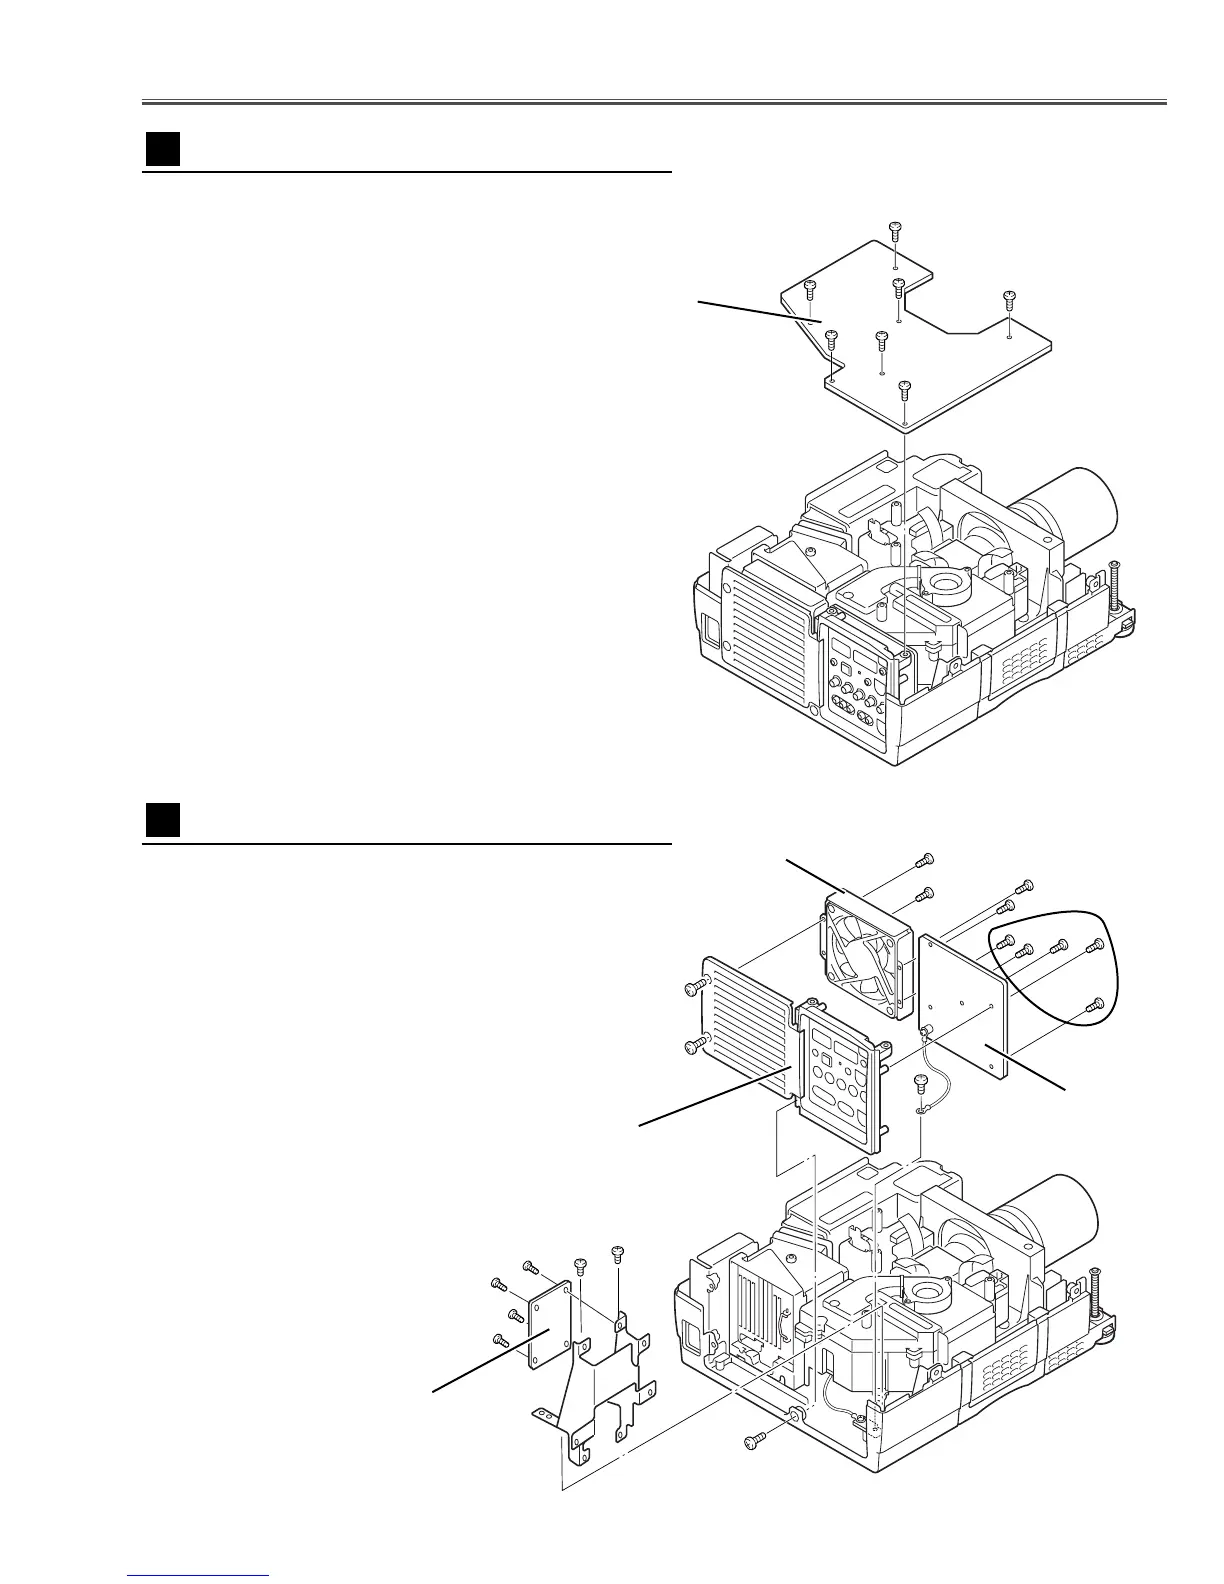
1 Remove 7 screws to take the Main Board upward.
Fig.3
Fig.4
1 Remove 1 screw A and take the Rear Panel ass’y
upward off.
2 Remove 4 screws B to take the fan (FN905) off.
3 Remove 5 screws C and 1 screw D to take AV Board
from the Rear Panel ass’y off.
4 Remove 2 screws E and grounding leads and then pull
up the I/F Board and Holder assy from the bottom cabi-
net.
5 Remove 4 screws F to take the I/F Board.
Main Board removal
3
AV, I/F Board & Rear Panel removal
4
Main Board
A
B
B
B
B
C
D
Rear Panel Ass’y
FN905
AV Board
I/F Board
F
F
F
F
E
E
 Loading...