Do you have a question about the Sanyo PLC-XR301 - XGA Projector With 3000 Lumens and is the answer not in the manual?
| Resolution | XGA (1024 x 768) |
|---|---|
| Brightness | 3000 Lumens |
| Contrast Ratio | 2000:1 |
| Display Technology | LCD |
| Weight | 3.3 kg |
| Input Ports | VGA, S-Video, Composite Video |
| Aspect Ratio | 4:3 (native), 16:9 compatible |
| Lamp Type | UHP |
| Projection Distance | 1.2 m to 10.2 m |
| Screen Size | 30 - 300 inches |
| Keystone Correction | Vertical ±30 degrees |
| Output Ports | VGA, Audio |
| Power Consumption | 220 W (eco mode) |
Warnings regarding electrical shock, heat exposure, and proper installation.
Read all instructions, unplug before cleaning, avoid liquid/aerosol cleaners.
Avoid unstable surfaces, ensure ventilation, do not block openings, keep away from heat.
Do not service yourself, refer to qualified personnel, replace parts with specified ones.
Ensure openings are not blocked for reliable operation and to prevent overheating.
Install perpendicularly to screen, avoid tilting beyond limits, do not point up or down.
Details control port, computer/video inputs, audio out/in, LAN terminal.
Explains select, point, auto setup, power, menu, lamp replace, and warning indicators.
Details buttons for input selection, setup, image adjustment, and special functions.
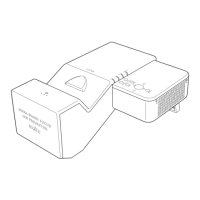
Guidelines for positioning the projector perpendicular to the screen for best image.
Details VGA and audio cable connections for computer input.
Details connections for S-video, composite video, and audio inputs.
Details connections for component video and RGB Scart signals.
Connecting the power cord, outlet requirements for different regions.
Steps for connecting power, turning on, and initial display sequence.
How to enter a PIN code, explanation of PIN code, and handling precautions.
Steps for turning off the projector, cooling fans, and power cord unplugging.
Using MENU, SELECT, and Point buttons to access and adjust settings.
Adjusting zoom/focus, and using Auto Setup for image correction.
How to execute Auto PC Adjustment for optimal image conformity.
Adjusting fine sync, total dots, horizontal, vertical, clamp, and display area.
Setting Input search, Auto PC adjustment, and Auto Keystone correction.
Locking top control and remote control buttons to prevent unauthorized operation.
Enabling PIN code protection for projector operation and changing the code.
Entering, changing, and securing the projector's PIN code.
Interpreting blinking or solid red warning lights for projector status.
Steps for cleaning filters to maintain cooling effectiveness.
Resetting the filter counter after cleaning to clear the warning icon.
Step-by-step guide for replacing the projector lamp safely.
Solutions for common problems like no image, no sound, or strange colors.
Troubleshooting image focus, reversal, brightness, and display anomalies.
Resolving issues with PC adjustment, settings not saving, power management, and auto setup.
Addressing distorted images, PIN code issues, remote control problems, and control lockouts.