-10-
Mechanical Disassemblies
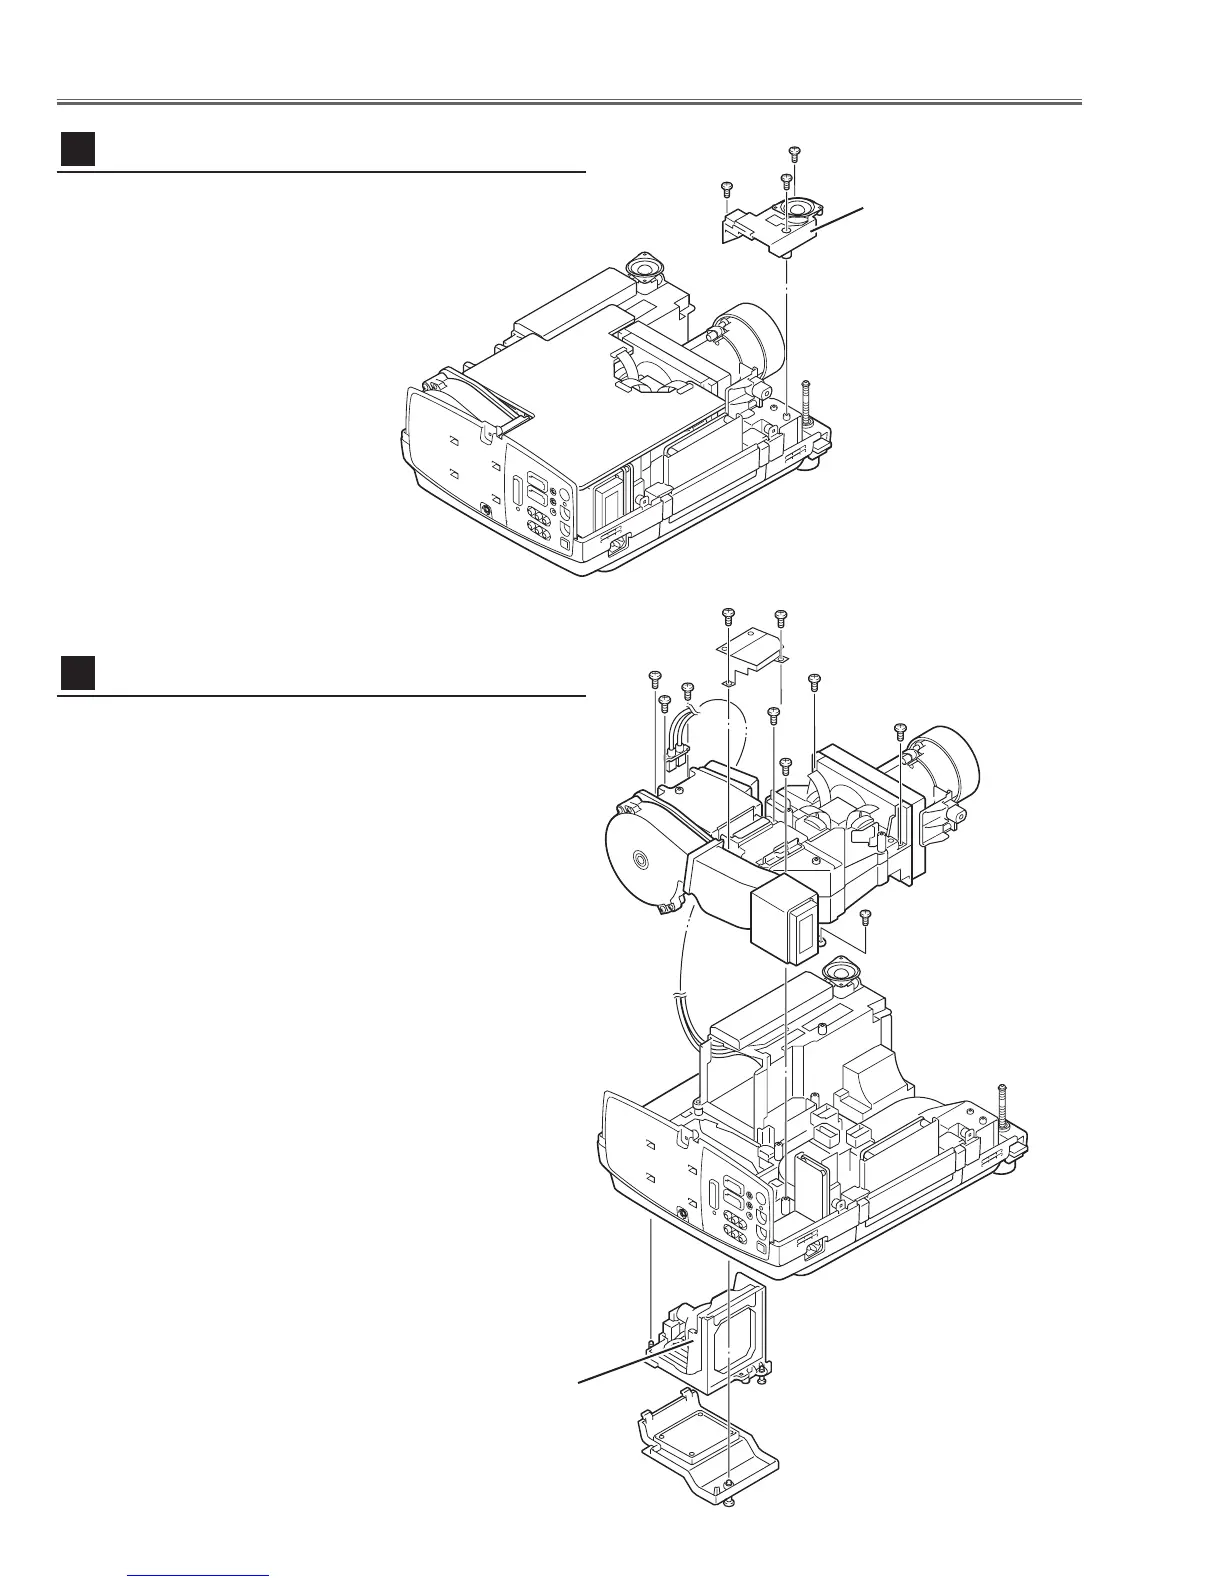
1 Loosen 1 screw A on the lamp cover and 2 screws B on
the lamp house and the take the Lamp House off from
the cabinet bottom.
2 Remove 2 screws C (M3x8) and disconnect the lamp
socket.
3 Remove 2 screws D (M3x8) and remove sheild plate.
4 Remove 5 screws E (T4x10) on the optical unit, 1 screw
F (T3x8) on the duct ass’y and then pull the Optical Unit
upward off.
Fig.5
Optical Unit removal
7
Lamp House
1 Remove 3 screws A (T3x10) and then remove the
Speaker Base.
Speaker base removal
6
Fig.4
A
AA
Speaker Base
A
B
B
C
C
E
E
E
E
E
F
D
D

 Loading...