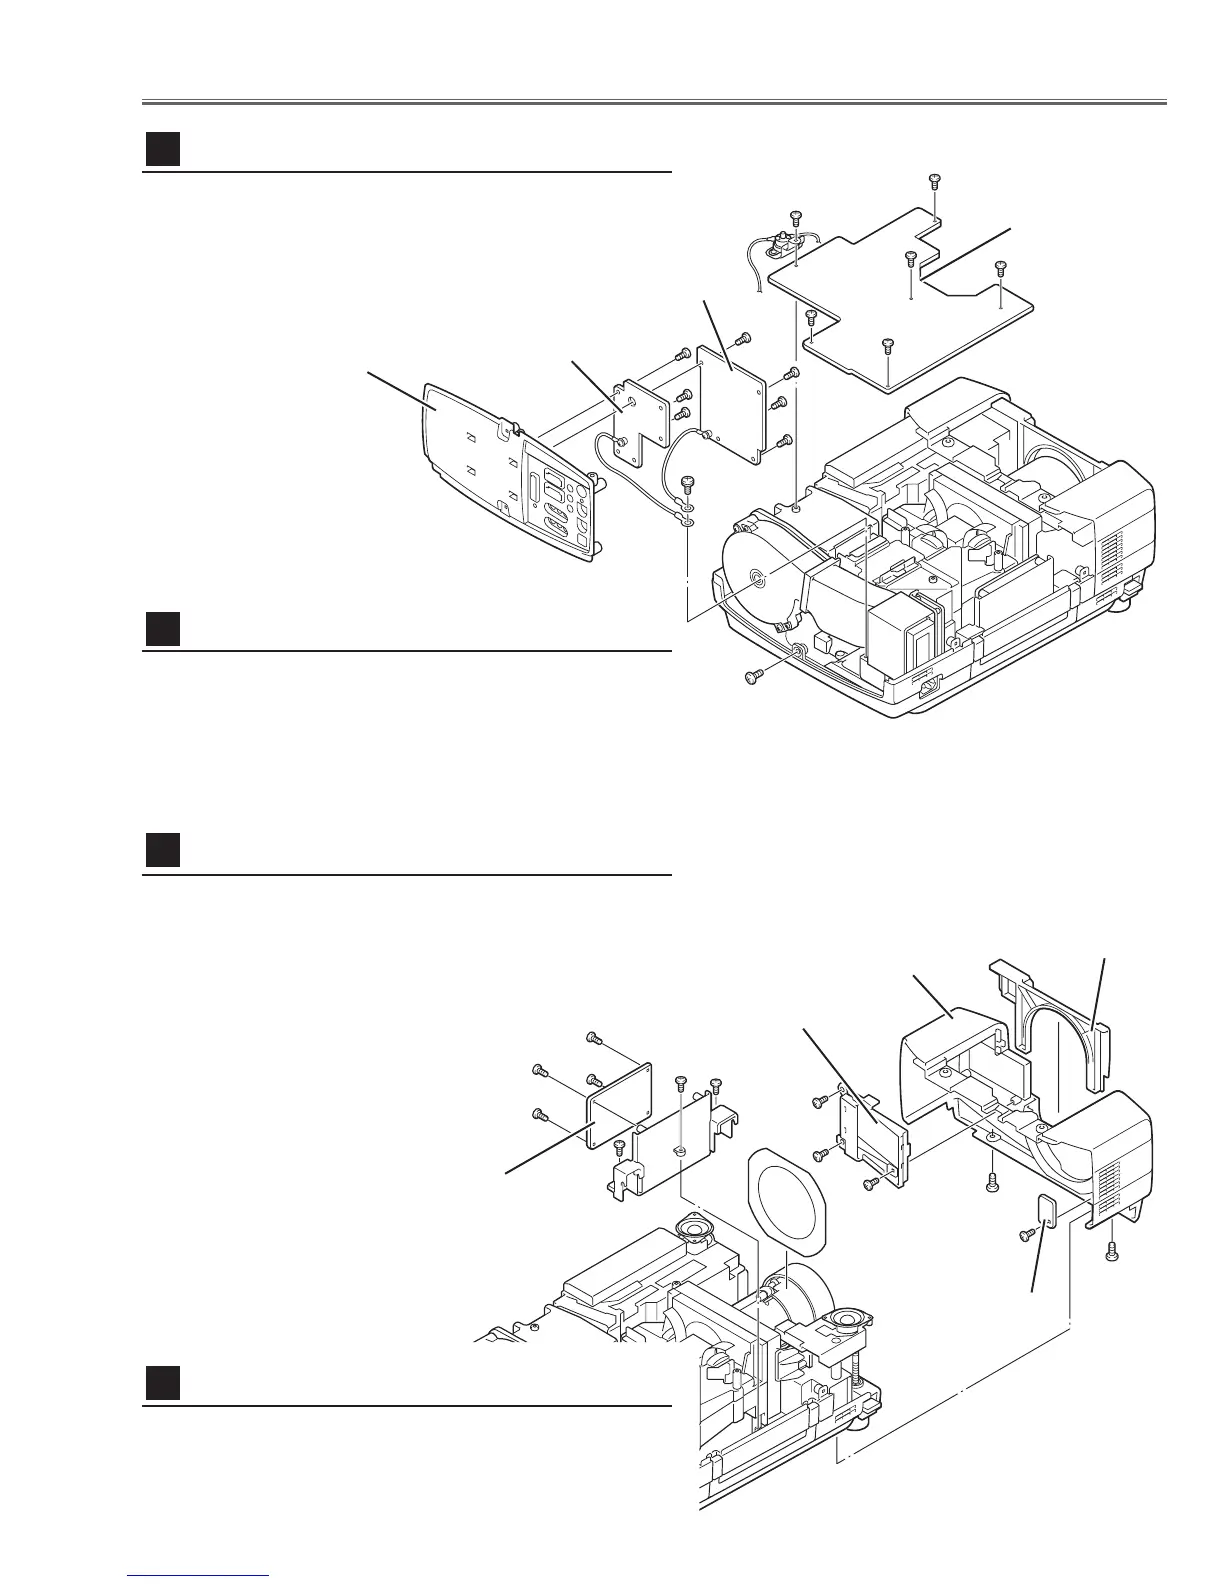
1 Remove 1 screw C (M4x10) and take the Rear Panel
ass’y upward off.
2 Remove 4 screws D (T3x6) to take the AV Board from
the Rear Panel ass’y off.
3 Remove 5 screws E (T3x6) to take the COM Board from
the Rear Panel ass’y off.
-9-
Mechanical Disassemblies
1 Remove 1 screw A (M3x8) to take the thermal
switch(SW905).
2 Remove 5 screws B (M3x6) to take the Main Board
upward.
Fig.2
Fig.3
1 Remove the Lens Cover upward off.
2 Remove 2 screws A (M4x10) and take the Cabinet Front off.
3 Remove 1 screw B (T3x10) and take the R/C Board off.
4 Remove 3 screws C (T3x8) and take the Filter Holder off.
Main Board & Thermal-SW removal
2
Cabinet Front removal
4
Main Board
Rear Panel Ass’y
COM Board
AV Board
A
B
B
D
B
B
B
C
AV, COM Board & Rear Panel removal
3
1 Remove 3 screws D (T3x10) and pull the Holder ass’y
upward off.
2 Remove 4 screws E (T3x8) to take the Audio Board
from the Holder.
Audio Board removal
5
D
D
D
E
E
SW905
A
A
B
C
C
C
D
D
D
E
E
E
E
Lens Cover
Cabinet Front
Filter Holder
R/C Board
Audio Board

 Loading...