-15-
Optical Parts Disassemblies
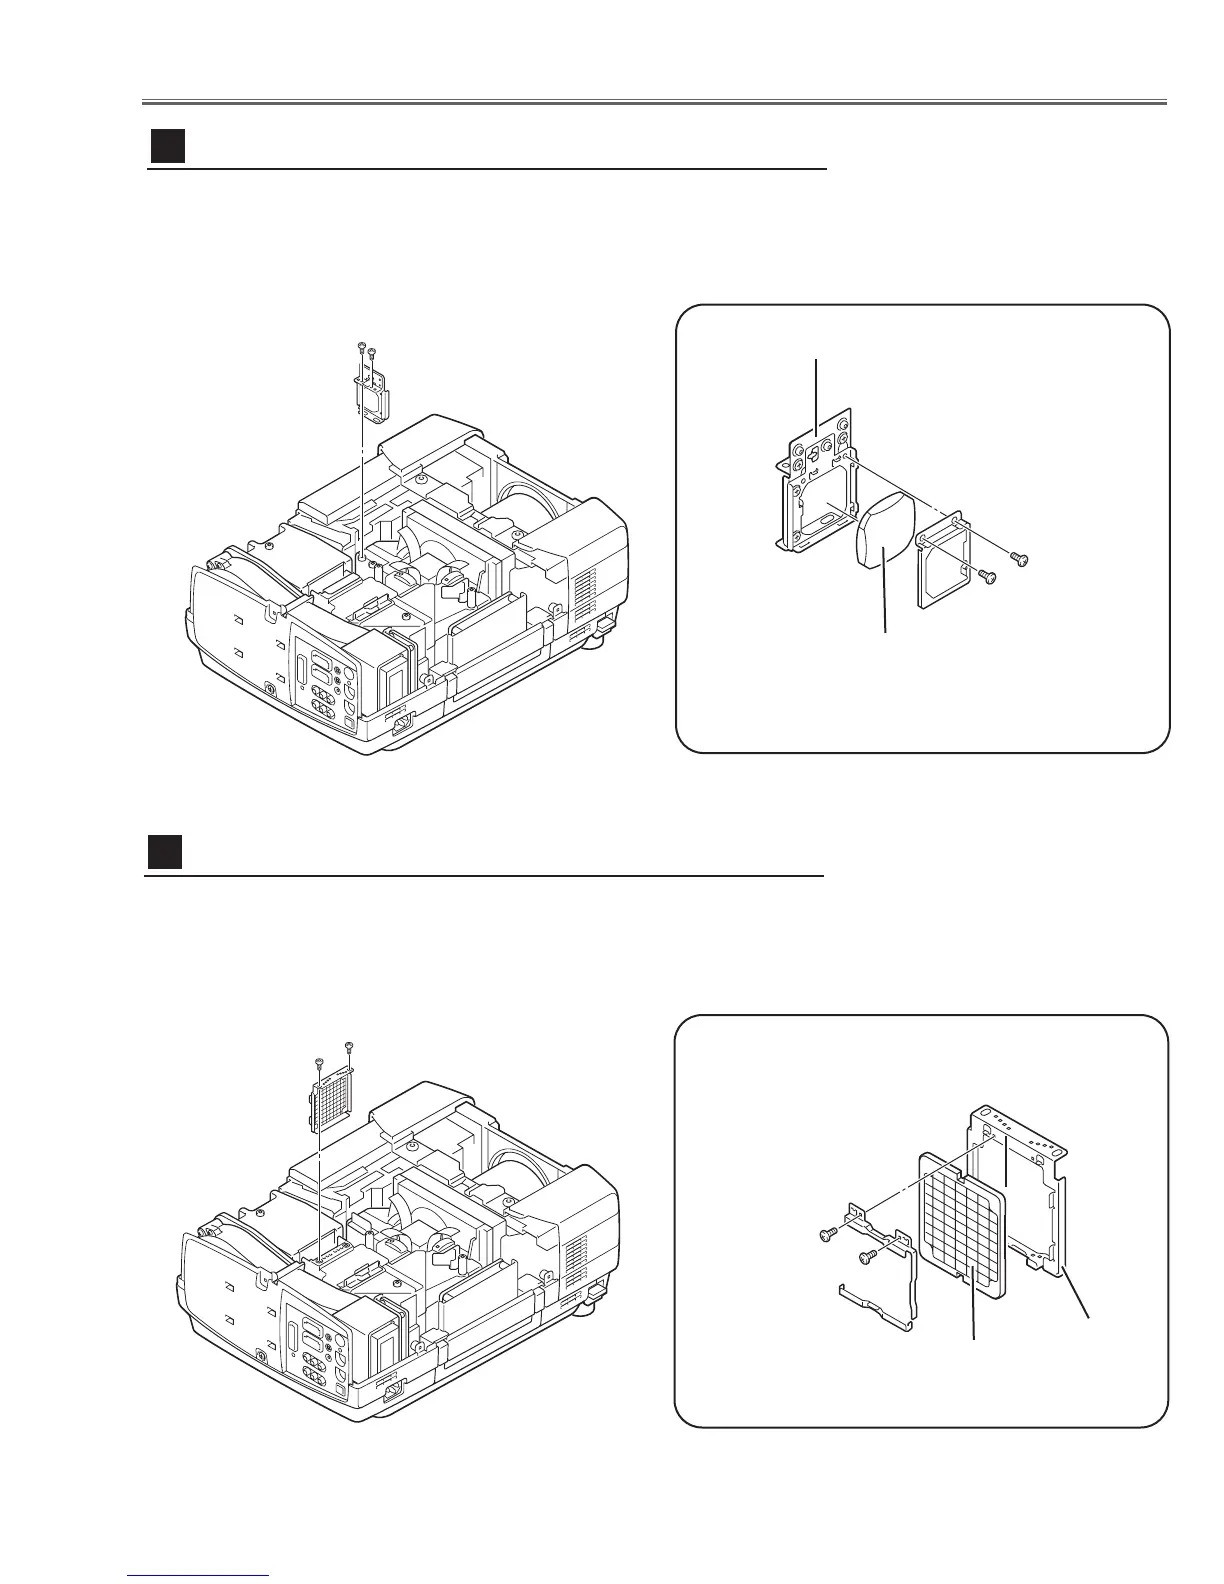
1 Remove 2 hex screws A and pull the Relay Lens ass’y upward.
2 Remove 2 screws B to take the Lens off from the holder.
Note:
There is no mounting direction of the lens.
A
Fig.4-1
B
B
Holder
Relay Lens
A
Relay Lens disassembly
4
1 Remove 2 hex screws A and take the Integrator Lens ass’y.
2 Remove 2 screws B to take the Lens off from the holder.
A
Fig.5-
2
Fig.5-1
B
Holder
A
Integrator-In disassembly
5
*Lens should be placed
as the flat surface side
comes to the holder
side.
Fig.4-2
B
Integrator-In

 Loading...