5
7
6
8
11
The Sapling Company, Inc.
1633 Republic Road
Huntingdon Valley, PA 19006
USA
P. (+1) 215.322.6063
F. (+1) 215.322.8498
www.sapling-inc.com
Installing a Master Clock - Rack Mount
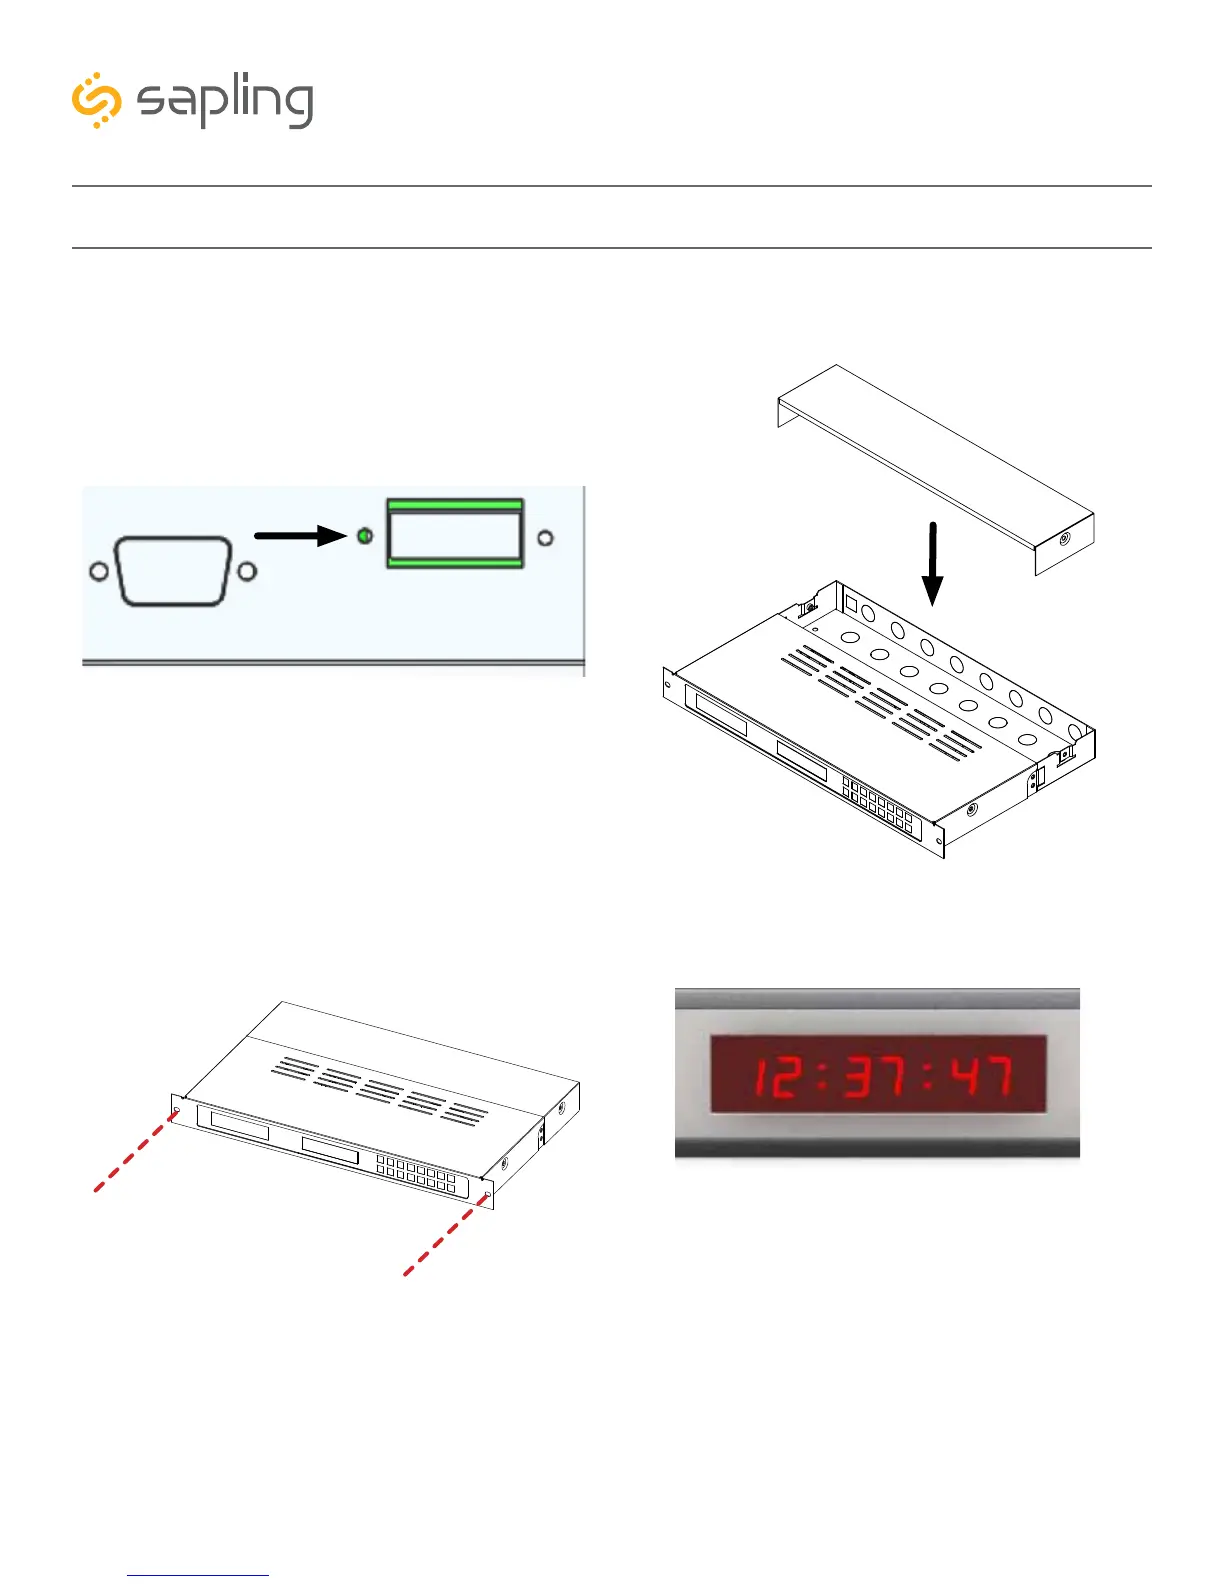
7) Install the master clock in the network rack by
inserting screws through the two holes positioned
on either side of the master clock.
5) Attach the power cables to the appropriate
port on the master clock. Refer to the instructions
included with E-PWR-CBL-KIT-1. If you wish to use
14 AWG Romex Cable instead, strip the ends of
three cables and install them in the green connector
with the configuration shown below:
6) Use a screwdriver to reattach the master clock
bottom panel.
8) Power the master clock. If the master clock has
been powered, the 7-segment LED screen on the
face of the master clock should illuminate.
*REFER TO THE SECTION “BASIC CONFIGURATION - DHCP AND STATIC
IP” FOR FURTHER INSTRUCTIONS
White - Neutral
Green - Ground
Black - Hot
 Loading...