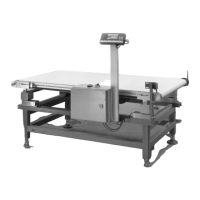
Troubleshooting Guide
Error codes are shown on the display for approx. 2 seconds.
The program then returns automatically to the previous mode.
Problem Cause Solution/Explanation
No segments lit in – No AC power is available – Check the power supply.
the display – Automatic shutoff to follow – Switch on the display
– The display is defective – Contact the customer service center
The display shows “H” – Weighing capacity has been exceeded – Unload the weighing platform
The display shows “L” – Conveyor belt not in place – Position the conveyor belt on the weighing
or “Err 54” instrument
The display shows “Err 01” – Data output in wrong format – Correct the setting in the operating menu
The display shows “Err 02” – Zero key = pressed – Wait for “zero” display before pressing
before zero displayed zero key–=
– Load on conveyor belt – Remove load from conveyor belt
The display shows “Err 08” – Zero-setting in the zero – Zero-setting is only possible within
range not possible a tolerance range of ± 2% of the
max. capacity
The display shows “Err 09” – Taring not possible when gross < 0 – Press = to zero
The readout changes constantly – The place of installation is – Adapt filter in operating menu
unstable (e.g., due to draft)
Readout does not stabilize – Foreign object on the load plate – Remove the foreign object
Results are incorrect – Weighing instrument not adjusted – Calibrate/adjust weighing instrument
– Weighing instrument not tared – Tare weighing instrument
– Weighing instrument not level – Level the weighing instrument
Weight Discrepancies
Discrepancies in weights can be caused by any of a number of factors:
– Poor motor cable installation
– Dirt/deposits on driver roller
– Dirt/deposits on load plate or weighing platform
– Dirt/deposits on or near the feed and/or discharge end of the conveyor
– Dirt/deposits on the product
Troubleshooting Electrical Parts
Function sequences of the checkweigher from power-up to normal operation are
described in these instructions. If an electrical error or defect occurs, inform the techni-
cians responsible for maintenance; they have the knowledge and responsibility to deal
with this type of problem. If the error cannot be localized, or if the cause of the problem
cannot be eliminated, please contact the Sartorius Technical Customer Service Center.
Errors in Normal Operation
There are a number of factors that can disrupt normal operation or cause errors.
These are listed below with their probable causes.
The LED on the photo sensor remains lit and does not switch off when a product
reaches the light barrier:
– the photo sensor is not positioned correctly, thus the product is not detected
– the photo sensor has been wired incorrectly (e.g., during recent replacement)
– the photo sensor is defective
16
 Loading...