SATEL OPAL 11
Press the MODE button briefly in order to proceed and configure another sensor. Blinking of
the proper LED will indicate which sensor is being configured (see: “Signaling in the
configuration mode”).
Ending configuration mode
Press the detector MODE button for 2 seconds or remove the common ground from the
SVCE terminal.
If the configuration mode was activated by means of the MODE button, it is
automatically exited after 20 minutes since the last operation performed by the user.
6. Start-up and walk test
1. Power-up the detector. All LEDs will begin alternately blinking for 40 seconds, which
indicates the detector warm-up.
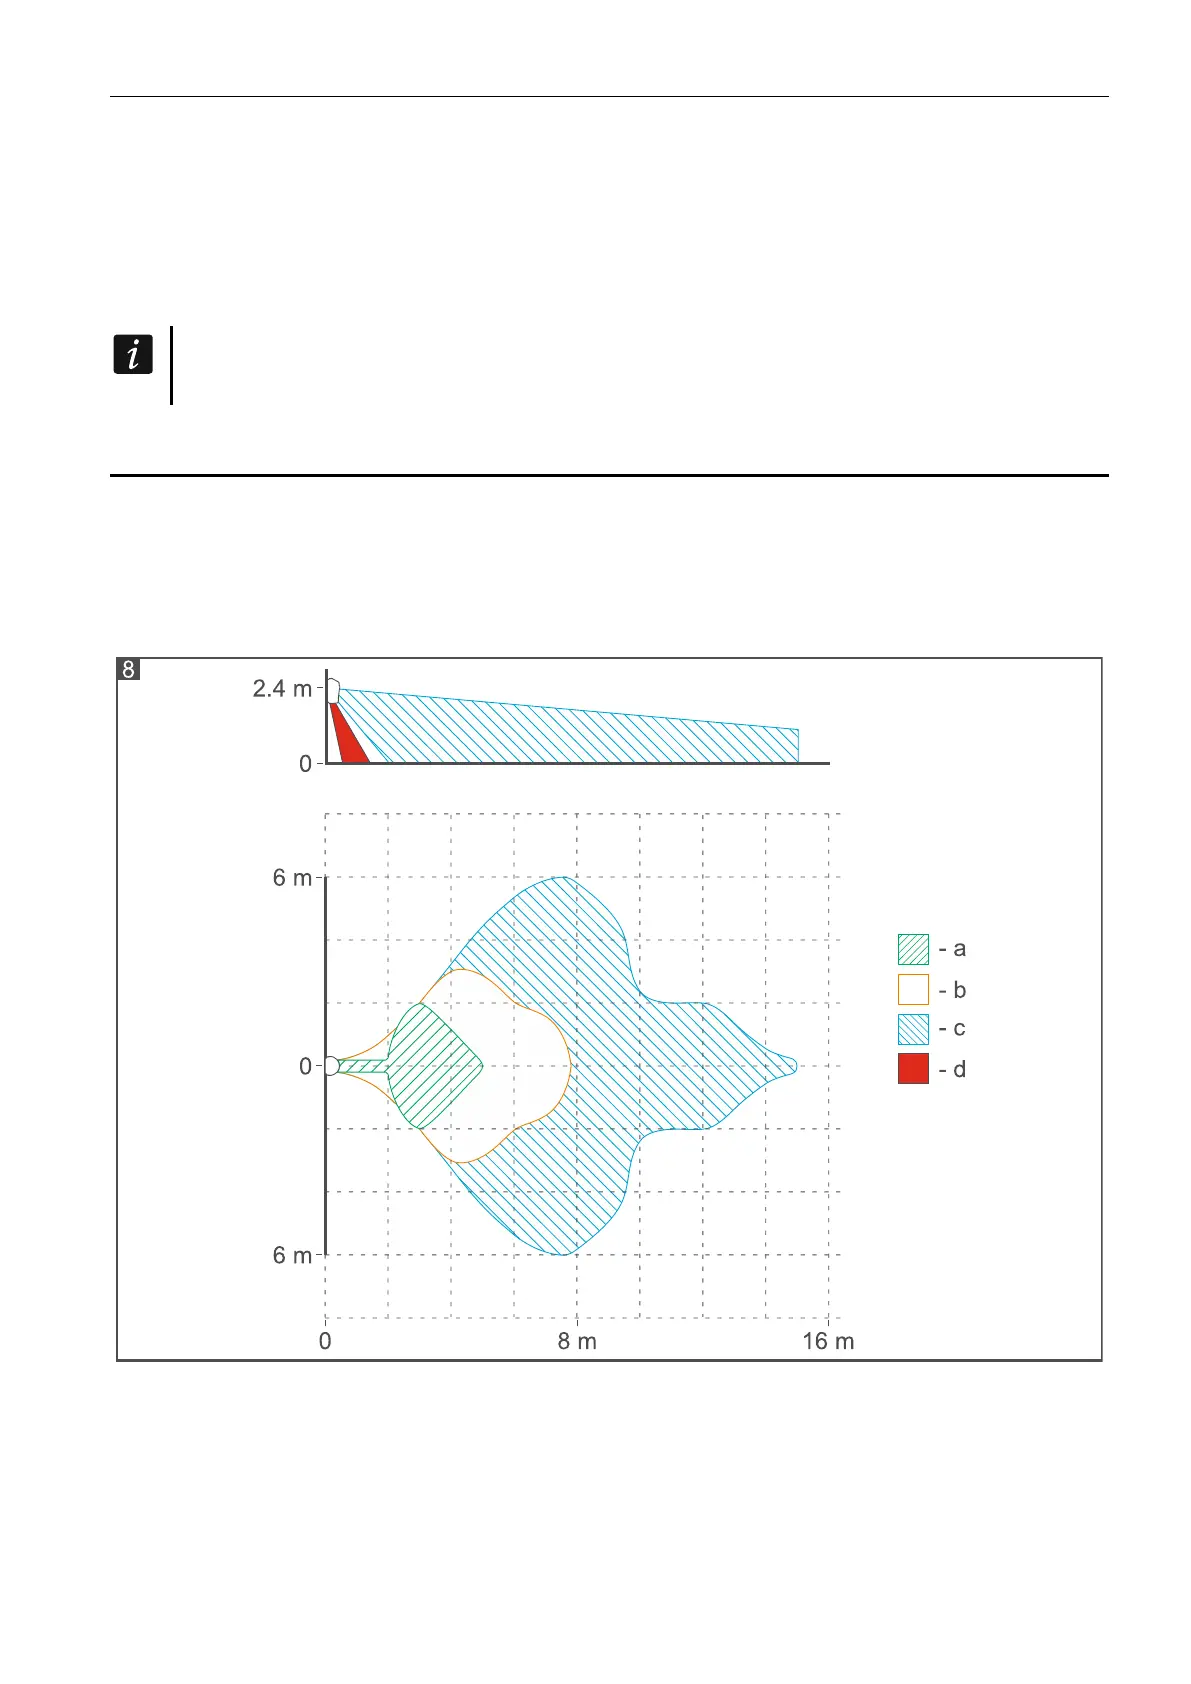
2. When the LEDs stop blinking, check that moving within the coverage area will make the
LED light up red. Figure 8 shows the coverage areas of the motion detector (a - minimum,
b - default, c - maximum, d - creep zone).
Separate testing of sensors
Testing of the sensors is done in the detector configuration mode. Starting the mode,
choosing the sensor and the way of changing sensitivity are described in detail in the chapter
“Configuring the detector”.
1. Start the configuration mode.
2. Choose the sensor to be tested.