Section 7: Replacement Procedures
Page 7-10
CG4 Series Service Manual
7.6 OPERATOR PANEL (KB) BOARD REPLACEMENT (cont’d)
6.
Replace the new Operator Panel (KB) board and follow
the above steps in reverse sequence, to reassemble the
parts.
Notes:
• During replacement, ensure the two blue buttons were
in the position where the tab sits in the groove.
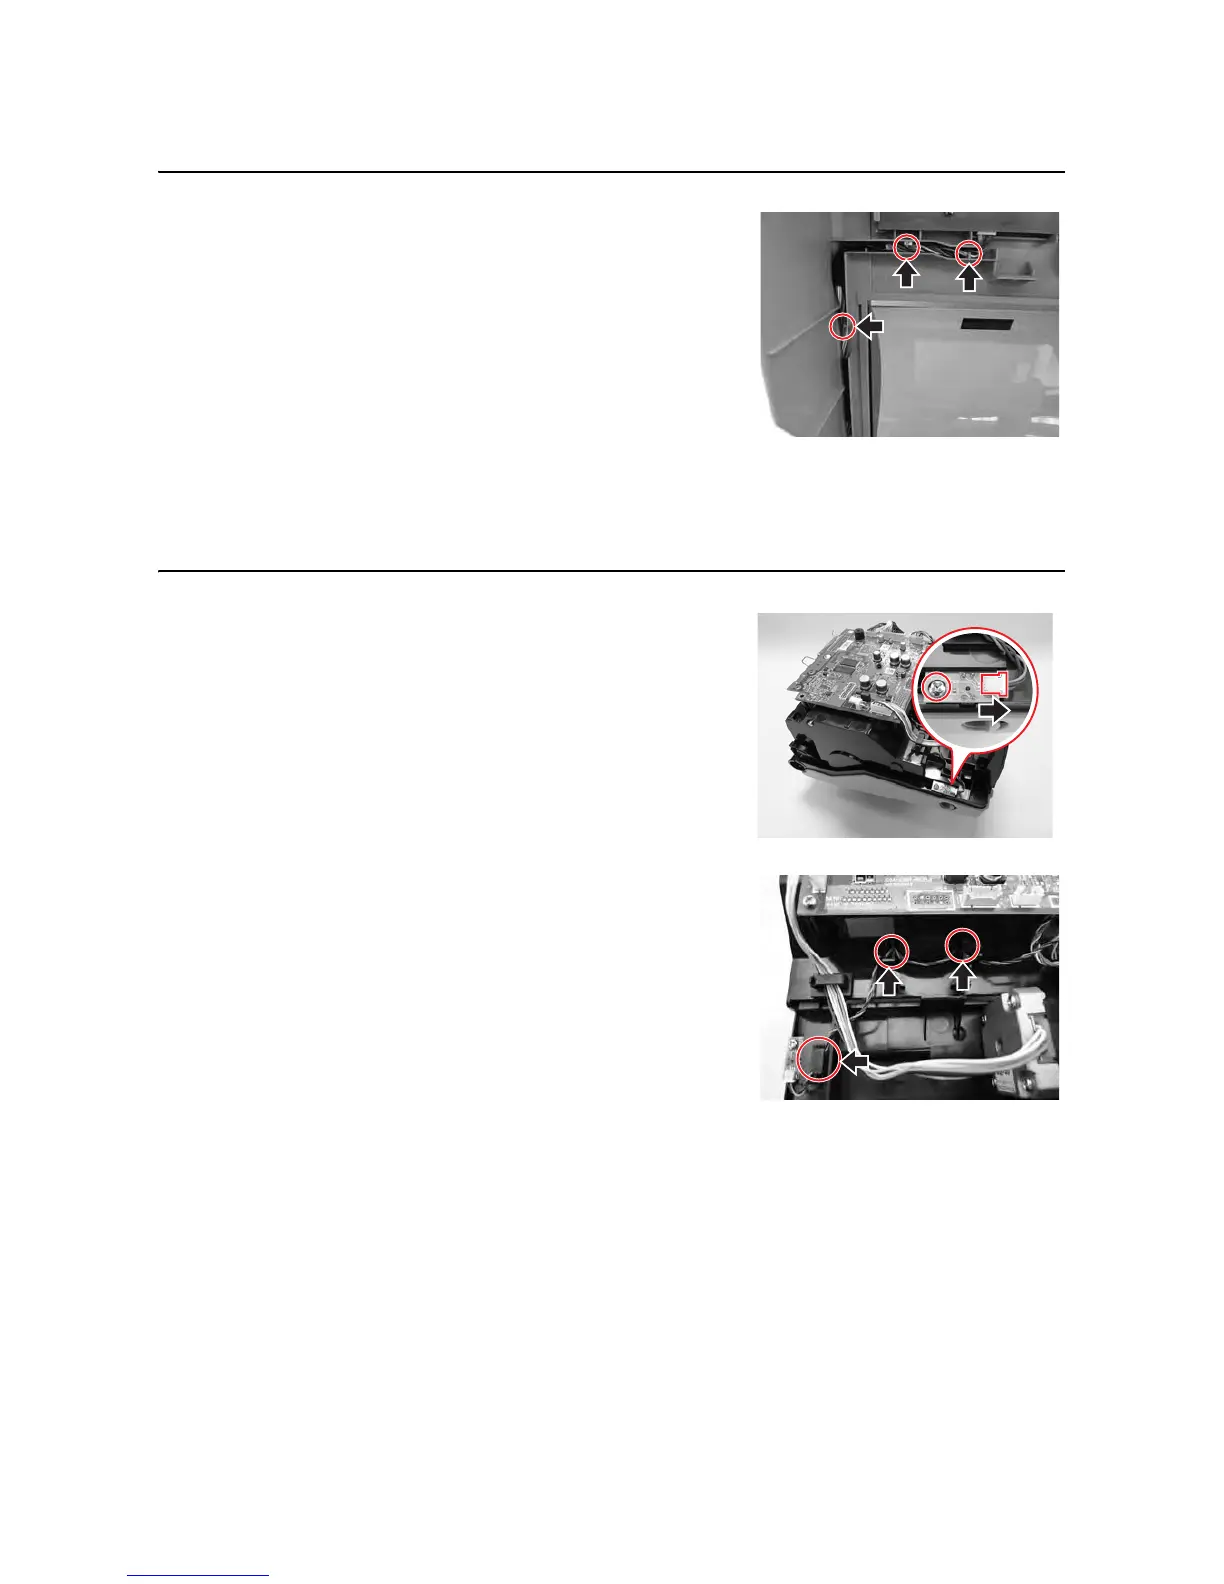
• Ensure the wiring route neatly as shown and arrange all
the wiring to avoid from being pinched.
7.7 TOP COVER OPEN SENSOR REPLACEMENT
1. Remove the Bottom Housing Cover as explained in the
earlier
Section 7.3 Removal of the Bottom Housing cover.
2. Locate the Cover sensor as shown.
3. Remove the screw (circled) securing the Cover sensor
board
to the printer.
4. Disconnect the cable connector from the defective Cover
sensor board
.
5. Replace the new Cover sensor board and follow the above
steps in reverse sequence, to reassemble the parts.
Note:
Ensure the wiring routes neatly as shown.

 Loading...


