Date Code 20210715 SEL-2890 Instruction Manual
Detailed Application Examples
Job Done Example 3
4.7
To establish a serial tunnel between SEL-2890 #1 and
SEL-2890 #2, open a Telnet Console session into SEL-2890
#1 and issue a TUN 192.168.0.3:23 <Enter> at the #> prompt.
Transceiver #1 should try to establish a connection with
SEL-2890 #2. You should receive the following message:
#>TUN 192.168.0.3:23
Commanded Serial Tunneling IP: 192.168.0.3 Port: 23
You now have a serial tunnel between SEL-2890 #1 and
SEL-2890 #2.
To establish a serial tunnel between SEL-2890 #1 and an
SEL-2701, open a Telnet Console session into the SEL-2890
#1 and issue a TUN 192.168.0.4:23 <Enter> at the #> prompt. A
serial tunnel will be established to the SEL-2701. It is very
important to note that all serial data coming from the IED
connected to SEL-2890 #1 will now be routed through the
SEL-2701 to the Host.
The SEL-2890 #2 and the SEL-2701 do not actively search for
a connection. They wait for someone or some device to
initiate a connection. The SEL-2890 #1 is the device that
actively tries to make a connection. Notice that the serial
data rates do not have to be the same.
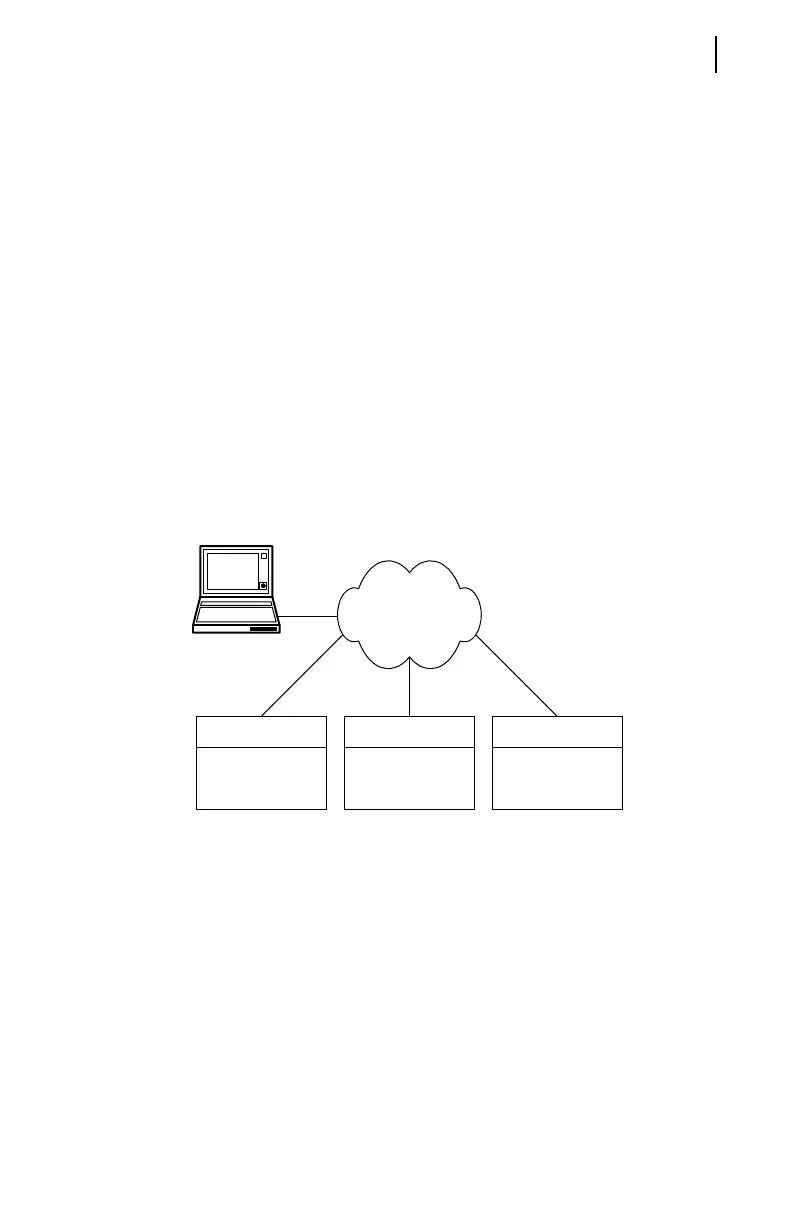
Figure 4.5 Serial Tunneling Network Connection
Tel n e t M od e
A Telnet mode works similarly to a Commanded mode with
the exception that the serial tunnel IP and Port are fixed by
the settings and cannot be changed with a command. Listed
below are the settings for creating a serial tunnel between
SEL-2890 #1 and SEL-2890 #2.
SEL-2890 #1: (IP 192.168.0.2 for this example)
SET <Enter>
PORT= 23
TEL_PROC=Y
TUNNEL= TELNET
TUNNEL_IP= 192.168.0.3
Network
SEL-2890 #2
IED
SEL-2701
Host
SEL-2890 #1
IED
PC