GB - 5
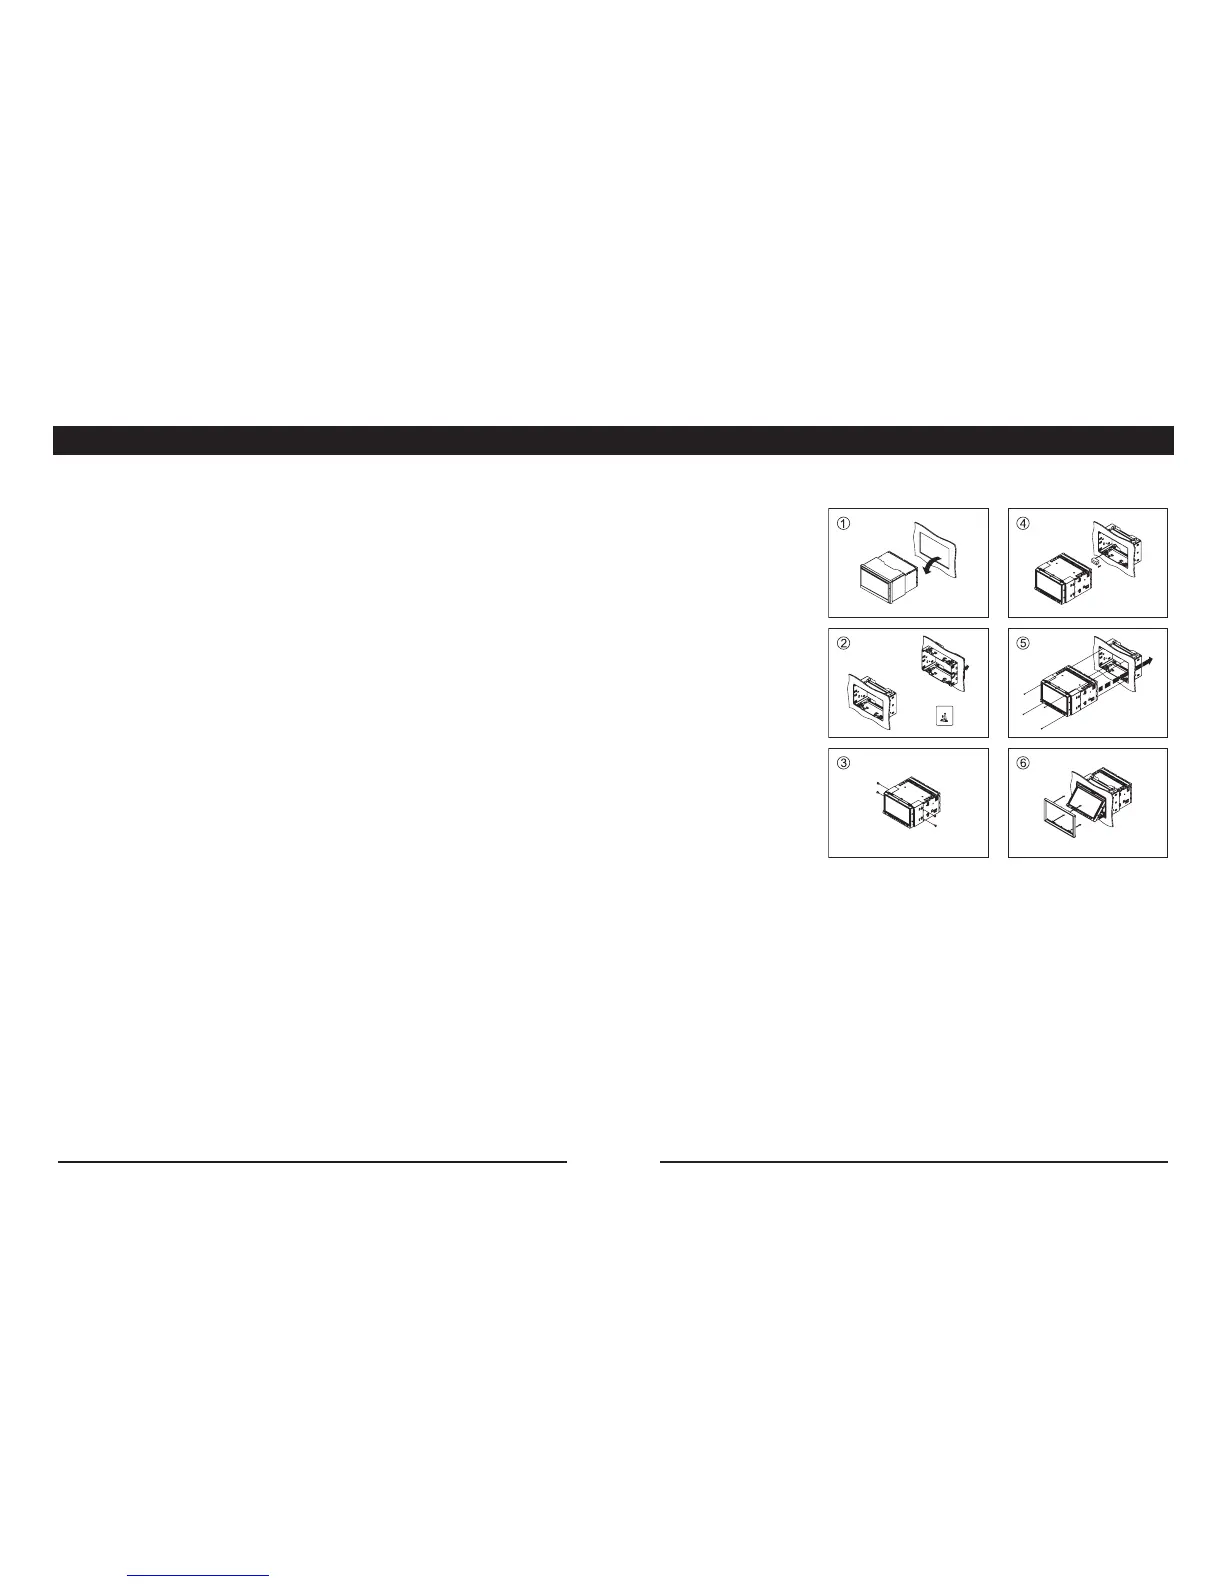
Installation procedure
1. If relevant, remove any other audio system from the car.
2. After unscrewing the four car radio attachment screws, insert the mounting sleeve into the
dashboard.Fixitrmlyinplacebyfoldingdownthemetaltabs.
3. If this has not already been done, attach the brackets (2x) to the car radio.
Inordertodothis,usethesuppliedatheadscrews(M5x6mm).
4. Perform the required electrical connections:
- If necessary, connect the hand brake wire to your hand brake contact in order to activate the
video display when playing a DVD (when the car is parked).
- Connect the wire that activates the reversing camera to the reversing sensor or to a reversing
light. If necessary, connect your reversing camera to the car radio’s reversing camera input using
a video cable (not supplied).
- Ensure that you now place the USB cable located at the back of the unit in such a way that it
comes out of the dashboard or the glove box.
5. Then check that everything works before installing the main unit in the mounting sleeve.
Note: if necessary, use the mounting screws and bolt rubber to complete installation of the unit.
6. Installthecarradiointhedashboardusingthesuppliedatheadscrews(M2,6x5mm).
7. Turn on the unit and slide down the panel, then attach the outer trim frame.
Ifyouarenotsurehowtoinstallthisunitcorrectly,contactaqualiedtechnician.
InstALLAtIon