12
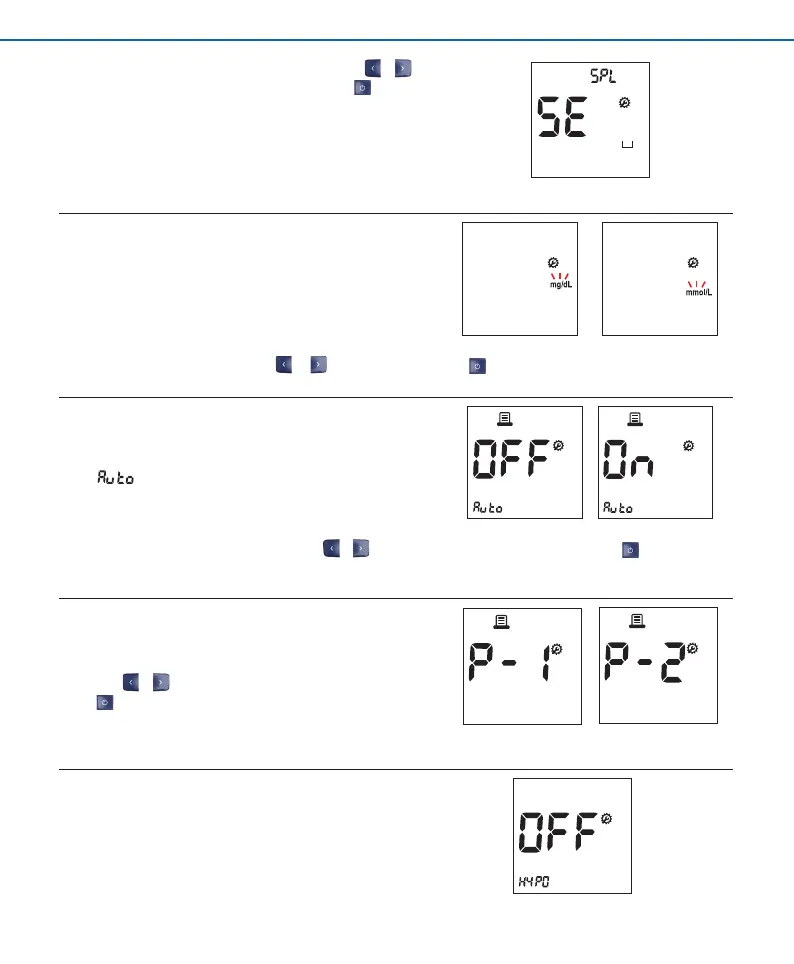
2. Set the Sample type for lipid test, ‘BL’ or ‘SE’, by pressing either or
button and then select the preferred feature by pressing the button.
SE
Stage 8) Setting – Unit of the Test Result
In stage 8, you set the Unit of the result.
1. After setting the Sample Type, the display for setting the Unit of the result will
appear.
2. You can set the preferred unit by pressing or buttons and select by pressing buttons.
Stage 9) Setting – Auto Printing
In stage 9, you set the Auto Printing function.
1. After setting the Unit, the display for setting the Auto Printing function will
appear.
- Auto Printing
2.
Set the
Auto Printing
function, ‘On’ or ‘O ’, by pressing either or button and then select the preferred feature by pressing the button. If you set Auto
Printing to 'On', then your results will be automatically printed when a test is completed.
Stage 10) Setting – Printing Page
In stage 10, you set the Printing Page.
1. After the Auto Printing function setting, the display for setting the Printing
Page mode will appear.
2. Set the Printing Page mode, - ‘P-1’ (1 copy) or ‘P-2’ (2 copies) - by pressing
either
or button and then select the preferred feature by pressing the
button.
Stage 11) Setting – Hypo Warning
In stage 11, you set the Hypo Warning function.
3. After the Printing Page setting, the display for setting the
Hypo Warning will appear.
Ex) O