21
Installation Instructions and Owner's Manual
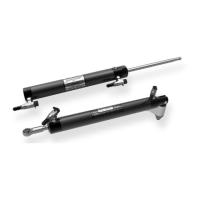
Once the controller is properly installed and turned on
for the first time, it will need to be calibrated. This will
allow the controller to determine the range of Jackplate
and, if connected, trim information from the engine(s).
In addition, it will allow you to set a Safe position for tilt
protection and a trim to tilt range threshold.
Please follow the procedure below to perform the controller
calibration.
If you need to recalibrate the controller apply 12V to J28
pin before turning the controller on. This will place the
controller in a calibration mode.
If the Jackplate smartstick or trim sender is replaced at
any time the sytem MUST be recalibrated. Failure to do
so may result in injury and/or loss of vessel control,
leading to possible ejection from vessel causing
property damage, personal injury and/or death.
Ensure engine is not running during calibration
procedure.
During the calibration procedure please ensure that
the engine can move through the entire trim/tilt range
without interference. Please note that the trim down
position calibration is performed with a Jackplate in
the fully up position.
If trim signal connected, ensure engine key is in ON
position for trim sender to be powered.
1. Turn the controller on. When in calibration mode the
LED will flash alternating RED/BLUE.
2. Move the Jackplate(s) to the full down position while
ensuring engine(s) are in a position that will not cause
any interference. Once a hard-stop is reached, continue
to drive through the hard-stop for three seconds. An
LED and buzzer code will indicate that the Jackplate(s)
down hard-stop has been memorized.
3. Move the Jackplate(s) to the full-up position. Once a
hard-stop is reached, continue to drive through the
hard-stop for three seconds. An LED and buzzer
code will indicate that the Jackplate(s) up hard-stop
has been memorized.
4. If there is no trim information connected to ProTap,
turn the controller off using the controller ON/OFF
switch and exit calibration mode. If trim signal is
present, proceed to step #5.
WARNING
WARNING
WARNING
NOTICE
NOTICE
Refer to section 7 for
blink and buzzer codes
during calibration.
5.0 CALIBRATION
PROCEDURE