ASSEMBLY AND INSTALLATION
21
6
Make sure that all the adjusters contact the floor. Otherwise the cabinet could
move, causing an accident.
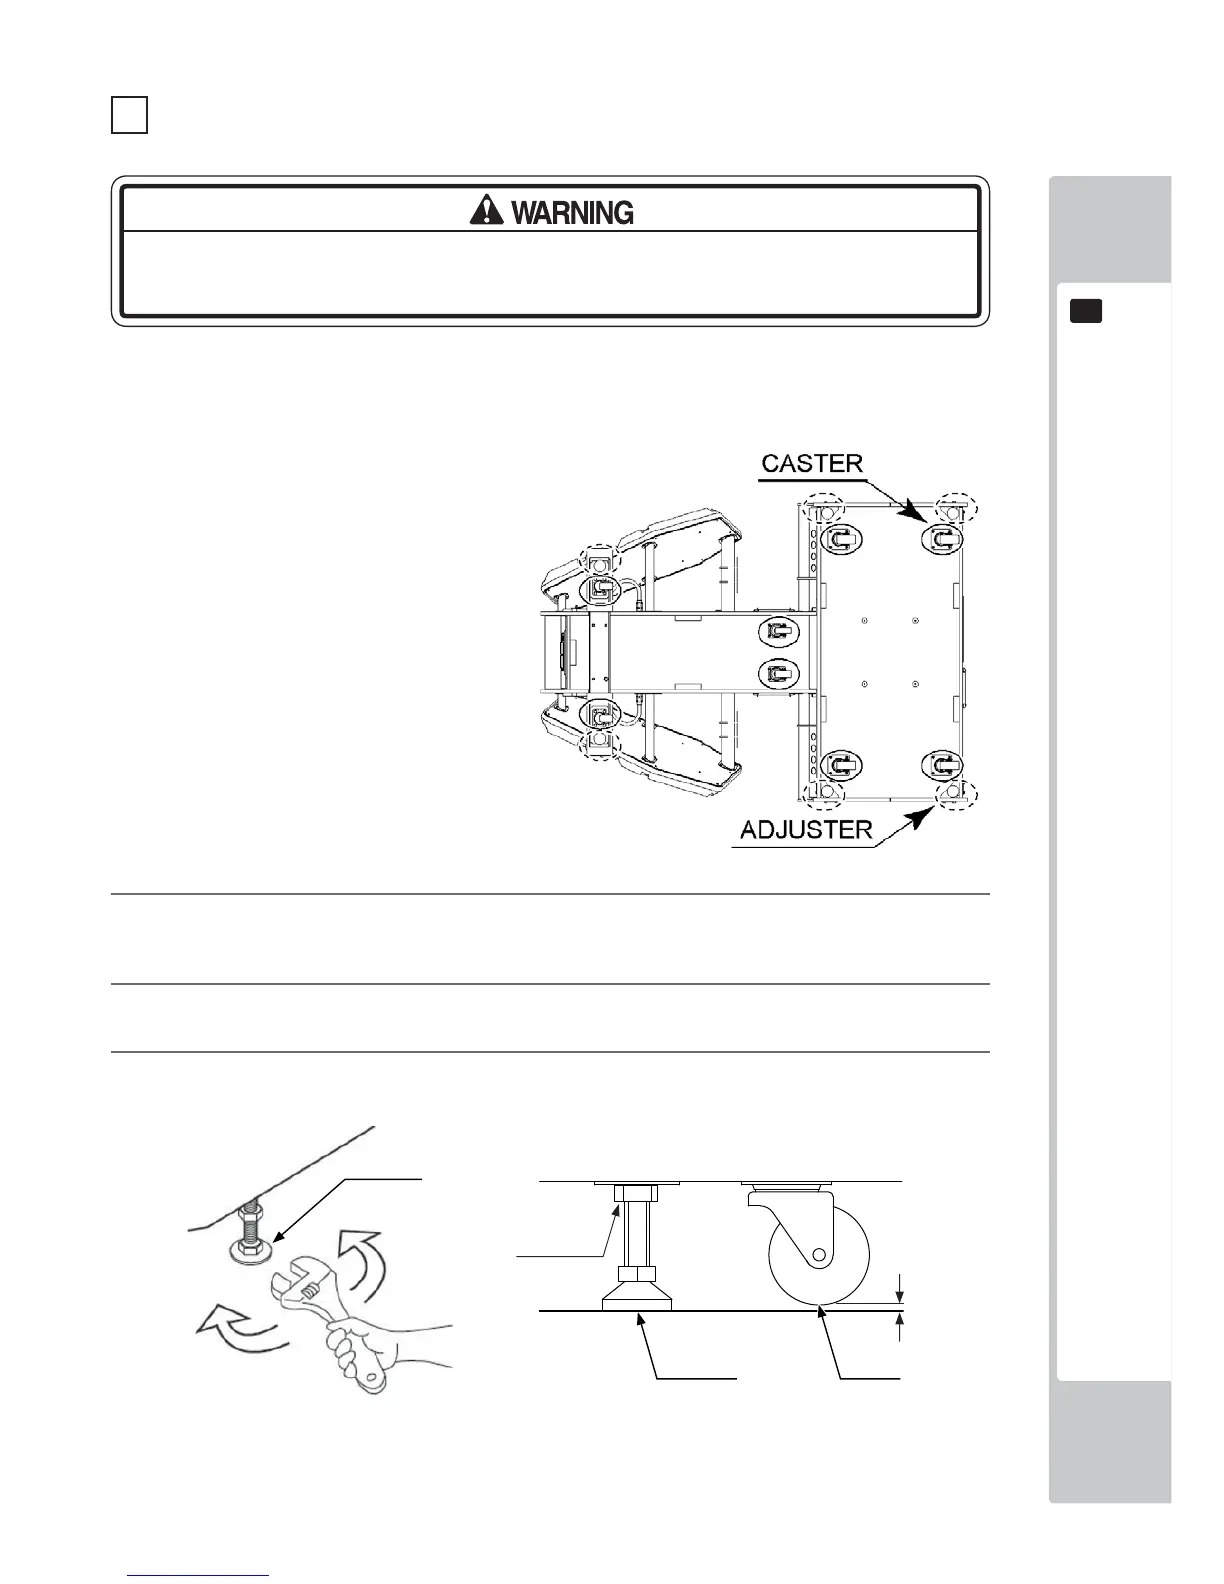
The product comes with casters attached at 8 locations and adjusters at 6 locations (Fig. 6-2a).
When the installation site has been determined, have the adjusters come in direct contact with the floor. Establish a
gap of about 5 mm between the floor and the casters and adjust the unit so that it will remain level.
1
Move the product to the installation site. If the product is to be installed near a wall, secure enough pas-
sageway space. You must also secure a 50 cm space between the back wall and the back of the cabinet for
ventilation.
2
Bring the adjusters into direct contact with the floor. Use a wrench to align the height of the adjusters until
the cabinet is perfectly level.
3
After setting, turn adjuster nuts upwards to tighten them and secure adjuster heights.
FIG. 6-2b Aligning the Adjusters
3 SECURING INTO LOCATION
FIG. 6-2a Bottom View
FIG. 6-2c Aligning the Adjusters
ADJUSTER
ADJUSTER CASTER
About 5 mm
Tighten nut
upwards.