40
Installation of Wall Hanging Bracket (3)
Fix the wall hanging bracket to the mounting surface, and then fix it firmly with 6 wall hanging
bracket attachment screws. WLK-B01-1 is designed to be installed on a wall.
After installation, make sure that the wall hanging bracket is fixed on the wall securely without rattle.
NOTE
◆
The accompanying wall hanging bracket attachment screws are for installing to wood
materials. DO NOT use them for other materials.
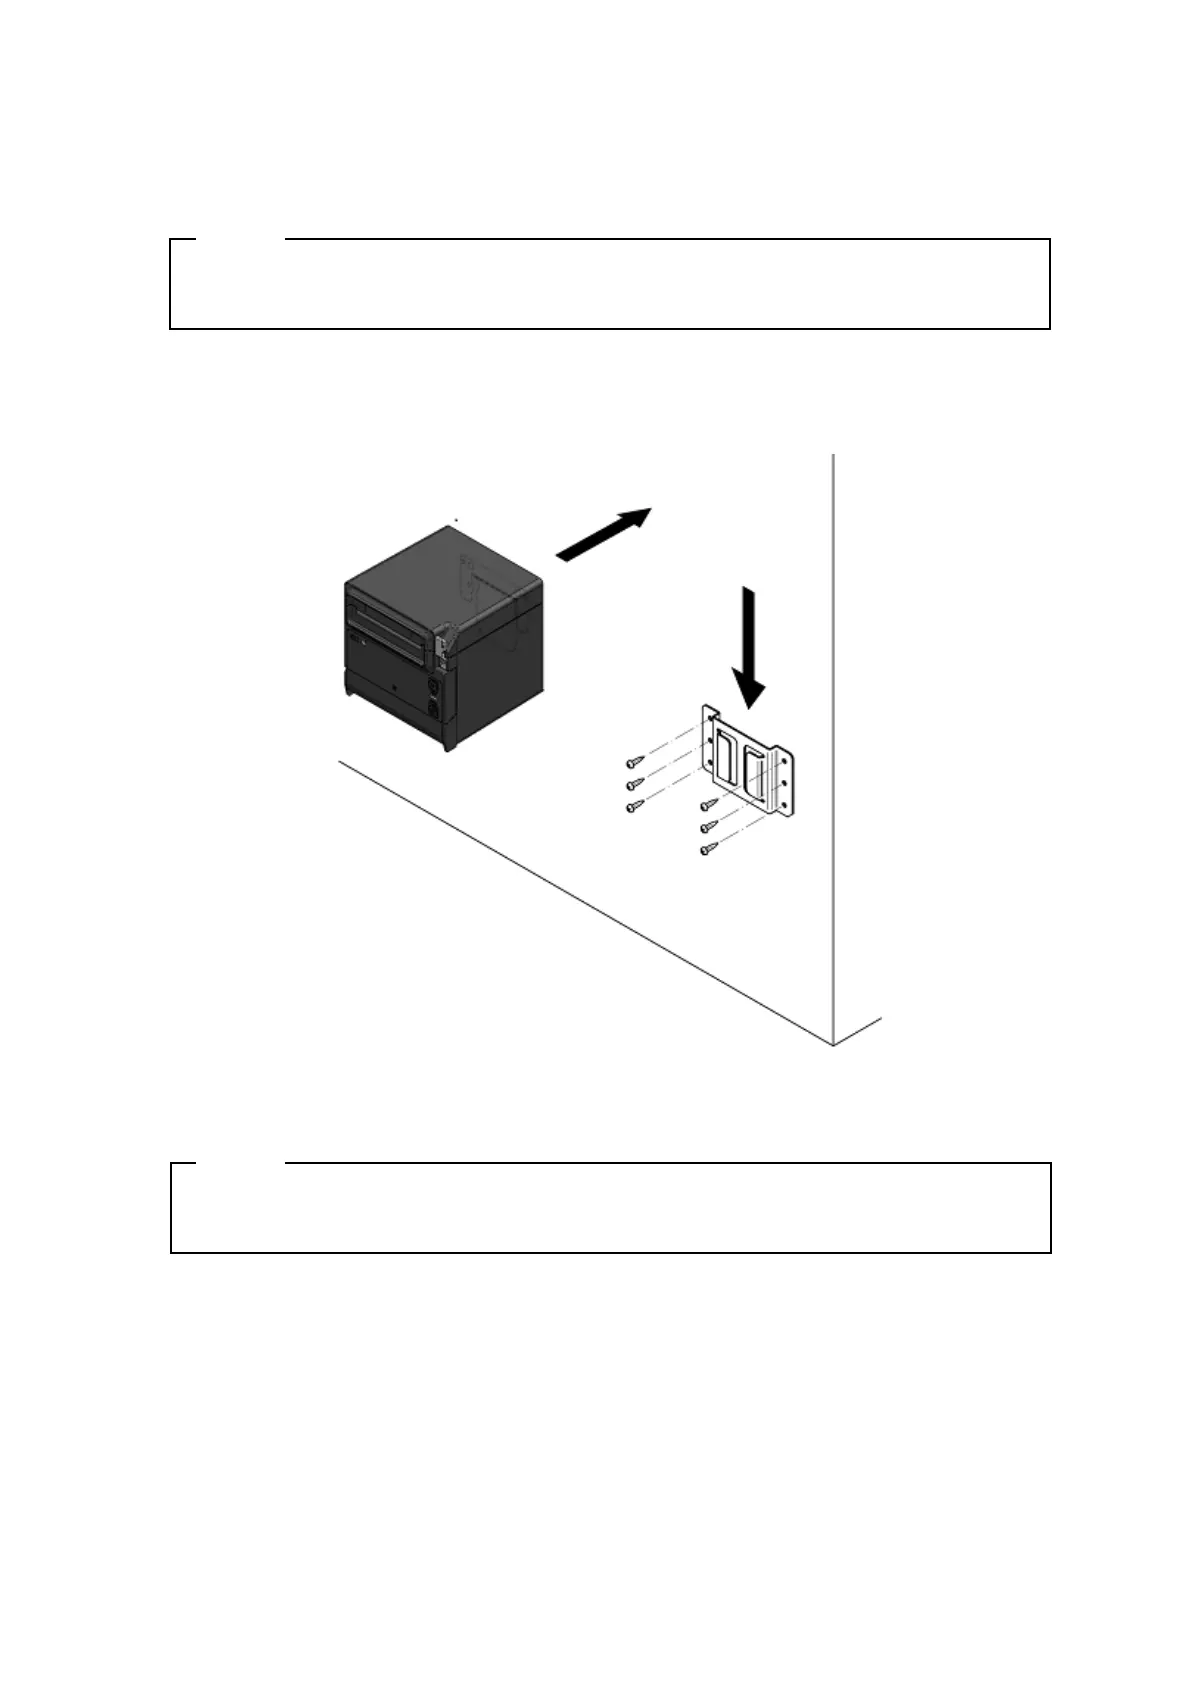
Installation of the Printer (4)
Slide the printer into the wall hanging bracket from the top to the bottom to insert the printer bracket
into the wall hanging bracket, as shown in Figure 15-3.
Figure 15-3 Installation of Printer
NOTE
◆
Check the place and the material/structure of the wall, and then install the printer
securely. Injury or destruction of property might occur by dropping off.
 Loading...