U.6.16
SEL-421/SEL-421-1 Relay User’s Guide Date Code 20020501
Testing and Troubleshooting
Test Methods
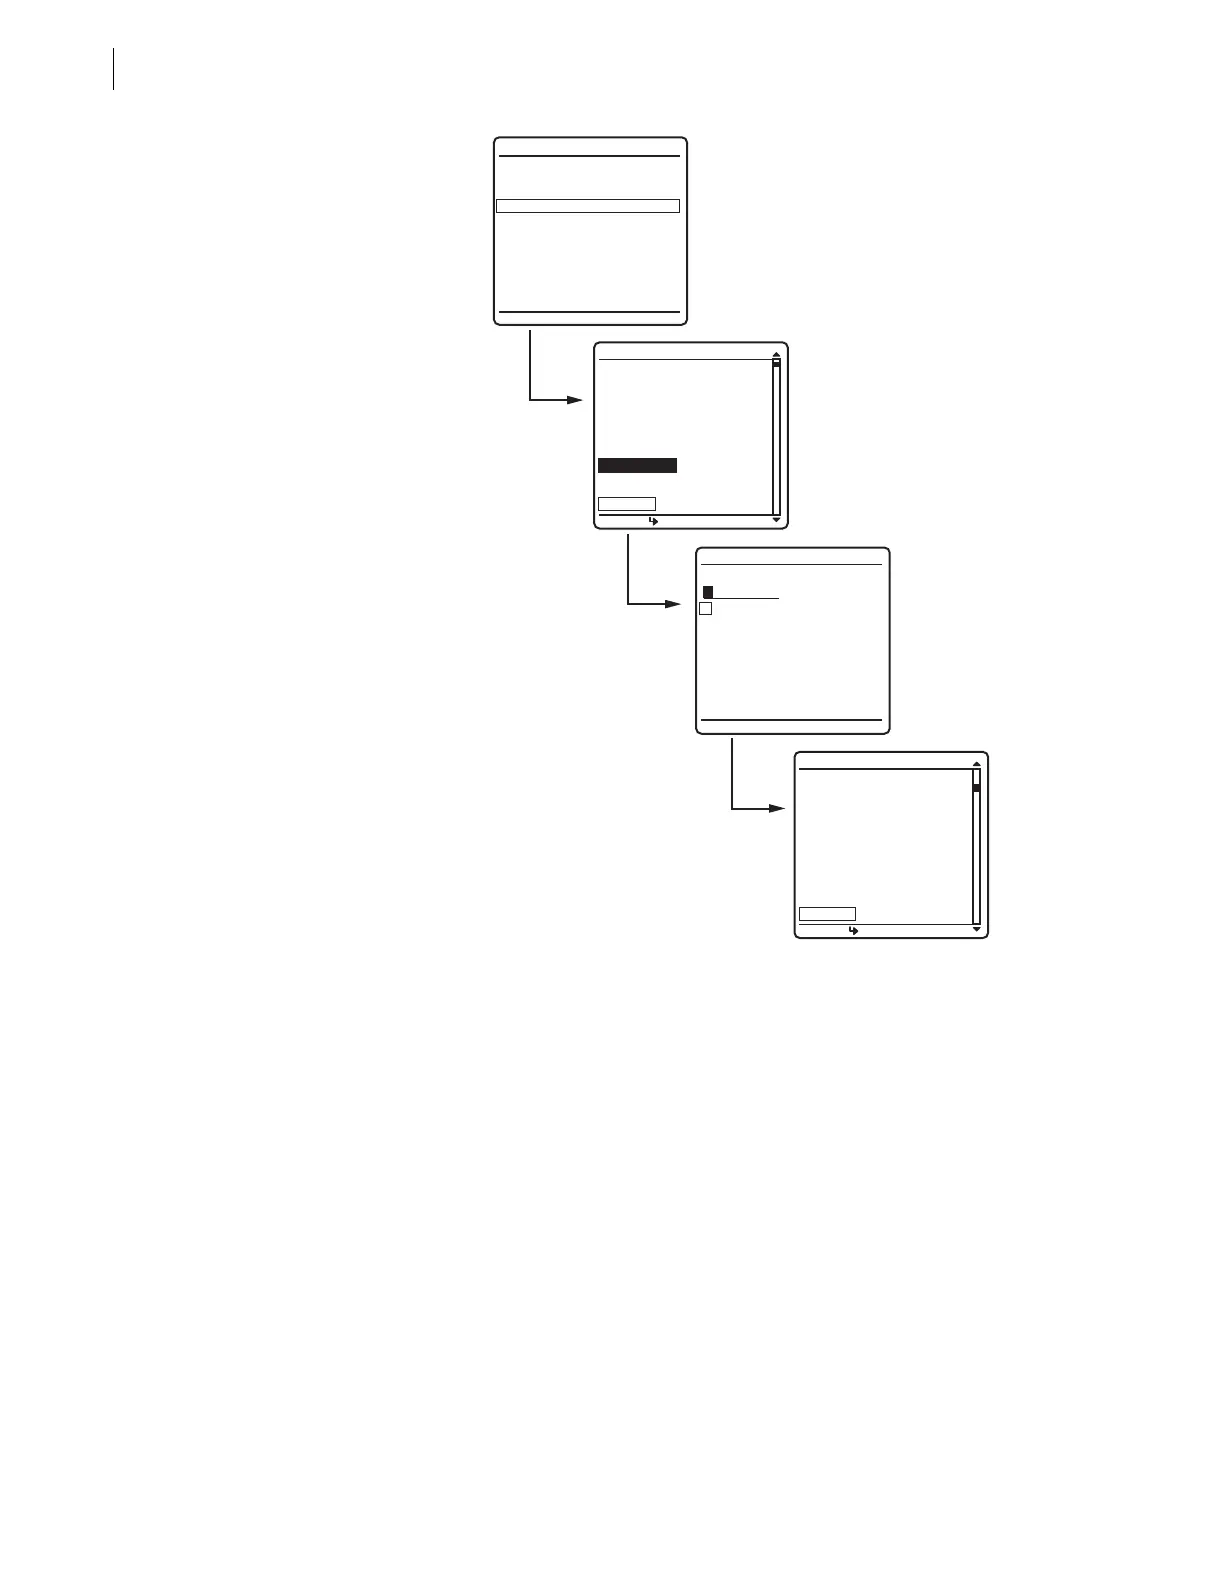
Figure 6.8 Viewing Relay Word Bits From the Front-Panel LCD.
Step 3. Display the 50P1 Relay Word bit on the front-panel LCD
screen. Press {ENT} to go to the ELEMENT SEARCH
submenu of Figure 6.8. Use the navigation keys to highlight 5
and then press {ENT} to enter the character 5 in the text input
field. Enter the “0, P, and 1 characters in the same manner.
Highlight ACCEPT and press {ENT}. The relay displays the
LCD screen containing the 50P1 element, as shown in the last
screen of Figure 6.8.
Step 4. Connect a test source to the relay. Set the current output of a
test source to zero output level. Connect a single-phase current
output of the test source to the IAW analog input (see
Figure 6.5 on page 6.12 and Secondary Circuits on page U.2.5
in the User’s Guide).
ELEMENT SEARCH
A B C D E F
G H I J K L
M N O P Q R
S T U V W X
Y Z 0 1 2 3
4 5 6 7 8 9
-
ACCEPT BACKSPACE
METER
EVENTS
BREAKER MONITOR
RELAY ELEMENTS
LOCAL CONTROL
SET/SHOW
RELAY STATUS
VIEW CONFIGURATION
DISPLAY TEST
RESET ACCESS LEVEL
MAIN MENU
PRESS TO SEARCH
RELAY ELEMENTS
SEARCH
PRESS TO SEARCH
RELAY ELEMENTS
SEARCH
ROW 22 ROW 23
32GR =0 67P4 =0
32GF =0 67P3 =0
R32QG =0 67P2 =0
F32QG =0 67P1 =0
R32V =0 50P4 =0
F32V =0 50P3 =0
R32I =0 50P2 =0
F32I =0 50P1 =0
ROW 0 ROW 1
*
=0 TLED_8 =0
*
=0 TLED_7 =0
* =0 TLED_6 =0
* =0 TLED_5 =0
* =0 TLED_4 =0
* =0 TLED_3 =0
TRIPLED=0 TLED_2 =0
EN =1 TLED_1 =0
 Loading...

