Do you have a question about the Serpent Natrix 748 and is the answer not in the manual?
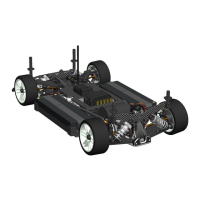
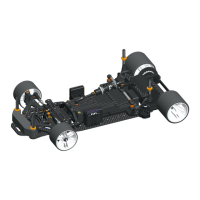
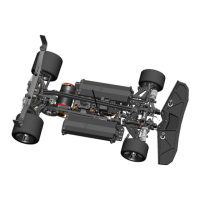
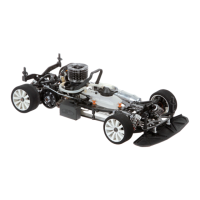
Introduction to the Serpent NATRIX 748 1/10 scale gaspowered racing car, highlighting its features.
Highlights the easy-to-follow, illustrated layout of the instruction manual for a quick building experience.
Emphasizes reading the 'Read this First' section before assembly, intended for ages 16+.
Provides information on obtaining additional support via website, dealer, or email.
Explains how kit bags are numbered to correspond with manual steps for efficient assembly.
Locates exploded views and parts lists in the back of the manual for easy reference and ordering.
A concluding remark encouraging users to enjoy the racing experience.
Instructions for applying silicone oil and Loctite during the initial steps of front differential assembly.
Details on applying silicone oil and Loctite for the second fastening stage of the front differential.
Guidance on filling the front differential case with silicone oil to the specified level.
Steps for closing the front differential, emphasizing gradual tightening of screws.
Instructions for applying silicone oil and Loctite during the initial steps of rear differential assembly.
Details on applying silicone oil and Loctite for the second fastening stage of the rear differential.
Guidance on filling the rear differential case with silicone oil to the specified level.
Steps for closing the rear differential, emphasizing gradual tightening of screws.
Mounting various components onto the rear chassis section, noting insert orientation.
Attaching the suspension arm assembly, including specific screws and parts.
Mounting the rear hub assemblies onto the chassis, with specific clearances noted.
Installing steering blocks and connecting suspension components with specified fasteners.
Attaching the brake caliper assembly to the chassis using specified screws.
Installing the differential and drive belt, noting excenter orientation.
Assembling and installing the steering rods, noting length specifications.
Mounting the anti-roll bar components, paying attention to connector orientation.
Attaching brake system components, including caliper and disc, with specified fasteners and parts.
Mounting the front bearing blocks, noting they are not symmetric.
Installing the front suspension brackets, noting they are not symmetric.
Attaching the front lower suspension arms, noting specific clearances.
Installing rear hub carriers and drive shafts, with attention to thrust bearing plates.
Mounting front hub carriers and drive shafts, noting excenter orientation.
Attaching steering system components, including the steering arm.
Installing the rear anti-roll bar and its associated components.
Assembling the internal components of the gearbox, including gears and shift point screws.
Mounting the assembled gearbox onto the main chassis.
Attaching front suspension components and drive shafts to the chassis.
Assembling and installing the rear camber links, noting their specific positions.
Mounting the radio box and steering servo, noting servo ear positions.
Connecting the servo linkages to the steering mechanism, including wire diagram.
Installing the radio receiver, noting that it is not included.
Guidance on selecting appropriate servo horns based on servo brand.
Mounting the fuel tank and radio plate, with notes on shims for battery placement.
Installing the receiver onto the chassis using specified fasteners.
Connecting the receiver's power input, with a diagram illustrating the connection.
Installing the throttle linkage and associated components.
Mounting the brake servo and its linkage, ensuring correct part placement.
Installing the fuel tank and connecting its associated parts.
Mounting the engine cooling fan and exhaust system components.
Final installation of the fuel tank and exhaust system onto the chassis.
Mounting chassis braces for structural support, noting insert positions.
Installing steering blocks and adjusting caster shims, noting various positions.
Detailed setup for front steering blocks, explaining neutral, trailing, and leading positions.
Mounting front uprights and drive shafts, ensuring correct assembly.
Assembling the steering linkage, noting specific lengths.
Mounting the front bumper to the chassis, using specified nuts and screws.
Assembling the front suspension components, including lower arms and shock towers.
Installing the front suspension arms onto the chassis.
Mounting a chassis brace using screws and nuts.
Steps for preparing shock components, filling with oil, and bleeding air bubbles.
Completing the shock assembly by assembling the spring and springcup.
Mounting the assembled shocks to the front of the chassis.
Mounting the assembled shocks to the rear of the chassis.
Aligning clutch gears with 2-speed gears and using shims if needed.
Noting the orientation of flyweights for clutch aggressiveness.
Instructions for screwing the adjusting nut all the way and then backing it out.
Noting the orientation of the 2-speed and 1st gears for proper assembly.
Important step for installing thrust bearing plates correctly.
Checking and setting the clutch gap to the specified range using shims.
Placing small shims to remove end play while retaining a small amount.
Installing the engines, noting that they are not included.
Mounting the exhaust system onto the chassis.
Installing throttle and brake linkages, with specific screw and nut usage.
Mounting the wheels onto the chassis, using flanged nuts.
| Brand | Serpent |
|---|---|
| Model | Natrix 748 |
| Category | Motorized Toy Car |
| Language | English |