How to Use the Shark HD510 CNC Machine for First Time Users (Ready2Control)
Setting the X and Y Axis to Zero
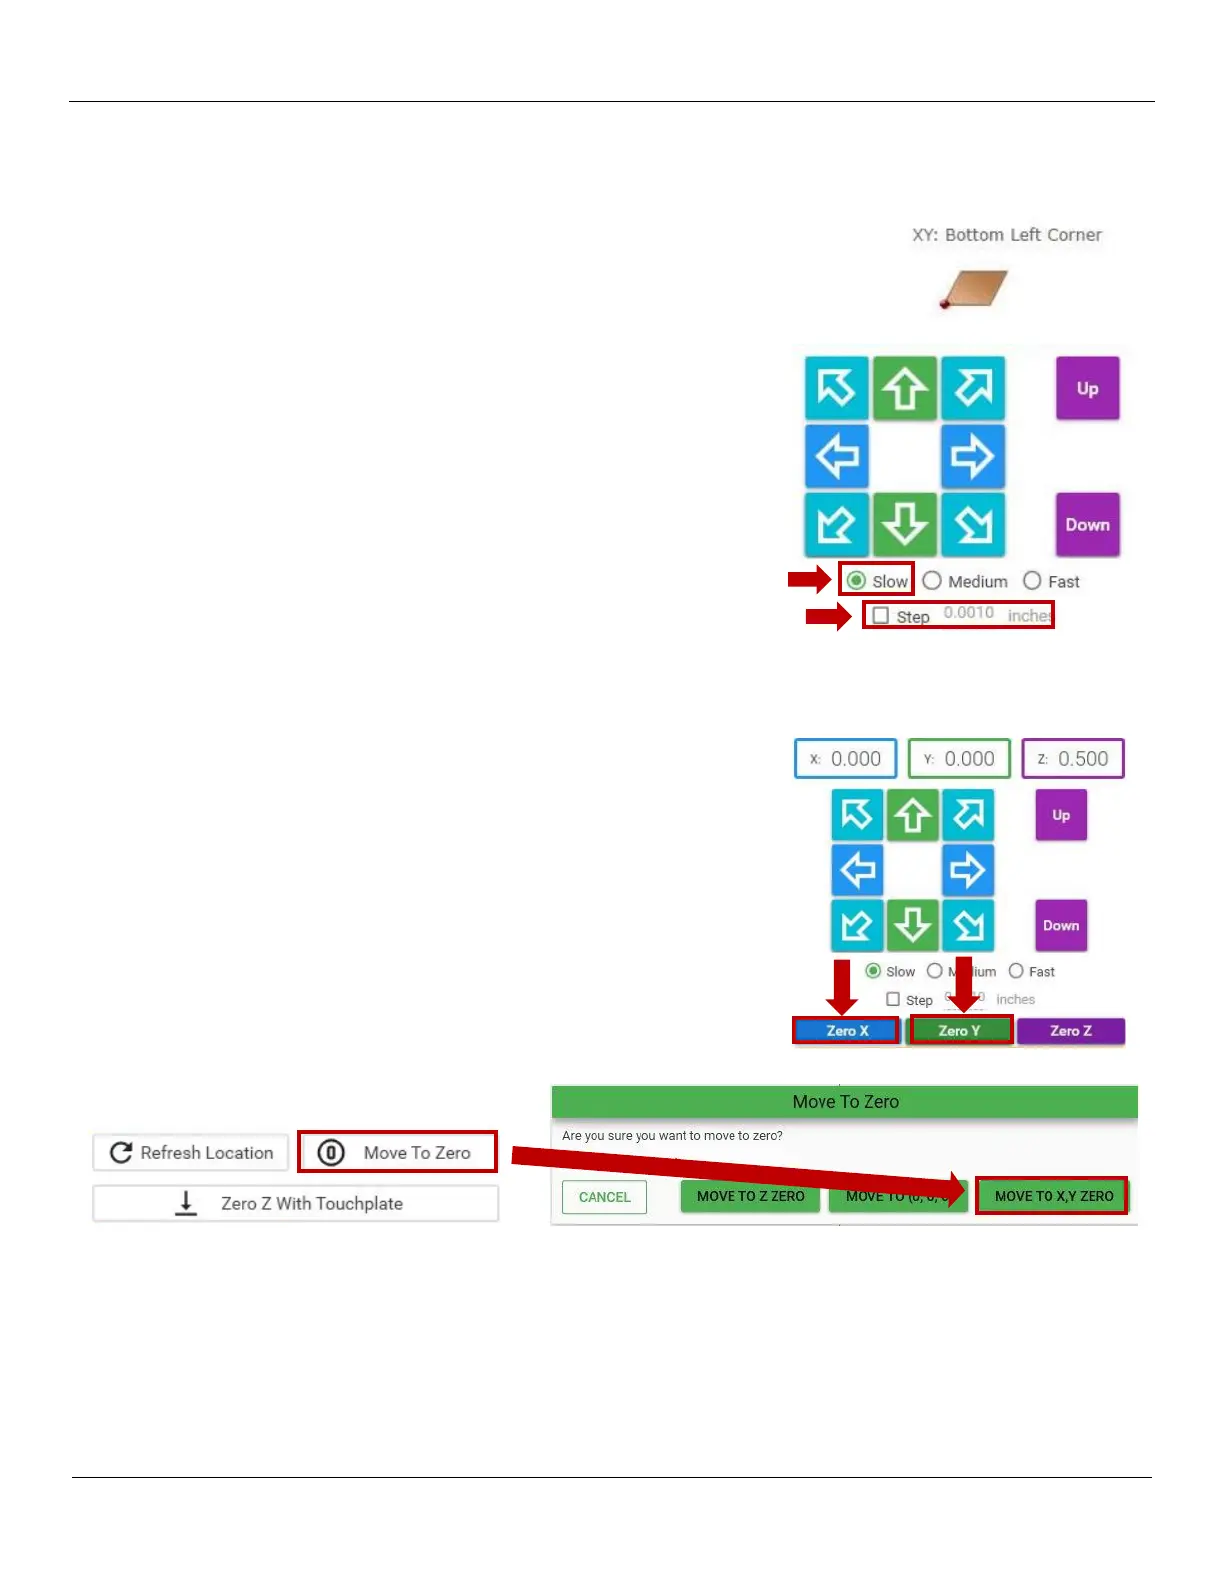
1) Referring to your job sheet, locate your X/Y Zero settings. In the Job Sheet example
to the right, the bottom left corner of the material is specified.
2) Raise the spindle (Z) so that it is higher than the bottom of the spindle
brace (ensuring it will clear any clamps). Then move the tool to the
starting X/Y location using either the keyboard controls or the onscreen
controls.
3) Lower spindle (Z-) to within 1” of project.
4) Set the speed to SLOW and lower Z (Z-) until you can reference your
start location accurately. Since the unit is set to slow, it is safe to adjust
your X and Y to fine tune the location
5) Move the gantry/spindle so your tool is directly over the designated X Y
= 0 location on your material.
If you need real precise, you can click on the Step checkbox and every time you move the gantry it will only move
the specified Step value (0.0010 inches in the example).
6) Once you are at your desired X/Y location, click the ZERO X button on
the Ready2Control screen (you will get a confirmation screen, click
Zero). Then click the ZERO Y button on the Ready2Control screen (you
will get a confirmation screen, click Zero).
7) Confirm that the X and Y values in the boxes at the top of the screen
are set to 0.000.
8) Continue to the next section to set the Z axis.
Note: You can check the X Y = 0 location at any time by clicking on the
Move To Zero button, then click the MOVE to X, Y ZERO button. The
gantry/spindle will move to the location you specified.
You have successfully set X Y = 0 location for your project. Continue to the next procedure to set the Z height.
 Loading...