How to Use the Shark HD510 CNC Machine for First Time Users (Ready2Control)
Setting the Z Axis to Zero
If you used a VGrove tool to set your X Y = 0 setting but are using a different tool for your first cut, remove the VGrove
tool and replace it with your starting bit using the Loading the Tool procedures back on page 8.
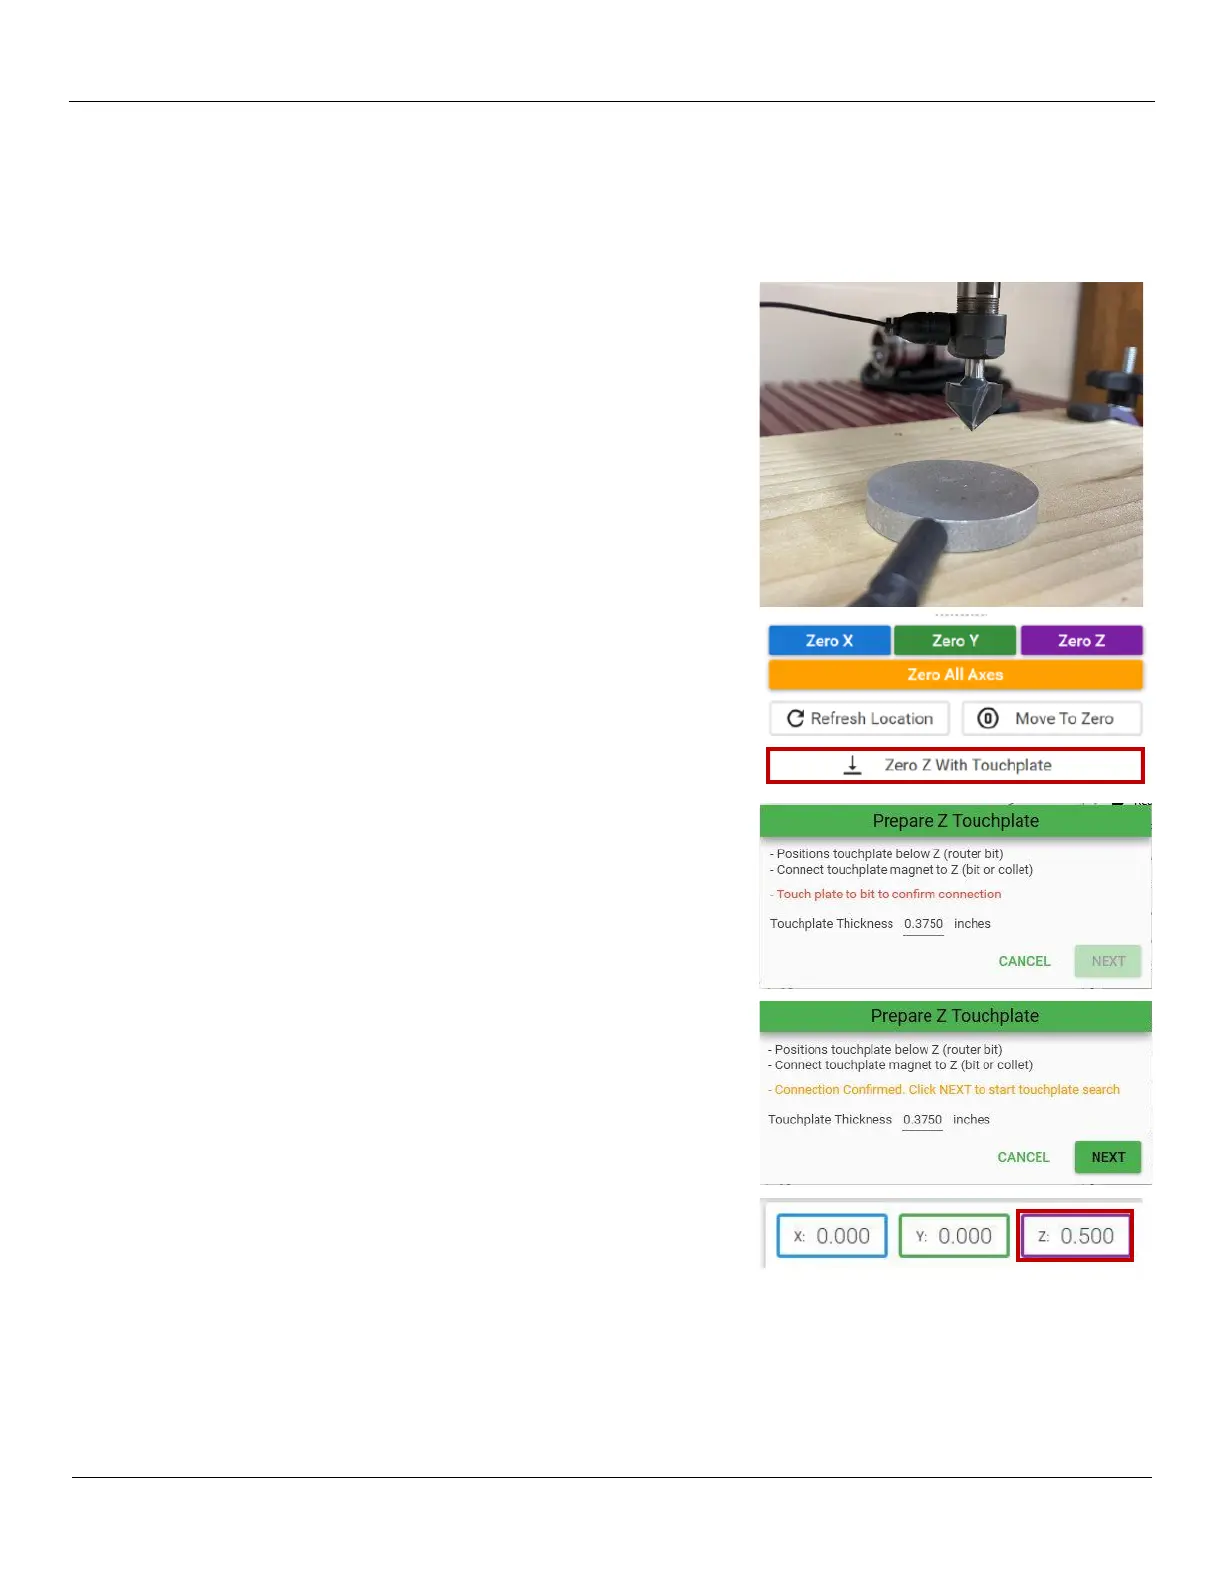
1) Raise the spindle approximately 1”-2” (Z+) and move it over your
material.
2) Locate the Touchplate and place the metal disc on top of project
surface and under the tool.
• Touch the magnetic lead wire to the collet nut to connect it.
• Make sure the Touchplate is plugged into the controller
• Make sure the Touchplate is oriented correctly. Look and make
sure the Touchplate is flat on the material. You may have to turn
the Touchplate over, the wire does not plug into the center of
the plate, but on the upper portion
3) At the Ready2Control screen, click on the Zero Z With Touchplate
button in the Machine Control panel.
4) A message window tells you to prepare for the touchplate.
Lift the metal disc up and physically touch the disk to the tip of the
tool. This will verify an electrical connection path exists.
5) The message in the middle of the window should change to
Connection Confirmed.
6) Click on the Next button.
SAFETY WARNING - Keep fingers and all items out of the way…the
tool will now start to move downward until it makes contact with the
metal touchplate.
7) After the tool makes contact with the touchplate, it will
automatically rise up. Verify that the Z position in the Machine
Control panel shows a value of 0.500
8) Disconnect the magnet from the collet and store the Touchplate.
You have successfully set Z height for your project.
 Loading...