39
27DV-S100
27DV-CS10
REPLACEMENT OF DRUM D.D. MOTOR
1. Set the ejection mode.
2. Withdraw the main power plug from the socket.
• Removal (Perform in numerical order.)
1. Disconnect the FFC cable 1.
2. Unscrew the D.D. stator assembly fixing screws 2.
3. Take out the D.D. stator assembly 3.
4. Unscrew the D.D. rotor assembly fixing screws 4.
5. Take out the D.D. rotor assembly 5.
Notes:
1. In removing the D.D. stator assembly, part of the drum
earth spring pops out of the pre-load collar.
Be careful not to lose it.
2. Install, so that the D.D. rotor ass'y and upper drum
ass'y mounting direction check holes align.
(Align the upper drum dent with the rotor hole.)
3. Be careful not to damage the upper drum or the video
head.
4. Protect the hole elements from shock due to contact
with D.D. stator or D.D. rotor ass'y.
5. After installation adjust the playback switching point for
adjustment of servo circuit.
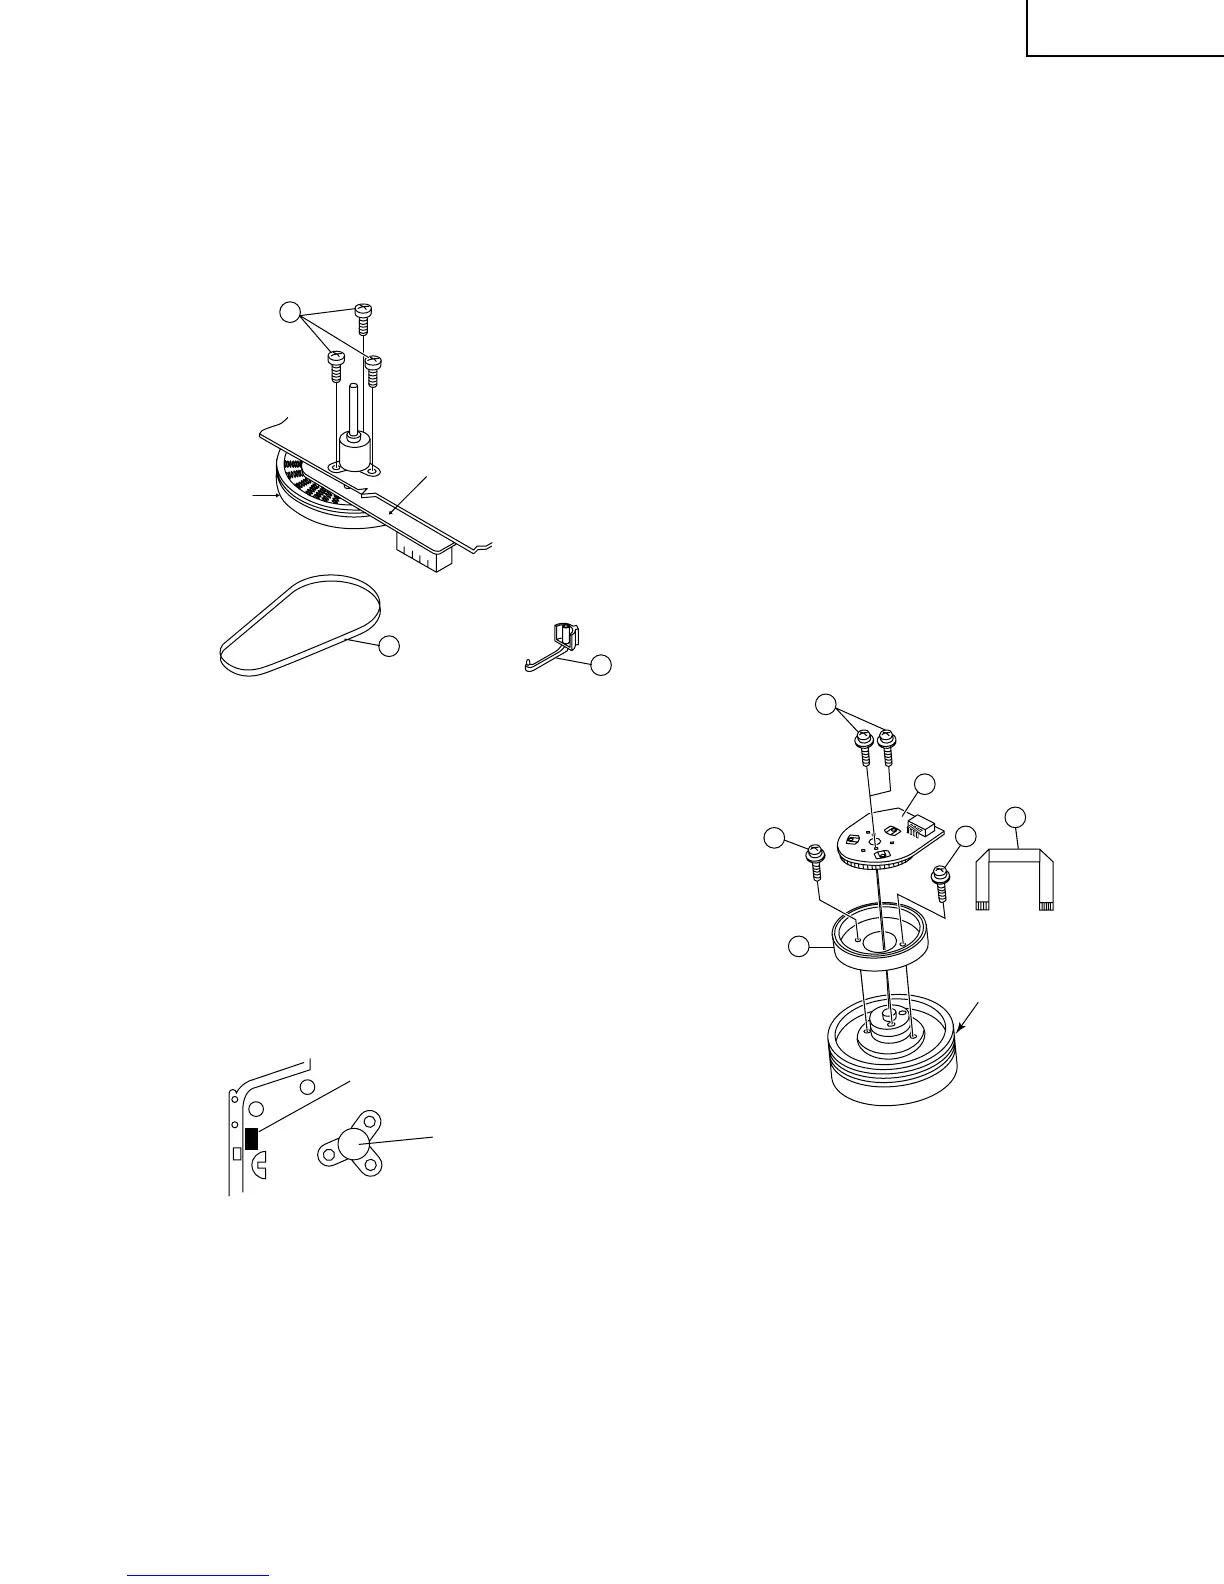
REPLACEMENT OF THE CAPSTAN D.D.
(DIRECT DRIVE) MOTOR
• Removal (Follow the order of indicated numbers.)
1. Remove the reel belt 1.
2. Remove the slow brake lever 2.
3. Remove the three screws 3.
• Reassembly
1. Taking care so that the capstan shaft does not contact
the mechanism chassis, set its position on the mecha-
nism chassis, and then install with the three screws.
2. Install the slow brake lever.
3. Install the reel belt.
Notes:
1. Before installing the capstan D.D. motor, confirm
whether an acetate tape (ZTAPEN120020E) is drawn
on the back of mechanism chassis.
Figure 1-37-1.
Figure 1-38.
3
1
Capstan D.D. motor
control PWB
Capstan D.D.
motor
Reel belt
2
Slow Brake Lever
2
4
5
3
4
1
D.D. stator ass'y
D.D. rotor ass'y
Upper drum
2. After installing the capstan D.D. motor, be sure to
rotate the capstan D.D. motor and check the move-
ment.
3. Set the tape, and check for the tape crease near the
reverse guide in the playback mode. Adjust the A/C
head and azimuth as stated in page 37 item 2. If crease
is found, adjust as stated in page 36 "HEIGHT AD-
JUSTMENT OF REVERSE GUIDE".
Stick on acetate tape on the
projection part of the chassis.
Capstan Motor
Installation posltion.
MechanismChassis from the back.
Figure 1-37-2.