EasyManua.ls Logo

Sharp AR-5520S - User Manual

Sharp AR-5520S
67 pages
Print Icon
To Next Page IconTo Next Page
Loading...
MODEL: AR-5516S
AR-5520S
DIGITAL MULTIFUNCTIONAL SYSTEM
OPERATION GUIDE

Table of Contents

Other manuals for Sharp AR-5520S

Questions and Answers

  • S
    smithbaileyAug 19, 2025
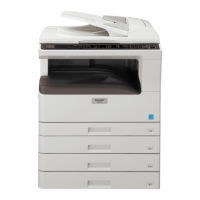
    Why is my Sharp AR-5520S All in One Printer not operating?
    • S
      sheilaroachAug 19, 2025
      There could be several reasons why your Sharp All in One Printer is not operating: * It might not be plugged into a power outlet. Ensure it is plugged into a grounded outlet. * The power switch could be off. Turn the power switch on. * The POWER SAVE indicator might be blinking, indicating that the machine is warming up. Wait until it finishes warming up. * The front or side cover might not be completely closed. Make sure to close them completely. * The machine might be in auto power shut-off mode. Press the [START] key to resume normal operation. * The PAPER SIZE indicator might be blinking, indicating a paper size mismatch. Change the paper size setting or clear the display by using the [PAPER SELECT] key, opening and closing the tray, or pressing the [CLEAR ALL] key.
  • A
    angelameyersAug 23, 2025
    What to do if my Sharp AR-5520S All in One Printer is not printing? (ON LINE indicator was blinking.)
    • D
      David MillerAug 25, 2025
      If your Sharp All in One Printer is not printing and the ON LINE indicator is blinking: * Ensure that the tray size settings are the same on the machine and in the printer driver. * Make sure the specified size of paper has been loaded in the paper tray. * If the PAPER SIZE indicator is blinking, you can press the [PAPER SELECT] key to select a tray manually, or load paper in the bypass tray and press the [ON LINE] key to begin printing. When "Use close paper size" is enabled, printing will take place using a size of paper that is close to the size of the print image.
  • L
    lisaallenAug 26, 2025
    Why are my Sharp AR-5520S copies too dark or too light?
    • M
      Miss Rebecca BakerAug 26, 2025
      If your copies are too dark or too light, ensure you select the correct original type for the original. You can select AUTO with the [AUTO/TEXT/PHOTO] key or manually adjust the exposure using the [Light] and [Dark] keys. If the copy is still too light or too dark even with AUTO selected, adjust the automatic exposure level.
  • A
    Amy ThompsonAug 29, 2025
    Why does my Sharp AR-5520S All in One Printer produce blank copies?
    • J
      Jerry CastanedaAug 30, 2025
      If your Sharp All in One Printer is producing blank copies, ensure that the original is placed face up in the SPF or face down on the document glass.
  • C
    Crystal StokesSep 1, 2025
    Why does my Sharp AR-5520S All in One Printer cut off part of the image or leave too much blank space?
    • A
      Ashley PerkinsSep 1, 2025
      If part of the image is cut off or there is too much blank space when copying with your Sharp All in One Printer: * Make sure to place the original correctly. * Press the [AUTO IMAGE] key to have the copy made using the appropriate ratio for the original and paper. * Whenever you change the size of paper loaded in the tray, be sure to change the tray's paper size setting.
  • U
    uwatsonSep 3, 2025
    Why does my Sharp All in One Printer produce copies with smudges or dirt?
    • A
      Aaron MartinezSep 3, 2025
      If your Sharp All in One Printer produces smudged or dirty copies, regularly clean the document glass or the underside of the document cover/SPF. Also, ensure you are using a clean original.
  • D
    Deborah BentonSep 5, 2025
    Why does my Sharp AR-5520S produce copies with white or black lines?
    • K
      Keith Mitchell IISep 5, 2025
      If white or black lines appear on copies from your Sharp All in One Printer, clean the long, narrow scanning glass and the transfer charger.
  • C
    cardenasrussellSep 7, 2025
    Why does the POWER SAVE indicator light up on my Sharp AR-5520S?
    • P
      Paul WashingtonSep 7, 2025
      If the POWER SAVE indicator is lit on your Sharp All in One Printer: * If other indicators are also lit, the machine is in "Preheat mode". Press any key on the operation panel to resume normal operation. * If only the POWER SAVE indicator and ON LINE indicator are lit, the machine is in auto power shut-off mode. Press the [START] key to resume normal operation.
  • C
    christopher55Sep 9, 2025
    Why does my Sharp AR-5520S All in One Printer display wrinkles on the paper or the image disappears in places?
    • F
      Felicia KlineSep 9, 2025
      If wrinkles appear in the paper or the image disappears in places when using your Sharp All in One Printer: * Use copy paper within the specified size and weight range. * Do not use curled or crimped paper. Replace with dry copy paper. During periods when the machine is not used for a long time, remove the paper from the tray and store it in a dark place in a bag to prevent moisture absorption.
  • A
    andreasmithSep 12, 2025
    Why is my Sharp AR-5520S not automatically selecting the original size? (When the SPF is installed.)
    • A
      April HarrisonSep 12, 2025
      If your Sharp All in One Printer is not automatically selecting the original size, straighten the original if it is curled or folded. Also, install the machine in a location that is not exposed to sunlight.

Summary

Introduction

Before Using the Machine

Part Names and Functions

Identifies and describes the various physical components of the multifunctional system.

Operation Panel

Details the controls, keys, indicators, and display on the machine's operation panel.

Power On and Off

Instructions for powering the machine on and off, including power save modes.

Loading Paper

Guides on how to load paper into the standard paper trays and the bypass tray.

Changing a Trays Paper Size Setting

Explains how to adjust the paper size settings for each paper tray.

Operation in Copy and Printer Modes

Describes simultaneous operations and limitations when using copy and printer modes.

Copy Functions

Normal Copying

Basic steps for making a regular copy from the document glass or SPF.

Making a Copy Darker or Lighter

Adjusting copy exposure levels for different original types and brightness.

Selecting the Tray

How to select paper trays for copying, including automatic paper selection.

Setting the Number of Copies

How to set the desired quantity of copies using the numeric keys.

Reduction;Enlargement;Zoom

Options for resizing copies using automatic or manual zoom functions.

Automatic Ratio Selection

Using the AUTO IMAGE key for automatic copy ratio adjustments.

Manual Ratio Selection

Manually selecting copy ratios using preset keys or zoom keys.

Selecting the Vertical and Horizontal Copy Ratios Separately (XY ZOOM Copying)

Independently adjusting horizontal and vertical copy ratios.

Two-Sided Copying Using the Bypass Tray

Performing manual two-sided copying using the bypass tray.

Dual Page Copying

Copying two pages of an original onto separate sheets.

Interrupting a Copy Run (Interrupt Copying)

Temporarily pausing a copy job to perform another task.

Printer Functions

Basic Printing

Step-by-step guide to printing a document from an application.

Opening the Printer Driver From the Start Button

Accessing printer driver settings via the Windows Start menu.

Printer Driver Setting Screen

Explains the interface and options within the printer driver setup screen.

Setting Advanced Print Functions

Advanced printing features like N-Up printing and border settings.

Printing Multiple Pages on One Page (N-Up Printing)

Printing multiple pages on a single sheet to save paper.

Fitting the Printed Image to the Paper (Fit To Paper Size)

Automatically resizing print output to fit the selected paper size.

Rotating the Print Image 180 Degrees (Rotate 180 degrees)

Rotating the print image for specific paper loading orientations.

Enlarging;Reducing the Print Image (Zoom)

Adjusting the print image size by percentage.

Printing Faint Text and Lines in Black (Text To Black;Vector To Black)

Enhancing faint text and graphics by printing them in black.

Adjusting the Brightness and Contrast of the Image (Image Adjustment)

Modifying image brightness and contrast for print output.

Adding a Watermark to Printed Pages (Watermark)

Embedding text or images as watermarks on printed documents.

Saving Frequently Used Print Settings

Saving and managing custom print settings for later use.

Outline of the Print Status Window

Overview of the window that monitors print job status and errors.

User Settings

Adjusting the Automatic Exposure Level

Fine-tuning automatic exposure for copies based on original type.

Customising Settings (System Settings)

Overview of system settings for machine customization.

Selecting a Setting for a System Setting

Procedure for selecting and configuring specific system settings.

Selecting Auditing Mode Settings

How to configure settings related to auditing and account tracking.

Copying When Auditing Mode is Enabled

Steps to enter account number for copying when auditing is active.

Troubleshooting

Machine;Copying Problems

Common issues related to machine operation and copy quality.

Printing Problems

Troubleshooting steps for issues preventing printing.

Indicators and Display Messages

Explains machine indicators and error messages.

Misfeed Removal

Procedures for removing paper jams from various locations.

Replacing the Toner Cartridge

Steps for replacing the toner cartridge when prompted.

Routine Maintenance

Checking the Total Output Count and Toner Level

How to view page counts and approximate toner levels.

Checking the Toner Level

Detailed steps to check the remaining toner quantity.

Cleaning the Document Glass and SPF;Document Cover

Instructions for cleaning the glass surfaces for clear copies.

Cleaning the Original Scanning Glass (Only When an SPF is Installed)

Specific cleaning for SPF-related scanning glass issues.

Cleaning the Bypass Tray Paper Feed Roller

Cleaning the roller to prevent bypass tray misfeeds.

Cleaning the Transfer Charger

Cleaning the transfer charger to resolve streaky or blotchy copies.

Peripheral Devices and Supplies

Peripheral Devices

Lists optional peripheral devices that can be installed on the machine.

Single Pass Feeder

Specifications and details for the Single Pass Feeder option.

250-Sheet Paper Feed Unit;2 X 250-Sheet Paper Feed Unit

Details on paper feed units for increased paper capacity.

Storage of Supplies

Guidelines for properly storing paper and toner cartridges.

Proper Storage

Specific recommendations for storing supplies to prevent issues.

Sharp AR-5520S Specifications

General IconGeneral
FunctionsPrint, Copy, Scan
Print Resolution1200 x 1200 dpi
Copy Resolution600 x 600 dpi
Scan Resolution600 x 600 dpi
Original SizeA3
Max Paper SizeA3
Warm-up Time30 seconds
Monthly Duty Cycle150, 000 pages
Print Speed55 ppm
Copy Speed55 pages per minute
InterfaceUSB 2.0
Network ConnectivityEthernet
Operating System CompatibilityWindows, macOS, Linux

Related product manuals