– 21 –
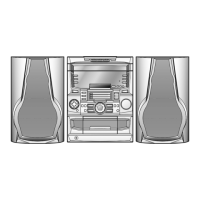
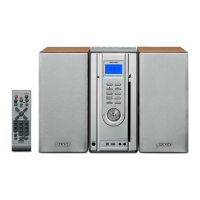
MD-C2
Entering the specific mode
Whenever the SURROUND button is pressed, the mode is changed.
AUTO pre-adjustment AUTO adjustment FAB adjustment RESULT Pre-adjustment
ERR DATA EEPROM setting MANUAL adjustment MANUAL pre-adjustment
2. Test mode
Test mode setting method
1. Holding down the MD1 PLAY button and FF(
)button, press POWER button switch.
(State A is changed to state B .)
2. Load playback disc 1 (high reflection disc) or recording disc 2 (low reflection disc) into DISC 3, and press MD RELEASE.
(State
C is set.)
Thus, the test mode state is set.
A tsm 16
e : TEST MODE represents version of MD microcomputer.
STOP state (When the MD2 PLAY button is ressed in the
C state, the indication A
is restored. To restore
C again, press the SURROUND button.)
B EJECT
C AUT YOBI
• Test Mode
1. EJECT mode • TEMP setting (of EEPROM setting)
• CONTROL setting (of EEPROM setting)
• Setting of laser power (record/playback power)
2. AUTO pre-adjustment mode • Automatic pre-adjustment is performed.
3. AUTO adjustment mode • Automatic adjustment is performed. (After adjustment the grating adjustment mode is set.)
• FAB adjustment mode • Therefore do not set this mode since it is not necessary for the service.
• RESULT sub-mode
• RESULT mode (final adjustment)
• MANUAL pre-adjustment mode
• MANUAL adjustment mode
• EER DATA mode
4. EEPROM setting mode • Various coefficients of digital servo are changed manually.
5. TEST-PLAY mode • Continuous playback from the specified address is performed.
• C1 error rate measurement, ADIP error rate measurement.
6. TEST-REC mode • Continuous recording from the specified address is performed.
7. INNER mode • The position where the INNER switch is turned on is measured.
RESULT
Cancel of TEST mode
To restore the usual state once reset.
*Before pressing the POWER button, be sure to perform the AUTO preliminary adjustment and the AUTO adjustment. Make
sure that they return a "COMPLETE" result.
*When the data of EEPROM was changed or the preliminary adjustment was performed again, be sure to press the POWER
button to write data in the EEPROM.
(Data is written in the EEPROM by pressing the POWER button.)
*When changing the EEPROM settings, write them into the EEPROM and then enter the test mode again. Perform the AUTO
preliminary adjustment and the AUTO adjustment. Then, write those into the EEPROM.