MX-C250 DISASSEMBLY AND ASSEMBLY 10 – 13
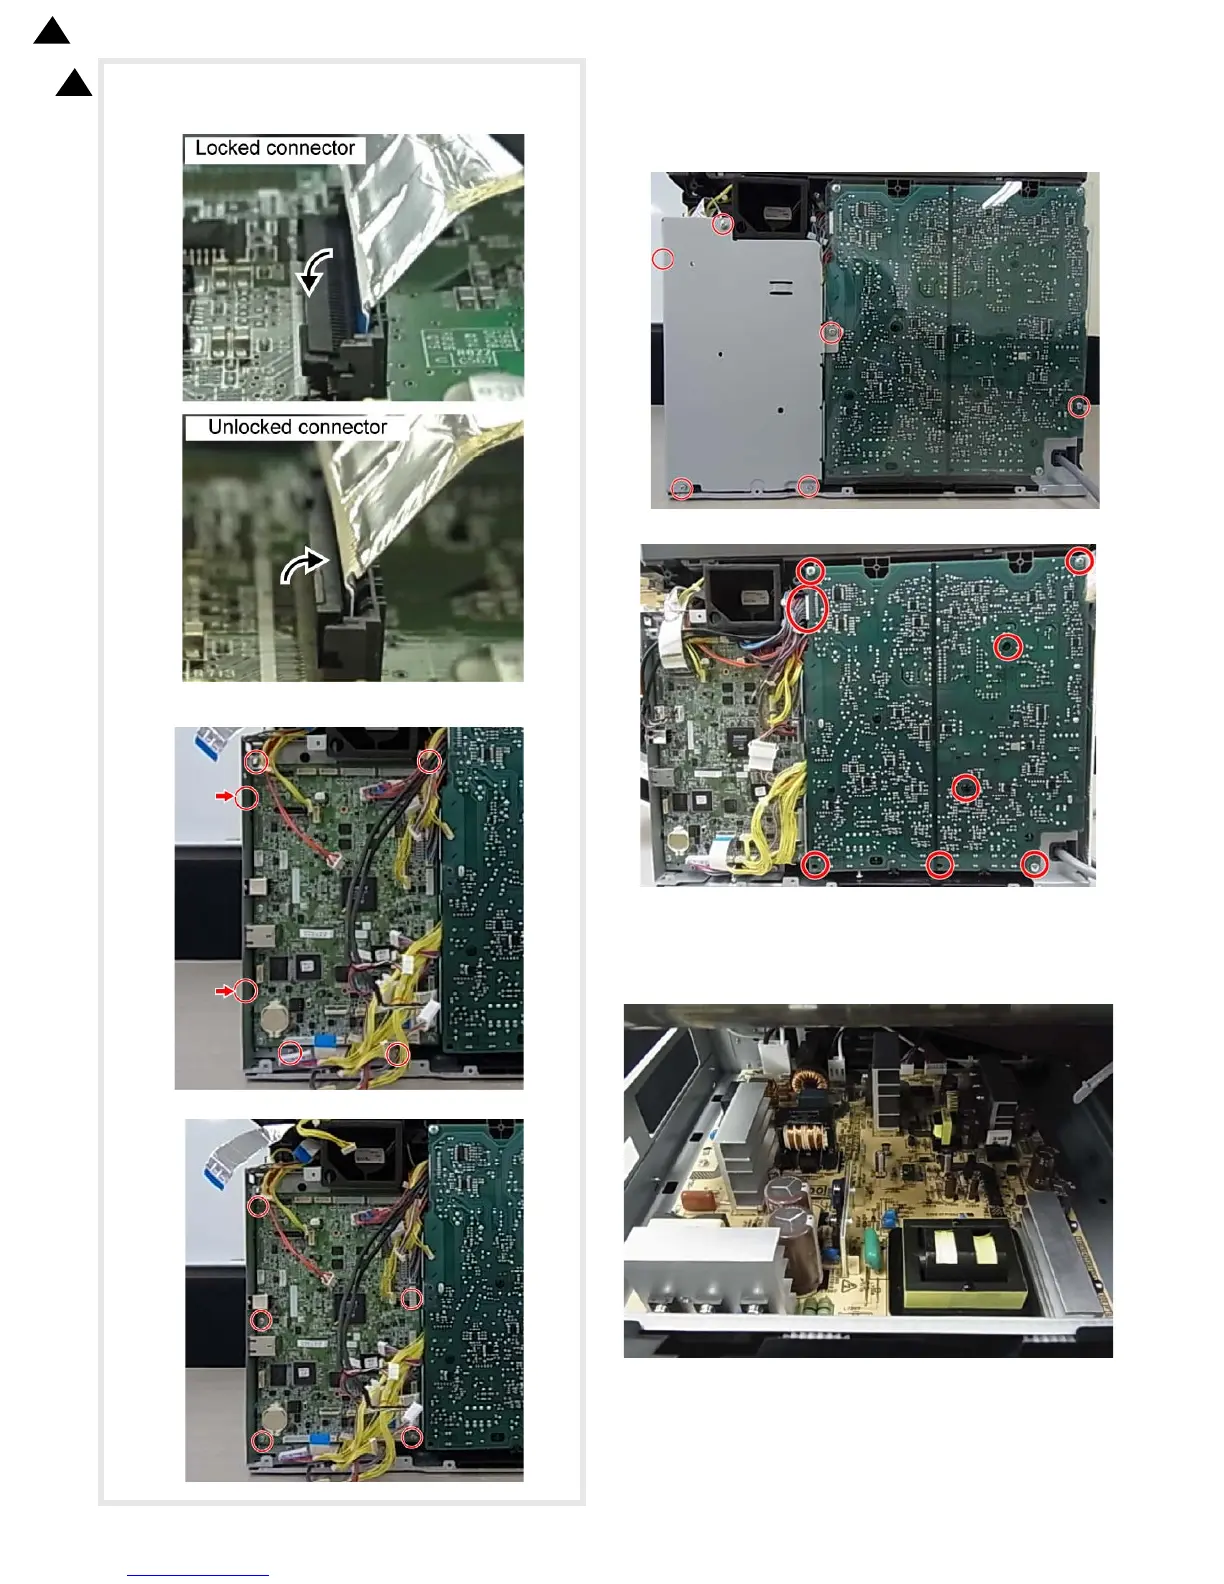
When the connection part of the connector is lifted up as shown
in the figure, the connector is unlocked. It is necessary to
remove the FFC with releasing the lock of the connector.
5) Remove the MFPC frame.
6) Remove the MFPC PWB from the MFPC PWB frame.
(2) HV PWB
1) Remove the right cabinet rear NE
2) Remove the rear cabinet rear NE
3) Remove the PWB protection sheet NE and the MFPC cover.
4) Remove the HV PWB.
(3) AC DC PWB
1) Open the front cover.
2) Remove the paper exit tray.
3) Remove the AC DC PWB with the stubby driver. .
2
‘13
/Oct
2