8
BEFORE USING THE MACHINE
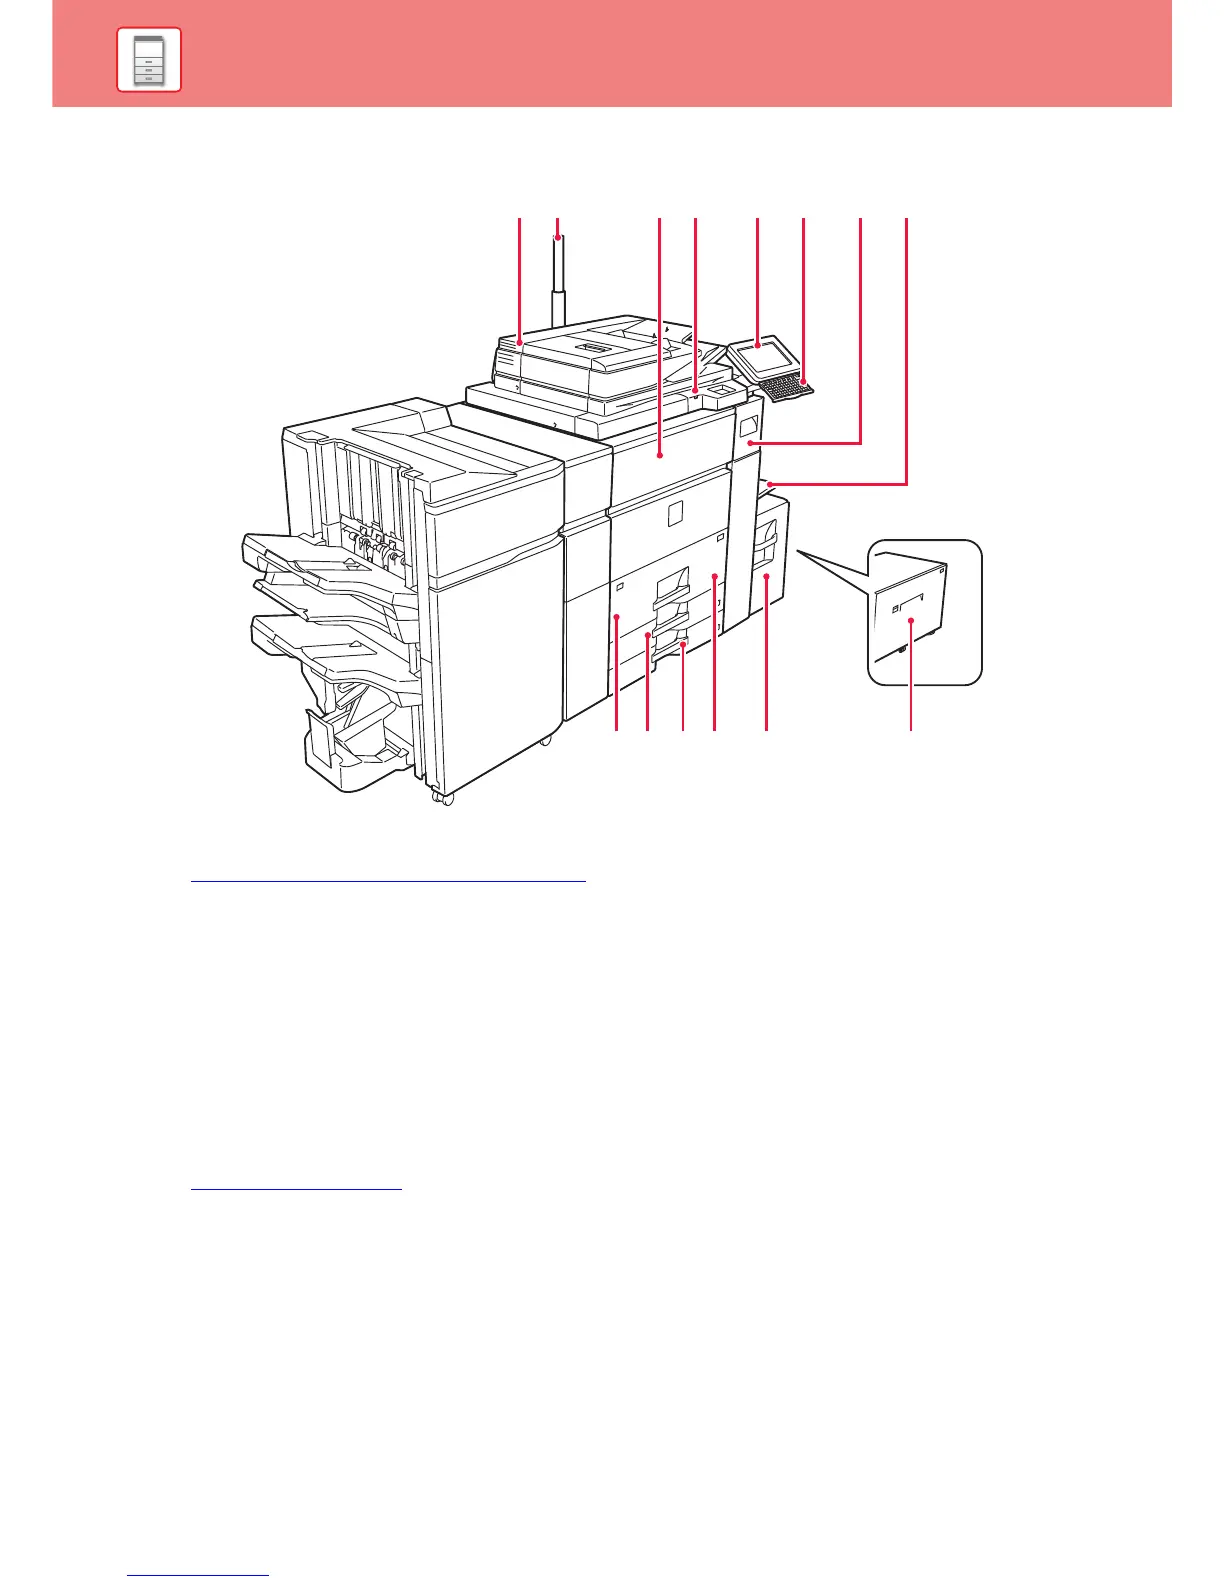
PART NAMES AND FUNCTIONS
(1) Automatic document feeder
This automatically feeds and scans multiple originals. Both sides
of 2-sided originals can be automatically scanned at one time.
►
USING THE AUTOMATIC DOCUMENT FEEDER (page 14)
(2) Status indicator*
The status of the machine is indicated.
(3) Front cover
Open this to remove a paper misfeed from or to switch the main
power switch on and off.
(4) USB connector (A type)
This is used to connect a USB device such as a USB memory
device to the machine.
For the USB cable, use a shielded cable.
Supports USB 2.0 (Hi-Speed).
(5) Operation panel
This panel hosts the [Power] button, [Power Save]
button/indicator, [Home Screen] button/indicator, main power
button, IC card reader holder, USB port (A type) and touch
panel. Use the touch panel to operate each of these functions.
► OPERATION PANEL (page 12)
(6) Keyboard*
Use this as a substitute for the soft keyboard displayed on the
touch panel. When not being used, it can be stored under the
operation panel.
(7) Toner tray
This tray contains toner cartridge. When the toner in a cartridge
runs out, the cartridge that ran out must be replaced.
(8) Bypass tray*
Use this tray to feed paper manually.
When loading paper larger than A4R or 8-1/2" × 11"R, pull out
the extension guide.
(9) Tray 1
Store paper in this tray. Up to 1200 sheets can be stored.
(10) Tray 3
Store paper in this tray. Up to 500 sheets can be stored.
(11) Tray 4
Store paper in this tray. Up to 500 sheets can be stored.
(12) Tray 2
Store paper in this tray. Up to 800 sheets can be stored.
(13) Tray 5 (MX-LC12)*
Store paper in this tray. Up to 3500 sheets can be stored.
(14) Tray 5 (MX-LCX3 N)*
Store paper in this tray. Up to 3000 sheets can be stored.
* Peripheral device. For more information, see the User's Manual.