-12
5
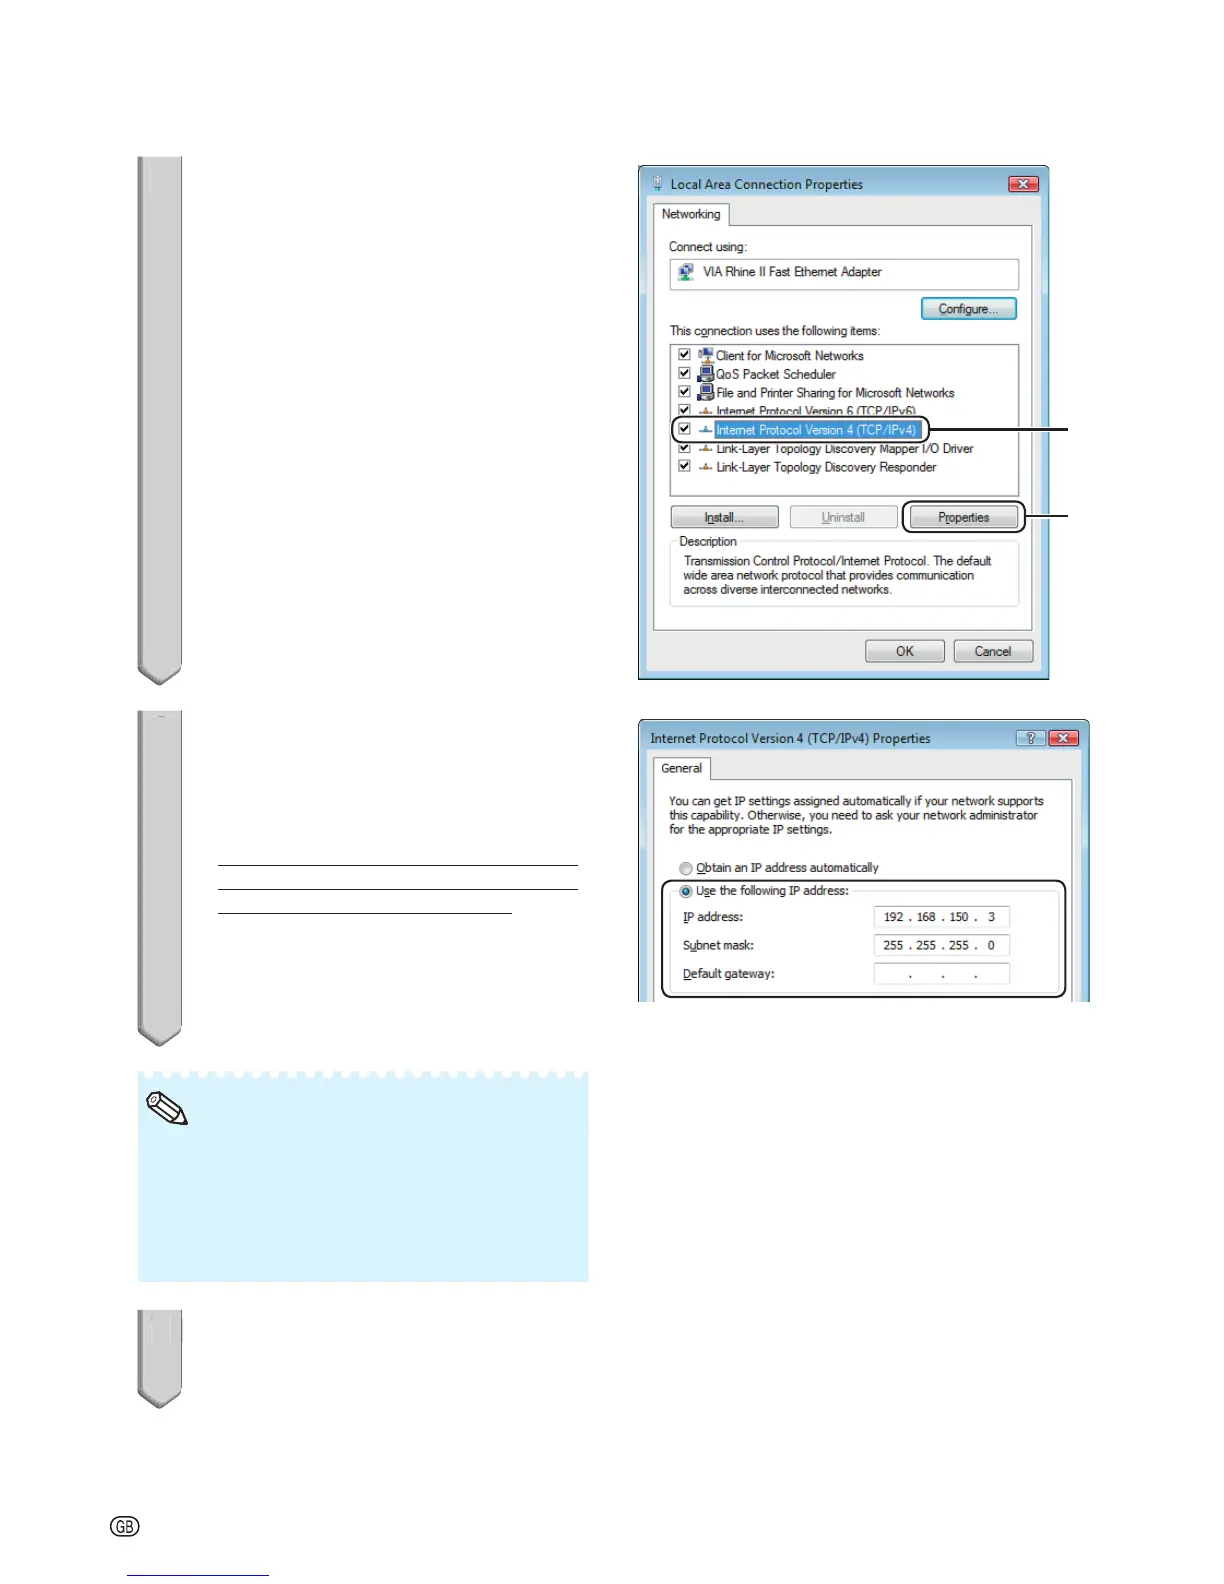
Click “Internet Protocol Version 4
(TCP/IPv4)”, and click the
“Properties” button.
6
Confi rm or change an IP address
for the setup computer.
1 Confi rm and note the current IP
address, Subnet mask and Default
gateway.
Make sure to note the current IP address,
Subnet mask and Default gateway as you
will be required to reset them later.
2 Set temporarily as follows:
IP address: 192.168.150.3
Subnet mask: 255.255.255.0
Default gateway: (Do not input any
values.)
The factory default settings for the projector are
as follows:
DHCP Client: OFF
IP address: 192.168.150.2
Subnet mask: 255.255.255.0
Default gateway: 0.0.0.0
•
Note
7
After setting, click the “OK”
button, and then restart the
computer.
After confi rming or setting, proceed to “3. Setting up Network Connection for the Projector”.
Setting up the Projector Network Environment